 - Collegamento all'originale")
Making Effective, Affordable Water Level Monitors

Water wells are simple things, but that doesn’t mean they are maintenance-free. It can be important to monitor water levels in a well, and that gets complicated when the well is remote. Commercial solutions exist, of course, but tend to be expensive and even impractical in some cases. That’s where [Hans Gaensbauer]’s low-cost, buoyancy-based well monitor comes in. An Engineers Without Border project, it not only cleverly measures water level in a simple way — logging to a text file on a USB stick in the process — but it’s so low-power that a single battery can run it for years.
The monitor [Hans] designed works in the following way: suspend a length of pipe inside the well, and attach that pipe to a load cell. The apparent weight of the pipe will be directly proportional to how much of the pipe is above water. The fuller the well, the less the pipe will seem to weigh. It’s very clever, requires nothing to be in the well that isn’t already water-safe, and was designed so that the electronics sit outside in a weatherproof enclosure. Cost comes out to about $25 each, which compares pretty favorably to the $1000+ range of industrial sensors.
The concept is clever, but it took more that that to create a workable solution. For one thing, space was an issue. The entire well cap was only six inches in diameter, most of which was already occupied. [Hans] figured he had only about an inch to work with, but he made it work by designing a custom load cell out of a piece of aluminum with four strain gauges bonded to it. The resulting sensor is narrow, and sits within a nylon and PTFE tube that mounts vertically to the top of the well cap. Out from the bottom comes a steel cable that attaches to the submerged tube, and out the top comes a cable that brings the signals to the rest of the electronics in a separate enclosure. More details on the well monitor are in the project’s GitHub repository.
All one has to do after it’s installed is swap out the USB stick to retrieve readings, and every once in a long while change the battery. It sure beats taking manual sensor readings constantly, like meteorologists did back in WWII.

Making a Functional Control Panel of the Chernobyl RBMK Reactor
Top of an RBMK at the Leningrad plant.
Control panels of a pre-digitalization nuclear plant look quite daunting, with countless dials, buttons and switches that all make perfect sense to a trained operator, but seem as random as those of the original Enterprise bridge in Star Trek to the average person. This makes the reconstruction of part of the RBMK reactor control by the [Chornobyl Family] on YouTube a fun way to get comfortable with one of the most important elements of this type of reactor’s controls.

The section that is built here pertains to the control rods of the RBMK’s reactor, its automatic regulations and emergency systems like AZ-5 and BAZ. The goal is not just to have a shiny display piece that you can put on the wall, but to make it function just like the real control panel, and to use it for demonstrations of the underlying control systems. The creators spent a lot of time talking with operators of the Chornobyl Nuclear Plant – which operated until the early 2000s – to make the experience as accurate as possible.
Although no real RBMK reactor is being controlled by the panel, its ESP32-powered logic make it work like the real deal, and even uses a dot-matrix printer to provide logging of commands. Not only is this a pretty cool simulator, it’s also just the first element of what will be a larger recreation of an RBMK control room, with more videos in this series to follow.
Also covered in this video are the changes made after the Chernobyl Nuclear Plant’s #4 accident, which served to make RBMKs significantly safer, albeit at the cost of more complexity on the control panel.
youtube.com/embed/DDlrnJIbkds?…
Implementing 3D Graphics Basics

Plenty of our childhoods had at least one math teacher who made the (ultimately erroneous) claim that we needed to learn to do math because we wouldn’t always have a calculator in our pockets. While the reasoning isn’t particularly sound anymore, knowing how to do math from first principles is still a good idea in general. Similarly, most of us have hugely powerful graphics cards with computing power that PC users decades ago could only dream of, but [NCOT Technology] still decided to take up this project where he does the math that shows the fundamentals of how 3D computer graphics are generated.
The best place to start is at the beginning, so the video demonstrates a simple cube wireframe drawn by connecting eight points together with lines. This is simple enough, but modern 3D graphics are really triangles stitched together to make essentially every shape we see on the screen. For [NCOT Technology]’s software, he’s using the Utah Teapot, essentially the “hello world” of 3D graphics programming. The first step is drawing all of the triangles to make the teapot wireframe. Then the triangles are made opaque, which is a step in the right direction but isn’t quite complete. The next steps to make it look more like a teapot are to hide the back faces of the triangles, figure out which of them face the viewer at any given moment, and then make sure that all of these triangles are drawn in the correct orientation.
Rendering a teapot is one thing, but to get to something more modern-looking like a first-person shooter, he also demonstrates all the matrix math that allows the player to move around an object. Technically, the object moves around the viewer, but the end effect is one that eventually makes it so we can play our favorite games, from DOOM to DOOM Eternal. He notes that his code isn’t perfect, but he did it from the ground up and didn’t use anything to build it other than his computer and his own brain, and now understands 3D graphics on a much deeper level than simply using an engine or API would generally allow for. The 3D world can also be explored through the magic of Excel.
youtube.com/embed/yaG1fBNxjdE?…
DIY Wall-Plotter Does Generative Art, But Not As We Know It

[Teddy Warner]’s GPenT (Generative Pen-trained Transformer) project is a wall-mounted polargraph that makes plotter art, but there’s a whole lot more going on than one might think. This project was partly born from [Teddy]’s ideas about how to use aspects of machine learning in ways that were really never intended. What resulted is a wall-mounted pen plotter that offers a load of different ‘generators’ — ways to create line art — that range from procedural patterns, to image uploads, to the titular machine learning shenanigans.
Want to see the capabilities for yourself? There’s a publicly accessible version of the plotter interface that lets one play with the different generators. The public instance is not connected to a physical plotter, but one can still generate and preview plots, and download the resulting SVG file or G-code.
Most of the generators do not involve machine learning, but the unusual generative angle is well-represented by two of them: dcode and GPenT.
dcode is a diffusion model that, instead of converting a text prompt into an image, has been trained to convert text directly into G-code. It’s very much a square peg in a round hole. Visually it’s perhaps not the most exciting, but as a concept it’s fascinating.
The titular GPenT works like this: give it a scrap of text inspiration (a seed, if you will), and that becomes a combination of other generators and parameters, machine-selected and stacked with one another to produce a final composition. The results are unique, to say the least.
Once the generators make something, the framed and wall-mounted plotter turns it into physical lines on paper. Watch the system’s first plot happen in the video, embedded below under the page break.
This is a monster of a project representing a custom CNC pen plotter, a frame to hold it, and the whole software pipeline both for the CNC machine as well as generating what it plots. Of course, the journey involved a few false starts and dead ends, but they’re all pretty interesting. The plotter’s GitHub repository combined with [Teddy]’s write up has all the details one may need.
It’s also one of those years-in-the-making projects that ultimately got finished and, we think, doing so led to a bit of a sigh of relief on [Teddy]’s part. Most of us have unfinished projects, and if you have one that’s being a bit of a drag, we’d like to remind you that you don’t necessarily have to finish-finish a project to get it off your plate. We have some solid advice on how to (productively) let go.
youtube.com/embed/8UEqEzWdhAY?…
Thermoforming: Shaping Curvy Grilles With No Supports
")
Although hobbyists these days most often seem to use thermoplastics as a print-and-done material in FDM printers, there’s absolutely nothing stopping you from taking things further with thermoforming. Much like forming acrylic using a hot wire or hot air, thermoplastics like PLA can be further tweaked with a similar method. This can be much less complex than 3D printing the design with supports, as demonstrated by [Zion Brock].

For this classically styled radio project the front grille was previously 3D printed with the curved shape, but to avoid an ugly edge it had to be printed with most of the grille off the print bed, requiring countless supports and hours of printing time. To get around this, [Zion] opted to print the grille flat and then thermoform its curved shape. Of course, due to the unusual shape of the grille, this required a bit more effort than e.g. a spherical form.
This is similar to what is used with sheet metal to get detailed shaped, also requiring a mold and a way to stretch the flat shape over the mold. With the flat form designed to have all the material in the right places, it was able to be printed in less than an hour in PLA and then formed with a heatgun aimed at the part while the two-section mold is slid together to create the final form.
You can find the design files and full instructions on the website for the radio project.
youtube.com/embed/z20IXm1w-Fo?…
FLOSS Weekly Episode 864: Work Hard, Save Money, Retire Early

This week Jonathan chats with Bill Shotts about The Linux Command Line! That’s Bill’s book published by No Starch Press, all about how to make your way around the Linux command line! Bill has had quite a career doing Unix administration, and has thoughts on the current state of technology. Watch to find out more!
youtube.com/embed/9zpSG6sAJiY?…
Did you know you can watch the live recording of the show right on our YouTube Channel? Have someone you’d like us to interview? Let us know, or have the guest contact us! Take a look at the schedule here.
play.libsyn.com/embed/episode/…
Direct Download in DRM-free MP3.
If you’d rather read along, here’s the transcript for this week’s episode.
Places to follow the FLOSS Weekly Podcast:
Theme music: “Newer Wave” Kevin MacLeod (incompetech.com)
Licensed under Creative Commons: By Attribution 4.0 License
hackaday.com/2026/02/11/floss-…
Motorola’s Password Pill Was Just One Idea

Let’s face it; remembering a bunch of passwords is the pits, and it’s just getting worse as time goes on. These days, you really ought to have a securely-generated key-smash password for everything. And at that point you need a password manager, but you still have to remember the password for that.
Well, Motorola is sympathetic to this problem, or at least they were in 2013 when they came up with the password pill. Motorola Mobility, who were owned by Google at the time, debuted it at the All Things Digital D11 tech conference in California. This was a future that hasn’t come to pass, for better or worse, but it was a fun thought experiment in near-futurism.
Dancing with DARPA
Back then, such bleeding-edge research was headed by former DARPA chief Regina Dugan. At the conference, Dugan stated that she was “working to fix the mechanical mismatch between humans and electronics” by doing things such as partnering with companies that “make authentication more human”.
Along with Proteus Digital Health, Dugan et. al created a pill with a small chip inside of it and a switch. Once swallowed, your various stomach acids serve as the electrolyte. The acids power the chip, and the switch goes on and off, creating an 18-bit ECG-like signal.
Basically, your entire body becomes an authentication token. Unlock your phone, your car door handle, and turn on your computer, just by existing near them.
It should be noted that Proteus already had FDA clearance for a medical device consisting of an ingestible sensor. The idea behind those is that medical staff can track when a patient has taken a pill based on the radio signal. Dugan said at the conference that it would be medically safe to ingest up to thirty of these pills per day for the rest of your life. Oh yeah, and she says the only thing that the pill exposes about the taker is whether they took it or not.
Motorola head Dennis Woodside stated that they had demonstrated this authentication technology working and authenticating a phone. While Motorola never intended to ship this pill, it was based on the Proteus device with FDA clearance, presumably so they could test it safely.
The story of Proteus Digital Health is beyond us here, but for whatever reason, their smart pills never took off. So we’re left to speculate about the impact on society that this past future of popping password pills would have had.
About That Government Influence

While it sounds sorta cool at first, it also seems like something a government might choose to force on a person sooner or later. Someone they wanted to insert behind enemy lines, perhaps, or just create an inside job that otherwise wouldn’t have happened.
Taking off my tin foil hat for a moment, I’ll compare this pill with existing modern biometrics. A face scan, a fingerprint, or even my voice is my passport, verify me are all momentary actions.
With these, you’re more or less in control of when authentication happens. A pill, on the other hand, must run its course. You can’t change the signal mid-digestive cycle. Plus, you’d have to guard your pills with your life, and if a couple pills pass through you every day, you’d better have a big pillbox.
Authentication Can Be Skin Deep

So the password pill never came to pass, but it’s worth mentioning that at the same conference, Dugan debuted another method of physical authentication — a temporary password tattoo they developed along with MC10, a company that makes stretchable circuits and has since been acquired by a company called Medidata.
More typically, their circuits are used to do things like concussion detection for sports, or baby thermometers that continuously track temperature.
Dugan said that the key MC10 technology is in the accordion-like structures connecting the islands of inflexible silicon. These structures can stretch up to 200% and still work just fine. The tattoos are waterproof, so go ahead and swim or shower. Of course, the password tattoo never came to be, either. And that’s just fine with me.
Vintage Film Editor Becomes HDMI Monitor

With the convenience of digital cameras and editing software, shooting video today is so easy. But fifty years ago it wasn’t electronics that stored the picture but film, and for many that meant Super 8. Editing Super 8 involved a razor blade and glue, and an editing station, like a small projector and screen, was an essential accessory. Today these are a relatively useless curio, so [Endpoint101] picked one up for not a lot and converted it into an HDMI monitor.
Inside these devices there’s a film transport mechanism and a projection path usually folded with a couple of mirrors. In this case the glass screen and much of the internals have been removed, and an appropriate LCD screen fitted. It’s USB powered, and incorporates a plug-in USB power supply mounted in a UK trailing socket for which there’s plenty of space.
There’s always some discussion whenever a vintage device like this is torn apart as to whether that’s appropriate. These film editors really are ten a penny though, so even those of us who are 8 mm enthusiasts can see beyond this one. The result is a pleasingly retro monitor, which if we’re honest we could find space for ourselves. The full video is below the break. Meanwhile it’s not the first conversion we’ve seen, here’s another Hanimex packing a Raspberry Pi.
youtube.com/embed/YTQoNQL0R9E?…
PROFS: The Office Suite of the 1980s

Today, we take office software suites for granted. But in the 1970s, you were lucky to have a typewriter and access to a photocopier. But in the early 1980s, IBM rolled out PROFS — the Professional Office System — to try to revolutionize the office. It was an offshoot of an earlier internal system. The system would hardly qualify as an office suite today, but for the time it was very advanced.
The key component was an editor you could use to input notes and e-mail messages. PROFS also kept your calendar and could provide databases like phonebooks. There were several key features of PROFS that would make it hard to recognize as productivity software today. For one thing, IBM terminals were screen-oriented. The central computer would load a form into your terminal, which you could fill out. Then you’d press send to transmit it back to the mainframe. That makes text editing, for example, a very different proposition since you work on a screen of data at any one time. In addition, while you could coordinate calendars and send e-mail, you could only do that with certain people.
In general, PROFS connected everyone using your mainframe or, perhaps, a group of mainframes. In some cases, there might be gateways to other systems, but it wasn’t universal. However, it did have most of the major functions you’d expect from an e-mail system that was text-only, as you can see in the screenshot from a 1986 manual. PF keys, by the way, are what we would now call function keys.
The calendar was good, too. You could grant different users different access to your calendar. It was possible to just let people see when you were busy or mark events as confidential or personal.
You could actually operate PROFS using a command-line interface, and the PF keys were simply shorthand. That was a good thing, too. If you wanted to erase a file named Hackaday, for example, you had to type: ERASE Hackaday AUT$PROF.
Styles
PROFS messages were short and were essentially ephemeral chat messages. Of course, because of the block-mode terminals, you could only get messages after you sent something to the mainframe, or you were idle in a menu. A note was different. Notes were what we could call e-mail. They went into your inbox, and you could file them in “logs”, which were similar to folders.
If you wanted something with more gravitas, you could create documents. Documents could have templates and be merged with profiles to get information for a particular author. For example, a secretary might prepare a letter to print and mail using different profiles for different senders that had unique addresses, titles, and phone numbers.
Documents could be marked draft or final. You had your own personal data storage area, and there was also a shared storage. Draft documents could be automatically versioned. Documents also received unique ID numbers and were encoded with their creation date. Of course, you could also restrict certain documents to certain users or make them read-only for particular users.
More Features

PROFS could remind you of things or calendar appointments. It could also let you look up things like phone numbers or work with other databases. The calendar could help you find times when all participants were available. PROFS could tie into DisplayWrite (at least, by version 2) so it could spell check using custom or stock dictionaries. It also looked for problematic words such as effect vs. affect and wordy phrases or clichés.
The real game changer, though, was the ability to find documents without searching through a physical filing cabinet. The amount of time spent maintaining and searching files in a typical pre-automation business was staggering.
You could ask PROFS to suggest rewrites for a certain grade level or access a thesaurus. This all sounds ordinary now, but it was a big innovation in the 1980s.
Of course, in those days, documents were likely to be printed on a computer-controlled typewriter or, perhaps, an ordinary line printer. But how could you format using text? This all hinged on IBM’s DisplayWriter word processor.
youtube.com/embed/5Snvu8U1IE8?…
Markup
Today we use HTML or Markdown to give hints about rendering our text. PROFS and DisplayWriter wasn’t much different, although it had its own language. The 😛. tag started a paragraph. You could set off a quotation between :q. and :eq. Unnumbered lists would start with :ul., continue with :li., and end with :eul. Sounds almost familiar, right? Of course, programs like roff and WordStar had similar kinds of commands, and, truthfully, the markup is almost like strange HTML.
The Whole Office
IBM wanted to show people that this wasn’t just wordprocessing for the secretarial pool. Advanced users could customize templates and profiles. Administrators could tailor menus and add features. There were applications you could add to provide a spreadsheet capability, access different databases, and gateway to other systems like TWX or Telex.
It is hard to find any demonstrations of PROFs, but a few years ago, someone documented their adventure in trying to get PROFS running. Check out [HS Tech Channel’s] video below.
youtube.com/embed/FIqbesDvNL8?…
History and Future
Supposedly, the original system was built in the late 1970s in conjunction with Amoco Research. However, we’re a little suspicious of that claim. We know of at least three other companies that were very proud of “helping IBM design PROFS.” As far as we could ever tell, that was a line IBM sales fed people when they helped them design a sign-in screen with their company name on it, and that was about it.
The system would go through several releases until it morphed into OfficeVision. As PCs started to take over, OfficeVision/2 and OS/2 were the IBM answer that few wanted. Eventually, IBM would suggest using Lotus Notes or Domino and would eventually buy Lotus in 1995 to own the products.
Scandal
One place that PROFS got a lot of public attention was during the Iran-Contra affair. Oliver North and others exchanged PROFS notes about their activities and deleted them. However, deleting a note in PROFS isn’t always a true deletion. If you send a note to several people, they all have to delete it before the system may delete it. If you send a document, deleting the message only deletes the notification that the document is ready, not the document.
Investigators recovered many “deleted” e-mails from PROFS that provided key details about the case. Oddly, around the same time, IBM offered an add-on to PROFS to ensure things you wanted to delete were really gone. Maybe a coincidence. Maybe not.
On Your Own
If you want to try to build up a new PROFS system, we suggest starting with a virtual machine. If anyone suggests that wordprocessing can’t get worse than DisplayWriter, they are very wrong.
The game is over: when “free” comes at too high a price. What we know about RenEngine

We often describe cases of malware distribution under the guise of game cheats and pirated software. Sometimes such methods are used to spread complex malware that employs advanced techniques and sophisticated infection chains.
In February 2026, researchers from Howler Cell announced the discovery of a mass campaign distributing pirated games infected with a previously unknown family of malware. It turned out to be a loader called RenEngine, which was delivered to the device using a modified version of a Ren’Py engine-based game launcher. Kaspersky solutions detect the RenEngine loader as Trojan.Python.Agent.nb and HEUR:Trojan.Python.Agent.gen.
However, this threat is not new. Our solutions began detecting the first samples of the RenEngine loader in March 2025, when it was used to distribute the Lumma stealer (Trojan-PSW.Win32.Lumma.gen).
In the ongoing incidents, ACR Stealer (Trojan-PSW.Win32.ACRstealer.gen) is being distributed as the final payload. We have been monitoring this campaign for a long time and will share some details in this article.
Incident analysis
Disguise as a visual novel
Let’s look at the first incident we detected in March 2025. At that time, the attackers distributed the malware under the guise of a hacked game on a popular gaming web resource.
The website featured a game download page with two buttons: Free Download Now and Direct Download. Both buttons had the same functionality: they redirected users to the MEGA file-sharing service, where they were offered to download an archive with the “game.”
Game download page

When the “game” was launched, the download process would stop at 100%. One might think that the game froze, but that was not the case — the “real” malicious code just started working.
Placeholder with the download screen

“Game” source files analysis
The full infection chain

After analyzing the source files, we found Python scripts that initiate the initial device infection. These scripts imitate the endless loading of the game. In addition, they contain the is_sandboxed function for bypassing the sandbox and xor_decrypt_file for decrypting the malicious payload. Using the latter, the script decrypts the ZIP archive, unpacks its contents into the .temp directory, and launches the unpacked files.
Contents of the .temp directory

There are five files in the .temp directory. The DKsyVGUJ.exe executable is not malicious. Its original name is Ahnenblatt4.exe, and it is a well-known legitimate application for organizing genealogical data. The borlndmm.dll library also does not contain malicious code; it implements the memory manager required to run the executable. Another library, cc32290mt.dll, contains a code snippet patched by attackers that intercepts control when the application is launched and deploys the first stage of the payload in the process memory.
HijackLoader
The dbghelp.dll system library is used as a “container” to launch the first stage of the payload. It is overwritten in memory with decrypted shellcode obtained from the gayal.asp file using the cc32290mt.dll library. The resulting payload is HijackLoader. This is a relatively new means of delivering and deploying malicious implants. A distinctive feature of this malware family is its modularity and configuration flexibility. HijackLoader was first detected and described in the summer of 2023. More detailed information about this loader is available to customers of the Kaspersky Intelligence Reporting Service.
The final payload can be delivered in two ways, depending on the configuration parameters of the malicious sample. The main HijackLoader ti module is used to launch and prepare the process for the final payload injection. In some cases, an additional module is also used, which is injected into an intermediate process launched by the main one. The code that performs the injection is the same in both cases.
Before creating a child process, the configuration parameters are encrypted using XOR and saved to the %TEMP% directory with a random name. The file name is written to the system environment variables.
Loading configuration parameters saved by the main module

In the analyzed sample, the execution follows a longer path with an intermediate child process, cmd.exe. It is created in suspended mode by calling the auxiliary module modCreateProcess. Then, using the ZwCreateSection and ZwMapViewOfSection system API calls, the code of the same dbghelp.dll library is loaded into the address space of the process, after which it intercepts control.
Next, the ti module, launched in the child process, reads the hap.eml file, from which it decrypts the second stage of HijackLoader. The module then loads the pla.dll system library and overwrites the beginning of its code section with the received payload, after which it transfers control to this library.
Payload decryption

The decrypted payload is an EXE file, and the configuration parameters are set to inject it into the explorer.exe child process. The payload is written to the memory of the child process in several stages:
- First, the malicious payload is written to a temporary file on disk using the transaction mechanism provided by the Windows API. The payload is written in several stages and not in the order in which the data is stored in the file. The
MZsignature, with which any PE file begins, is written last with a delay.
Writing the payload to a temporary file - After that, the payload is loaded from the temporary file into the address space of the current process using the
ZwCreateSectioncall. The transaction that wrote to the file is rolled back, thus deleting the temporary file with the payload. - Next, the sample uses the
modCreateProcessmodule to launch a child processexplorer.exeand injects the payload into it by creating a shared memory region with theZwMapViewOfSectioncall.
Payload injection into the child processAnother HijackLoader module,
rshell, is used to launch the shellcode. Its contents are also injected into the child process, replacing the code located at its entry point.
The rshell module injection - The last step performed by the parent process is starting a thread in the child process by calling
ZwResumeThread. After that, the thread starts executing thershellmodule code placed at the child process entry point, and the parent process terminates.
Thershellmodule prepares the final malicious payload. Once it has finished, it transfers control to another HijackLoader module calledESAL. It replaces the contents ofrshellwith zeros using thememsetfunction and launches the final payload, which is a stealer from the Lumma family (Trojan-PSW.Win32.Lumma).


In addition to the modules described above, this HijackLoader sample contains the following modules, which were used at intermediate stages: COPYLIST, modTask, modUAC, modWriteFile.
Kaspersky solutions detect HijackLoader with the verdicts Trojan.Win32.Penguish and Trojan.Win32.DllHijacker.
Not only games
In addition to gaming sites, we found that attackers created dozens of different web resources to distribute RenEngine under the guise of pirated software. On one such site, for example, users can supposedly download an activated version of the CorelDRAW graphics editor.
Distribution of RenEngine under the guise of the CorelDRAW pirated version

When the user clicks the Descargar Ahora (“Download Now”) button, they are redirected several times to other malicious websites, after which an infected archive is downloaded to their device.
File storage imitations

Distribution
According to our data, since March 2025, RenEngine has affected users in the following countries:
Distribution of incidents involving the RenEngine loader by country (TOP 20), February 2026 (download)
The distribution pattern of this loader suggests that the attacks are not targeted. At the time of publication, we have recorded the highest number of incidents in Russia, Brazil, Turkey, Spain, and Germany.
Recommendations for protection
The format of game archives is generally not standardized and is unique for each game. This means that there is no universal algorithm for unpacking and checking the contents of game archives. If the game engine does not check the integrity and authenticity of executable resources and scripts, such an archive can become a repository for malware if modified by attackers. Despite this, Kaspersky Premium protects against such threats with its Behavior Detection component.
The distribution of malware under the guise of pirated software and hacked games is not a new tactic. It is relatively easy to avoid infection by the malware described in this article — simply install games and programs from trusted sites. In addition, it is important for gamers to remember the need to install specialized security solutions. This ongoing campaign employs the Lumma and ACR stylers, and Vidar was also found — none of these are new threats, but rather long-known malware. This means that modern antivirus technologies can detect even modified versions of the above-mentioned stealers and their alternatives, preventing further infection.
Indicators of compromise
12EC3516889887E7BCF75D7345E3207A – setup_game_8246.zip
D3CF36C37402D05F1B7AA2C444DC211A – __init.py__
1E0BF40895673FCD96A8EA3DDFAB0AE2 – cc32290mt.dll
2E70ECA2191C79AD15DA2D4C25EB66B9 – Lumma Stealer
hxxps://hentakugames[.]com/country-bumpkin/
hxxps://dodi-repacks[.]site
hxxps://artistapirata[.]fit
hxxps://artistapirata[.]vip
hxxps://awdescargas[.]pro
hxxps://fullprogramlarindir[.]me
hxxps://gamesleech[.]com
hxxps://parapcc[.]com
hxxps://saglamindir[.]vip
hxxps://zdescargas[.]pro
hxxps://filedownloads[.]store
hxxps://go[.]zovo[.]ink
Lumma C2
hxxps://steamcommunity[.]com/profiles/76561199822375128
hxxps://localfxement[.]live
hxxps://explorebieology[.]run
hxxps://agroecologyguide[.]digital
hxxps://moderzysics[.]top
hxxps://seedsxouts[.]shop
hxxps://codxefusion[.]top
hxxps://farfinable[.]top
hxxps://techspherxe[.]top
hxxps://cropcircleforum[.]today
securelist.com/renengine-campa…

Forget Waldo. Where’s Luna 9?

Luna 9 was the first spacecraft to soft-land on the moon. In 1966, the main spacecraft ejected a 99-kg lander module that used a landing bag to survive impact. The problem is, given the technology limitations of 1966, no one is exactly sure where it is now. But it looks like that’s about to change.
We know that the lander bounced a few times and came to rest somewhere in Oceanus Procellarum, in the area of the Reiner and Marius craters. The craft deployed four stabilizing petals and sent back dramatic panoramas of the lunar surface. The Soviets were not keen to share, but Western radio astronomers noticed the pictures were in the standard Radiofax format, so the world got a glimpse of the moon, and journalists speculated that the use of a standard might have been a deliberate choice of the designers to end run against the government’s unwillingness to share data.
Several scientists have been looking for the remains of the historic mission, but with limited success. But there are a few promising theories, and the Indian Chandrayaan-2 orbiter may soon confirm which theory is correct. Interestingly, Pravda published exact landing coordinates, but given the state of the art in 1966, those coordinates are unlikely to be completely correct. The Lunar Reconnaissance Orbiter couldn’t find it at that location. The leading candidates are within 5 to 25 km of the presumed site.
The Luna series had a number of firsts, including — probably — the distinction of being the first spacecraft stolen by a foreign government. Don’t worry, though. They returned it. Since the Russians didn’t talk much about plans or failures, you can wonder what they wanted to build but didn’t. There were plenty of unbuilt dreams on the American side.
Featured Art – 1:1 model of the Luna 9, Public Domain.
Spam and phishing in 2025

The year in figures
- 99% of all emails sent worldwide and 43.27% of all emails sent in the Russian web segment were spam
- 50% of all spam emails were sent from Russia
- Kaspersky Mail Anti-Virus blocked 144,722,674 malicious email attachments
- Our Anti-Phishing system thwarted 554,002,207 attempts to follow phishing links
Phishing and scams in 2025
Entertainment-themed phishing attacks and scams
In 2025, online streaming services remained a primary theme for phishing sites within the entertainment sector, typically by offering early access to major premieres ahead of their official release dates. Alongside these, there was a notable increase in phishing pages mimicking ticket aggregation platforms for live events. Cybercriminals lured users with offers of free tickets to see popular artists on pages that mirrored the branding of major ticket distributors. To participate in these “promotions”, victims were required to pay a nominal processing or ticket-shipping fee. Naturally, after paying the fee, the users never received any tickets.

In addition to concert-themed bait, other music-related scams gained significant traction. Users were directed to phishing pages and prompted to “vote for their favorite artist”, a common activity within fan communities. To bolster credibility, the scammers leveraged the branding of major companies like Google and Spotify. This specific scheme was designed to harvest credentials for multiple platforms simultaneously, as users were required to sign in with their Facebook, Instagram, or email credentials to participate.

As a pretext for harvesting Spotify credentials, attackers offered users a way to migrate their playlists to YouTube. To complete the transfer, victims were to just enter their Spotify credentials.

Beyond standard phishing, threat actors leveraged Spotify’s popularity for scams. In Brazil, scammers promoted a scheme where users were purportedly paid to listen to and rate songs.

To “withdraw” their earnings, users were required to provide their identification number for PIX, Brazil’s instant payment system.

Users were then prompted to verify their identity. To do so, the victim was required to make a small, one-time “verification payment”, an amount significantly lower than the potential earnings.

The form for submitting this “verification payment” was designed to appear highly authentic, even requesting various pieces of personal data. It is highly probable that this data was collected for use in subsequent attacks.

In another variation, users were invited to participate in a survey in exchange for a $1000 gift card. However, in a move typical of a scam, the victim was required to pay a small processing or shipping fee to claim the prize. Once the funds were transferred, the attackers vanished, and the website was taken offline.

Even deciding to go to an art venue with a girl from a dating site could result in financial loss. In this scenario, the “date” would suggest an in-person meeting after a brief period of rapport-building. They would propose a relatively inexpensive outing, such as a movie or a play at a niche theater. The scammer would go so far as to provide a link to a specific page where the victim could supposedly purchase tickets for the event.

To enhance the site’s perceived legitimacy, it even prompted the user to select their city of residence.

However, once the “ticket payment” was completed, both the booking site and the individual from the dating platform would vanish.
A similar tactic was employed by scam sites selling tickets for escape rooms. The design of these pages closely mirrored legitimate websites to lower the target’s guard.

Phishing pages masquerading as travel portals often capitalize on a sense of urgency, betting that a customer eager to book a “last-minute deal” will overlook an illegitimate URL. For example, the fraudulent page shown below offered exclusive tours of Japan, purportedly from a major Japanese tour operator.

Sensitive data at risk: phishing via government services
To harvest users’ personal data, attackers utilized a traditional phishing framework: fraudulent forms for document processing on sites posing as government portals. The visual design and content of these phishing pages meticulously replicated legitimate websites, offering the same services found on official sites. In Brazil, for instance, attackers collected personal data from individuals under the pretext of issuing a Rural Property Registration Certificate (CCIR).

Through this method, fraudsters tried to gain access to the victim’s highly sensitive information, including their individual taxpayer registry (CPF) number. This identifier serves as a unique key for every Brazilian national to access private accounts on government portals. It is also utilized in national databases and displayed on personal identification documents, making its interception particularly dangerous. Scammer access to this data poses a severe risk of identity theft, unauthorized access to government platforms, and financial exposure.

Furthermore, users were at risk of direct financial loss: in certain instances, the attackers requested a “processing fee” to facilitate the issuance of the important document.
Fraudsters also employed other methods to obtain CPF numbers. Specifically, we discovered phishing pages mimicking the official government service portal, which requires the CPF for sign-in.

Another theme exploited by scammers involved government payouts. In 2025, Singaporean citizens received government vouchers ranging from $600 to $800 in honor of the country’s 60th anniversary. To redeem these, users were required to sign in to the official program website. Fraudsters rushed to create web pages designed to mimic this site. Interestingly, the primary targets in this campaign were Telegram accounts, despite the fact that Telegram credentials were not a requirement for signing in to the legitimate portal.

We also identified a scam targeting users in Norway who were looking to renew or replace their driver’s licenses. Upon opening a website masquerading as the official Norwegian Public Roads Administration website, visitors were prompted to enter their vehicle registration and phone numbers.

Next, the victim was prompted for sensitive data, such as the personal identification number unique to every Norwegian citizen. By doing so, the attackers not only gained access to confidential information but also reinforced the illusion that the victim was interacting with an official website.

Once the personal data was submitted, a fraudulent page would appear, requesting a “processing fee” of 1200 kroner. If the victim entered their credit card details, the funds were transferred directly to the scammers with no possibility of recovery.

In Germany, attackers used the pretext of filing tax returns to trick users into providing their email user names and passwords on phishing pages.

A call to urgent action is a classic tactic in phishing scenarios. When combined with the threat of losing property, these schemes become highly effective bait, distracting potential victims from noticing an incorrect URL or a poorly designed website. For example, a phishing warning regarding unpaid vehicle taxes was used as a tool by attackers targeting credentials for the UK government portal.

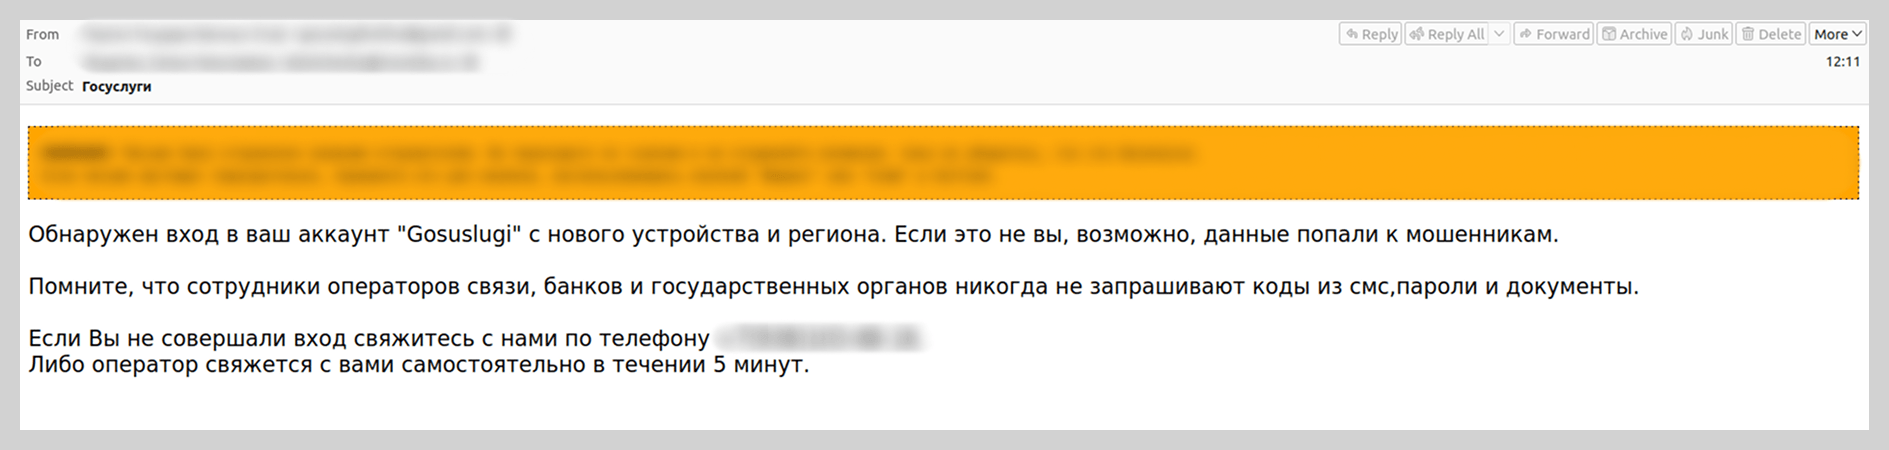
We have observed that since the spring of 2025, there has been an increase in emails mimicking automated notifications from the Russian government services portal. These messages were distributed under the guise of application status updates and contained phishing links.

We also recorded vishing attacks targeting users of government portals. Victims were prompted to “verify account security” by calling a support number provided in the email. To lower the users’ guard, the attackers included fabricated technical details in the emails, such as the IP address, device model, and timestamp of an alleged unauthorized sign-in.
Last year, attackers also disguised vishing emails as notifications from microfinance institutions or credit bureaus regarding new loan applications. The scammers banked on the likelihood that the recipient had not actually applied for a loan. They would then prompt the victim to contact a fake support service via a spoofed support number.

Know Your Customer
As an added layer of data security, many services now implement biometric verification (facial recognition, fingerprints, and retina scans), as well as identity document verification and digital signatures. To harvest this data, fraudsters create clones of popular platforms that utilize these verification protocols. We have previously detailed the mechanics of this specific type of data theft.
In 2025, we observed a surge in phishing attacks targeting users under the guise of Know Your Customer (KYC) identity verification. KYC protocols rely on a specific set of user data for identification. By spoofing the pages of payment services such as Vivid Money, fraudsters harvested the information required to pass KYC authentication.

Notably, this threat also impacted users of various other platforms that utilize KYC procedures.

A distinctive feature of attacks on the KYC process is that, in addition to the victim’s full name, email address, and phone number, phishers request photos of their passport or face, sometimes from multiple angles. If this information falls into the hands of threat actors, the consequences extend beyond the loss of account access; the victim’s credentials can be sold on dark web marketplaces, a trend we have highlighted in previous reports.
Messaging app phishing
Account hijacking on messaging platforms like WhatsApp and Telegram remains one of the primary objectives of phishing and scam operations. While traditional tactics, such as suspicious links embedded in messages, have been well-known for some time, the methods used to steal credentials are becoming increasingly sophisticated.
For instance, Telegram users were invited to participate in a prize giveaway purportedly hosted by a famous athlete. This phishing attack, which masqueraded as an NFT giveaway, was executed through a Telegram Mini App. This marks a shift in tactics, as attackers previously relied on external web pages for these types of schemes.

In 2025, new variations emerged within the familiar framework of distributing phishing links via Telegram. For example, we observed prompts inviting users to vote for the “best dentist” or “best COO” in town.

The most prevalent theme in these voting-based schemes, children’s contests, was distributed primarily through WhatsApp. These phishing pages showed little variety; attackers utilized a standardized website design and set of “bait” photos, simply localizing the language based on the target audience’s geographic location.

To participate in the vote, the victim was required to enter the phone number linked to their WhatsApp account.

They were then prompted to provide a one-time authentication code for the messaging app.

The following are several other popular methods used by fraudsters to hijack user credentials.
In China, phishing pages meticulously replicated the WhatsApp interface. Victims were notified that their accounts had purportedly been flagged for “illegal activity”, necessitating “additional verification”.

The victim was redirected to a page to enter their phone number, followed by a request for their authorization code.

In other instances, users received messages allegedly from WhatsApp support regarding account authentication via SMS. As with the other scenarios described, the attackers’ objective was to obtain the authentication code required to hijack the account.

Fraudsters enticed WhatsApp users with an offer to link an app designed to “sync communications” with business contacts.

To increase the perceived legitimacy of the phishing site, the attackers even prompted users to create custom credentials for the page.

After that, the user was required to “purchase a subscription” to activate the application. This allowed the scammers to harvest credit card data, leaving the victim without the promised service.
To lure Telegram users, phishers distributed invitations to online dating chats.

Attackers also heavily leveraged the promise of free Telegram Premium subscriptions. While these phishing pages were previously observed only in Russian and English, the linguistic scope of these campaigns expanded significantly this year. As in previous iterations, activating the subscription required the victim to sign in to their account, which could result in the loss of account access.

Exploiting the ChatGPT hype
Artificial intelligence is increasingly being leveraged by attackers as bait. For example, we have identified fraudulent websites mimicking the official payment page for ChatGPT Plus subscriptions.

Social media marketing through LLMs was also a potential focal point for user interest. Scammers offered “specialized prompt kits” designed for social media growth; however, once payment was received, they vanished, leaving victims without the prompts or their money.

The promise of easy income through neural networks has emerged as another tactic to attract potential victims. Fraudsters promoted using ChatGPT to place bets, promising that the bot would do all the work while the user collected the profits. These services were offered at a “special price” valid for only 15 minutes after the page was opened. This narrow window prevented the victim from critically evaluating the impulse purchase.

Job opportunities with a catch
To attract potential victims, scammers exploited the theme of employment by offering high-paying remote positions. Applicants responding to these advertisements did more than just disclose their personal data; in some cases, fraudsters requested a small sum under the pretext of document processing or administrative fees. To convince victims that the offer was legitimate, attackers impersonated major brands, leveraging household names to build trust. This allowed them to lower the victims’ guard, even when the employment terms sounded too good to be true.

We also observed schemes where, after obtaining a victim’s data via a phishing site, scammers would follow up with a phone call – a tactic aimed at tricking the user into disclosing additional personal data.

By analyzing current job market trends, threat actors also targeted popular career paths to steal messaging app credentials. These phishing schemes were tailored to specific regional markets. For example, in the UAE, fake “employment agency” websites were circulating.

In a more sophisticated variation, users were asked to complete a questionnaire that required the phone number linked to their Telegram account.

To complete the registration, users were prompted for a code which, in reality, was a Telegram authorization code.

Notably, the registration process did not end there; the site continued to request additional information to “set up an account” on the fraudulent platform. This served to keep victims in the dark, maintaining their trust in the malicious site’s perceived legitimacy.

After finishing the registration, the victim was told to wait 24 hours for “verification”, though the scammers’ primary objective, hijacking the Telegram account, had already been achieved.
Simpler phishing schemes were also observed, where users were redirected to a page mimicking the Telegram interface. By entering their phone number and authorization code, victims lost access to their accounts.

Job seekers were not the only ones targeted by scammers. Employers’ accounts were also in the crosshairs, specifically on a major Russian recruitment portal. On a counterfeit page, the victim was asked to “verify their account” in order to post a job listing, which required them to enter their actual sign-in credentials for the legitimate site.
Spam in 2025
Malicious attachments
Password-protected archives
Attackers began aggressively distributing messages with password-protected malicious archives in 2024. Throughout 2025, these archives remained a popular vector for spreading malware, and we observed a variety of techniques designed to bypass security solutions.
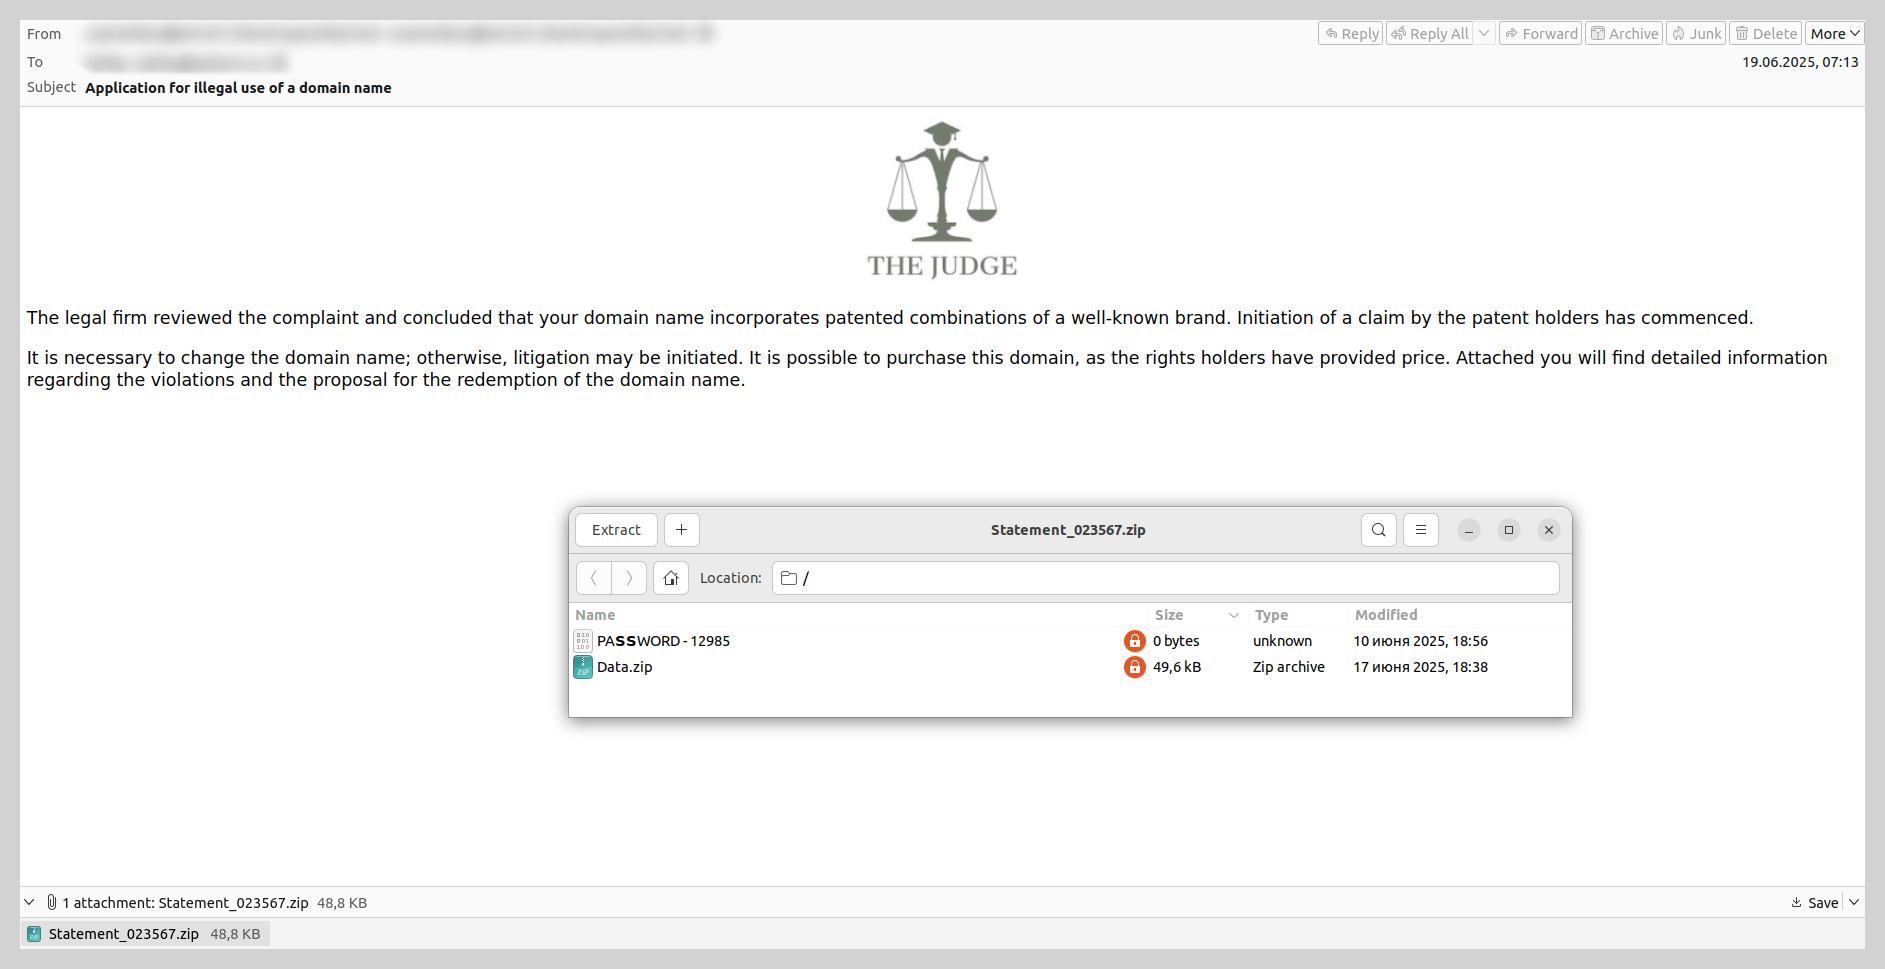
For example, threat actors sent emails impersonating law firms, threatening victims with legal action over alleged “unauthorized domain name use”. The recipient was prompted to review potential pre-trial settlement options detailed in an attached document. The attachment consisted of an unprotected archive containing a secondary password-protected archive and a file with the password. Disguised as a legal document within this inner archive was a malicious WSF file, which installed a Trojan into the system via startup. The Trojan then stealthily downloaded and installed Tor, which allowed it to regularly exfiltrate screenshots to the attacker-controlled C2 server.
In addition to archives, we also encountered password-protected PDF files containing malicious links over the past year.
E-signature service exploits
Emails using the pretext of “signing a document” to coerce users into clicking phishing links or opening malicious attachments were quite common in 2025. The most prevalent scheme involved fraudulent notifications from electronic signature services. While these were primarily used for phishing, one specific malware sample identified within this campaign is of particular interest.
The email, purportedly sent from a well-known document-sharing platform, notified the recipient that they had been granted access to a “contract” attached to the message. However, the attachment was not the expected PDF; instead, it was a nested email file named after the contract. The body of this nested message mirrored the original, but its attachment utilized a double extension: a malicious SVG file containing a Trojan was disguised as a PDF document. This multi-layered approach was likely an attempt to obfuscate the malware and bypass security filters.

“Business correspondence” impersonating industrial companies
In the summer of last year, we observed mailshots sent in the name of various existing industrial enterprises. These emails contained DOCX attachments embedded with Trojans. Attackers coerced victims into opening the malicious files under the pretext of routine business tasks, such as signing a contract or drafting a report.
The authors of this malicious campaign attempted to lower users’ guard by using legitimate industrial sector domains in the “From” address. Furthermore, the messages were routed through the mail servers of a reputable cloud provider, ensuring the technical metadata appeared authentic. Consequently, even a cautious user could mistake the email for a genuine communication, open the attachment, and compromise their device.

Attacks on hospitals
Hospitals were a popular target for threat actors this past year: they were targeted with malicious emails impersonating well-known insurance providers. Recipients were threatened with legal action regarding alleged “substandard medical services”. The attachments, described as “medical records and a written complaint from an aggrieved patient”, were actually malware. Our solutions detect this threat as Backdoor.Win64.BrockenDoor, a backdoor capable of harvesting system information and executing malicious commands on the infected device.

We also came across emails with a different narrative. In those instances, medical staff were requested to facilitate a patient transfer from another hospital for ongoing observation and treatment. These messages referenced attached medical files containing diagnostic and treatment history, which were actually archives containing malicious payloads.

To bolster the perceived legitimacy of these communications, attackers did more than just impersonate famous insurers and medical institutions; they registered look-alike domains that mimicked official organizations’ domains by appending keywords such as “-insurance” or “-med.” Furthermore, to lower the victims’ guard, scammers included a fake “Scanned by Email Security” label.
Messages containing instructions to run malicious scripts
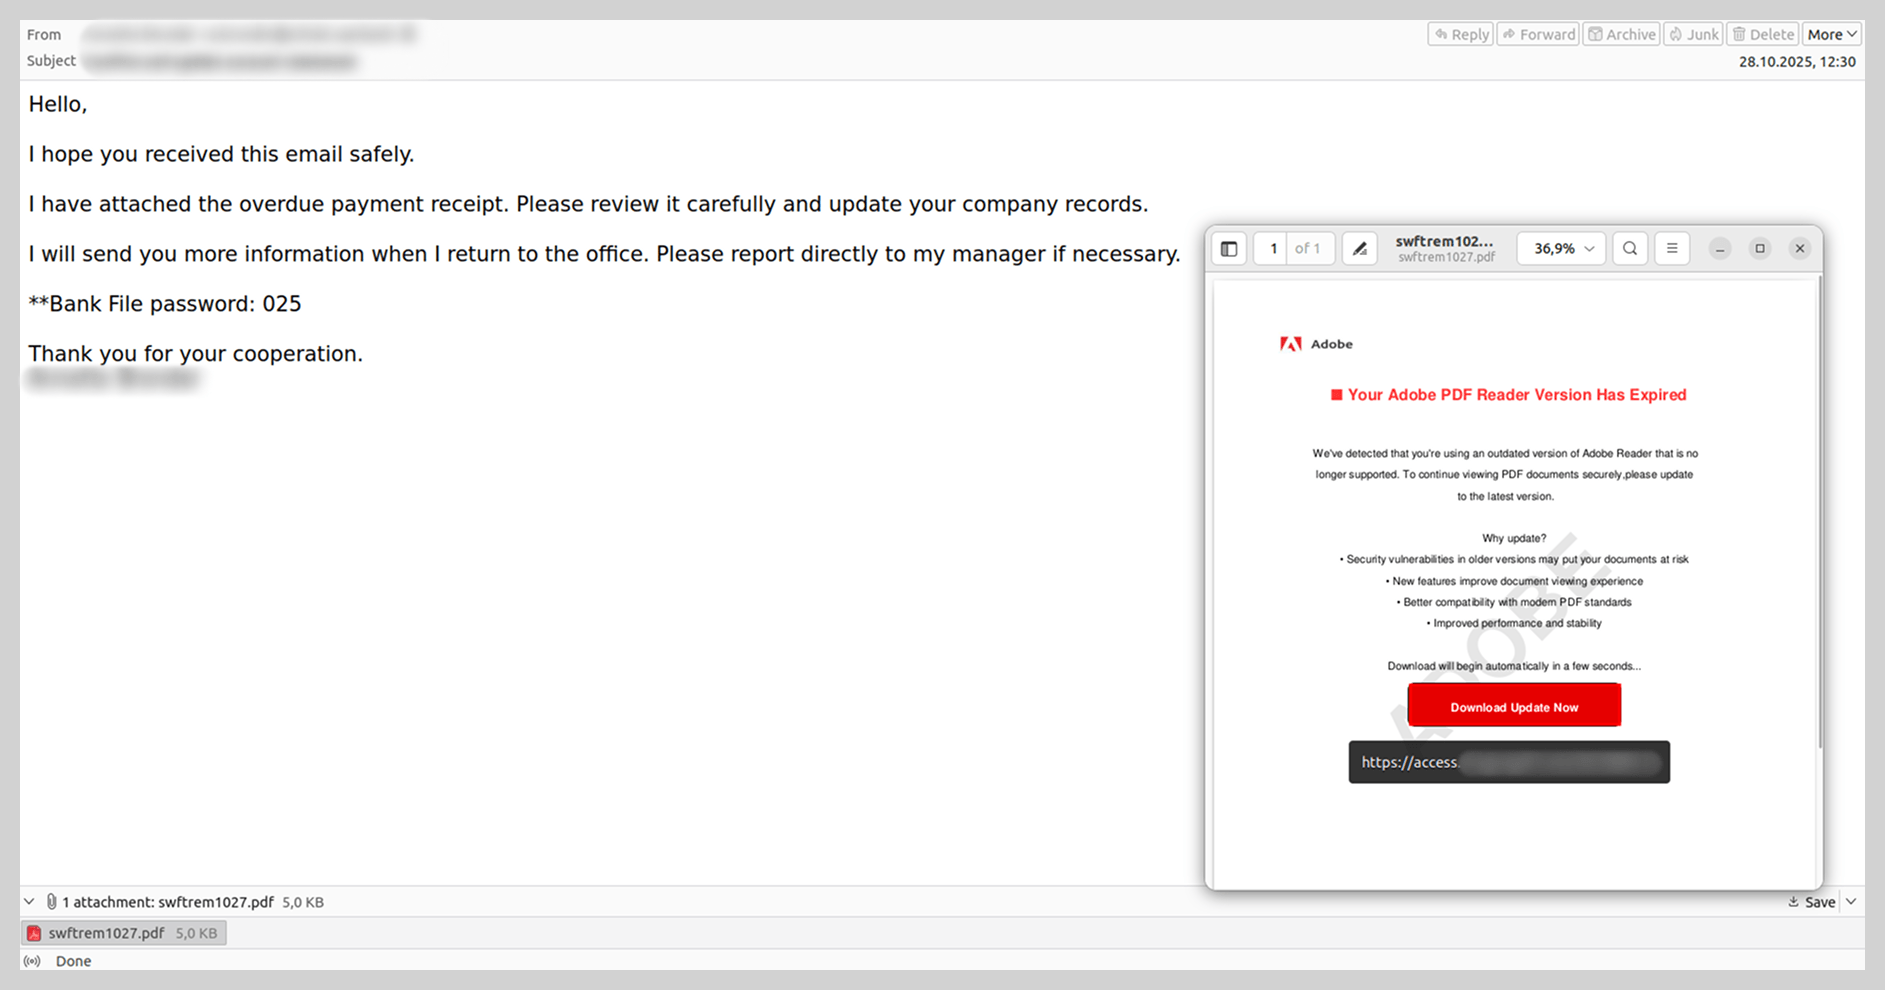
Last year, we observed unconventional infection chains targeting end-user devices. Threat actors continued to distribute instructions for downloading and executing malicious code, rather than attaching the malware files directly. To convince the recipient to follow these steps, attackers typically utilized a lure involving a “critical software update” or a “system patch” to fix a purported vulnerability. Generally, the first step in the instructions required launching the command prompt with administrative privileges, while the second involved entering a command to download and execute the malware: either a script or an executable file.
In some instances, these instructions were contained within a PDF file. The victim was prompted to copy a command into PowerShell that was neither obfuscated nor hidden. Such schemes target non-technical users who would likely not understand the command’s true intent and would unknowingly infect their own devices.

Scams
Law enforcement impersonation scams in the Russian web segment
In 2025, extortion campaigns involving actors posing as law enforcement – a trend previously more prevalent in Europe – were adapted to target users across the Commonwealth of Independent States.
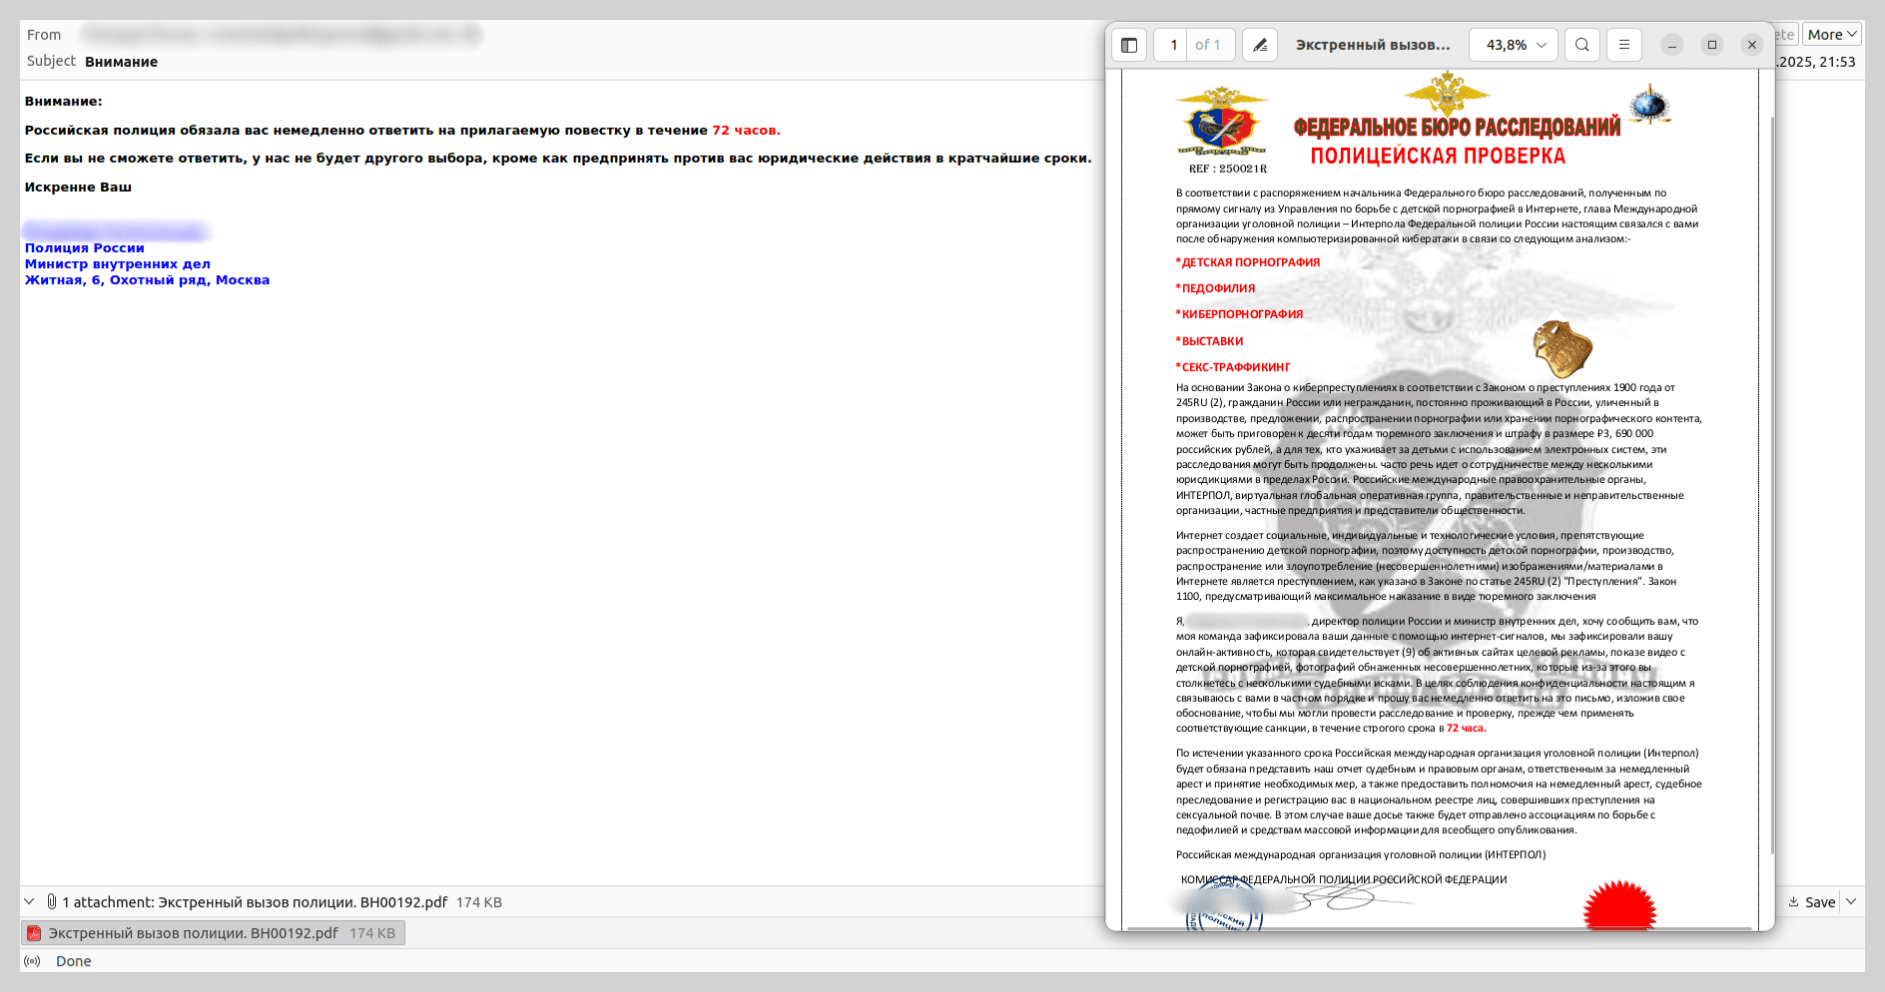
For example, we identified messages disguised as criminal subpoenas or summonses purportedly issued by Russian law enforcement agencies. However, the specific departments cited in these emails never actually existed. The content of these “summonses” would also likely raise red flags for a cautious user. This blackmail scheme relied on the victim, in their state of panic, not scrutinizing the contents of the fake summons.
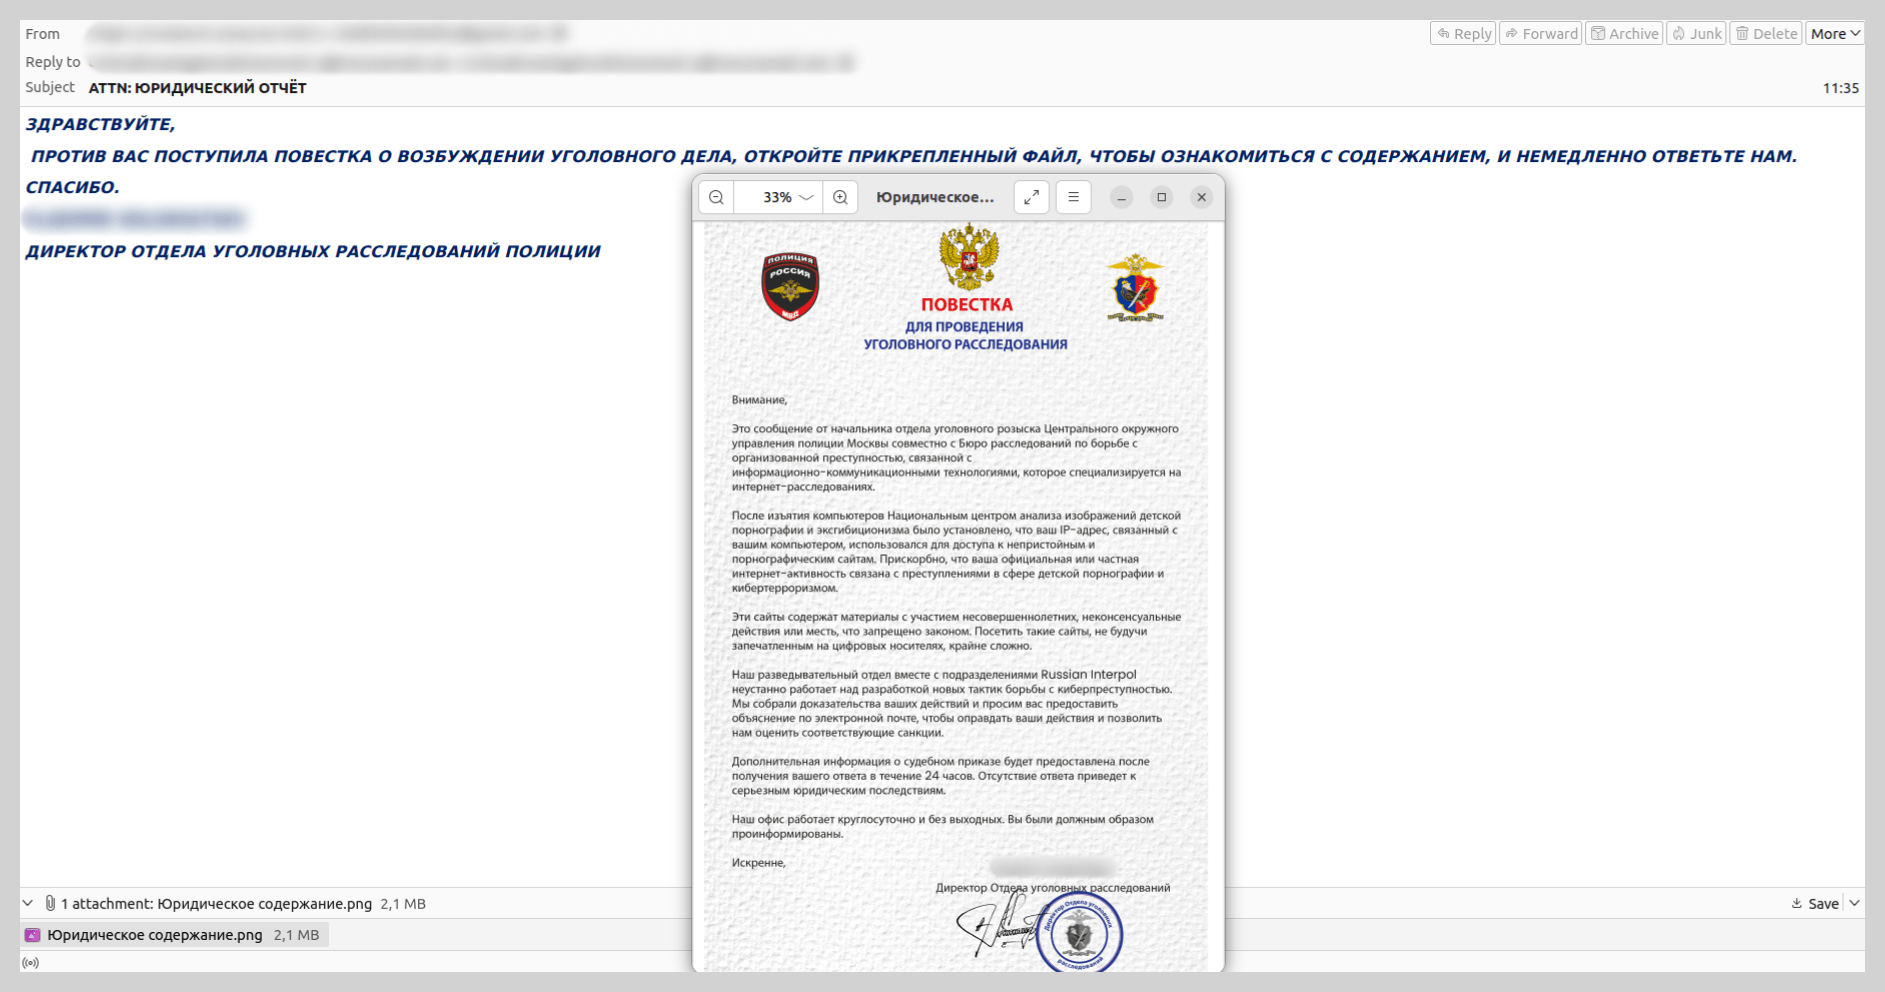
To intimidate recipients, the attackers referenced legal frameworks and added forged signatures and seals to the “subpoenas”. In reality, neither the cited statutes nor the specific civil service positions exist in Russia.
We observed similar attacks – employing fabricated government agencies and fictitious legal acts – in other CIS countries, such as Belarus.

Fraudulent investment schemes
Threat actors continued to aggressively exploit investment themes in their email scams. These emails typically promise stable, remote income through “exclusive” investment opportunities. This remains one of the most high-volume and adaptable categories of email scams. Threat actors embedded fraudulent links both directly within the message body and inside various types of attachments: PDF, DOC, PPTX, and PNG files. Furthermore, they increasingly leveraged legitimate Google services, such as Google Docs, YouTube, and Google Forms, to distribute these communications. The link led to the site of the “project” where the victim was prompted to provide their phone number and email. Subsequently, users were invited to invest in a non-existent project.
We have previously documented these mailshots: they were originally targeted at Russian-speaking users and were primarily distributed under the guise of major financial institutions. However, in 2025, this investment-themed scam expanded into other CIS countries and Europe. Furthermore, the range of industries that spammers impersonated grew significantly. For instance, in their emails, attackers began soliciting investments for projects supposedly led by major industrial-sector companies in Kazakhstan and the Czech Republic.

Fraudulent “brand partner” recruitment
This specific scam operates through a multi-stage workflow. First, the target company receives a communication from an individual claiming to represent a well-known global brand, inviting them to register as a certified supplier or business partner. To bolster the perceived authenticity of the offer, the fraudsters send the victim an extensive set of forged documents. Once these documents are signed, the victim is instructed to pay a “deposit”, which the attackers claim will be fully refunded once the partnership is officially established.

These mailshots were first detected in 2025 and have rapidly become one of the most prevalent forms of email-based fraud. In December 2025 alone, we blocked over 80,000 such messages. These campaigns specifically targeted the B2B sector and were notable for their high level of variation – ranging from their technical properties to the diversity of the message content and the wide array of brands the attackers chose to impersonate.
Fraudulent overdue rent notices
Last year, we identified a new theme in email scams: recipients were notified that the payment deadline for a leased property had expired and were urged to settle the “debt” immediately. To prevent the victim from sending funds to their actual landlord, the email claimed that banking details had changed. The “debtor” was then instructed to request the new payment information – which, of course, belonged to the fraudsters. These mailshots primarily targeted French-speaking countries; however, in December 2025, we discovered a similar scam variant in German.

QR codes in scam letters
In 2025, we observed a trend where QR codes were utilized not only in phishing attempts but also in extortion emails. In a classic blackmail scam, the user is typically intimidated by claims that hackers have gained access to sensitive data. To prevent the public release of this information, the attackers demand a ransom payment to their cryptocurrency wallet.
Previously, to bypass email filters, scammers attempted to obfuscate the wallet address by using various noise contamination techniques. In last year’s campaigns, however, scammers shifted to including a QR code that contained the cryptocurrency wallet address.

News agenda
As in previous years, spammers in 2025 aggressively integrated current events into their fraudulent messaging to increase engagement.
For example, following the launch of $TRUMP memecoins surrounding Donald Trump’s inauguration, we identified scam campaigns promoting the “Trump Meme Coin” and “Trump Digital Trading Cards”. In these instances, scammers enticed victims to click a link to claim “free NFTs”.

We also observed ads offering educational credentials. Spammers posted these ads as comments on legacy, unmoderated forums; this tactic ensured that notifications were automatically pushed to all users subscribed to the thread. These notifications either displayed the fraudulent link directly in the comment preview or alerted users to a new post that redirected them to spammers’ sites.

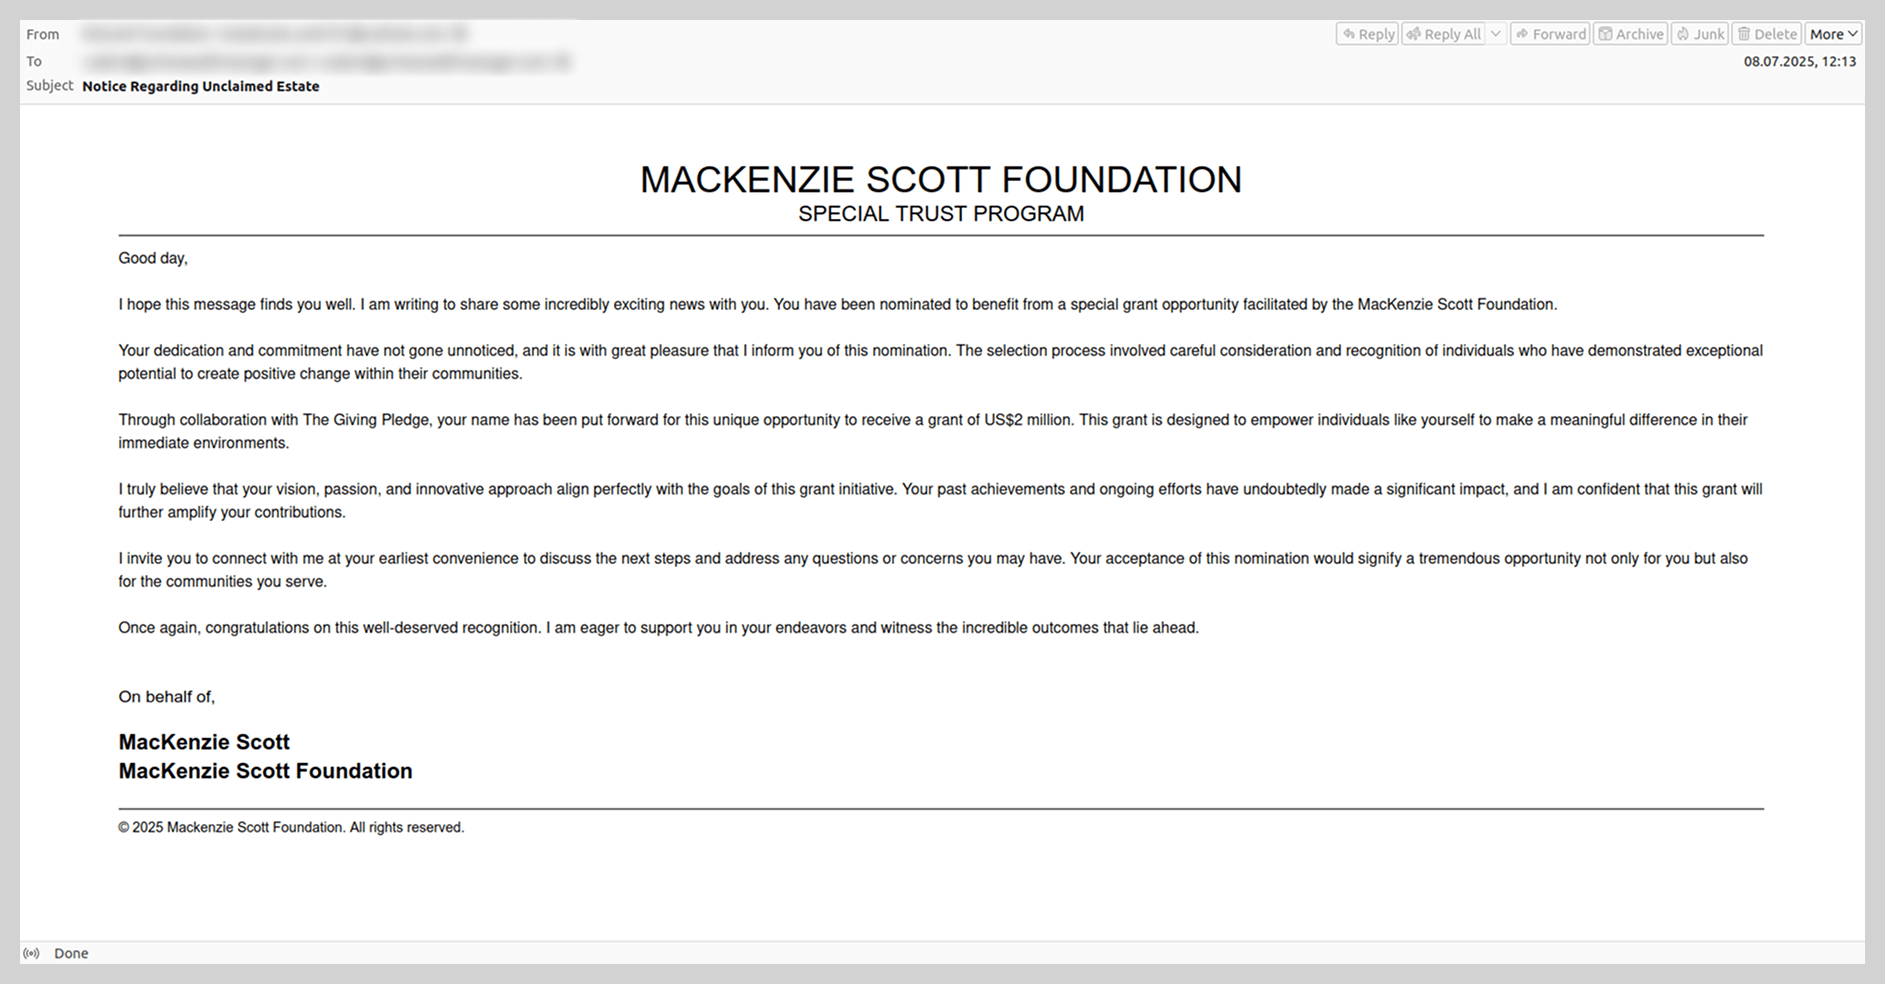
In the summer, when the wedding of Amazon founder Jeff Bezos became a major global news story, users began receiving Nigerian-style scam messages purportedly from Bezos himself, as well as from his former wife, MacKenzie Scott. These emails promised recipients substantial sums of money, framed either as charitable donations or corporate compensation from Amazon.
During the BLACKPINK world tour, we observed a wave of spam advertising “luggage scooters”. The scammers claimed these were the exact motorized suitcases used by the band members during their performances.
Finally, in the fall of 2025, traditionally timed to coincide with the launch of new iPhones, we identified scam campaigns featuring surveys that offered participants a chance to “win” a fictitious iPhone 17 Pro.

After completing a brief survey, the user was prompted to provide their contact information and physical address, as well as pay a “delivery fee” – which was the scammers’ ultimate objective. Upon entering their credit card details into the fraudulent site, the victim risked losing not only the relatively small delivery charge but also the entire balance in their bank account.
The widespread popularity of Ozempic was also reflected in spam campaigns; users were bombarded with offers to purchase versions of the drug or questionable alternatives.

Localized news events also fall under the scrutiny of fraudsters, serving as the basis for scam narratives. For instance, last summer, coinciding with the opening of the tax season in South Africa, we began detecting phishing emails impersonating the South African Revenue Service (SARS). These messages notified taxpayers of alleged “outstanding balances” that required immediate settlement.
Methods of distributing email threats
Google services
In 2025, threat actors increasingly leveraged various Google services to distribute email-based threats. We observed the exploitation of Google Calendar: scammers would create an event containing a WhatsApp contact number in the description and send an invitation to the target. For instance, companies received emails regarding product inquiries that prompted them to move the conversation to the messaging app to discuss potential “collaboration”.

Spammers employed a similar tactic using Google Classroom. We identified samples offering SEO optimization services that likewise directed victims to a WhatsApp number for further communication.

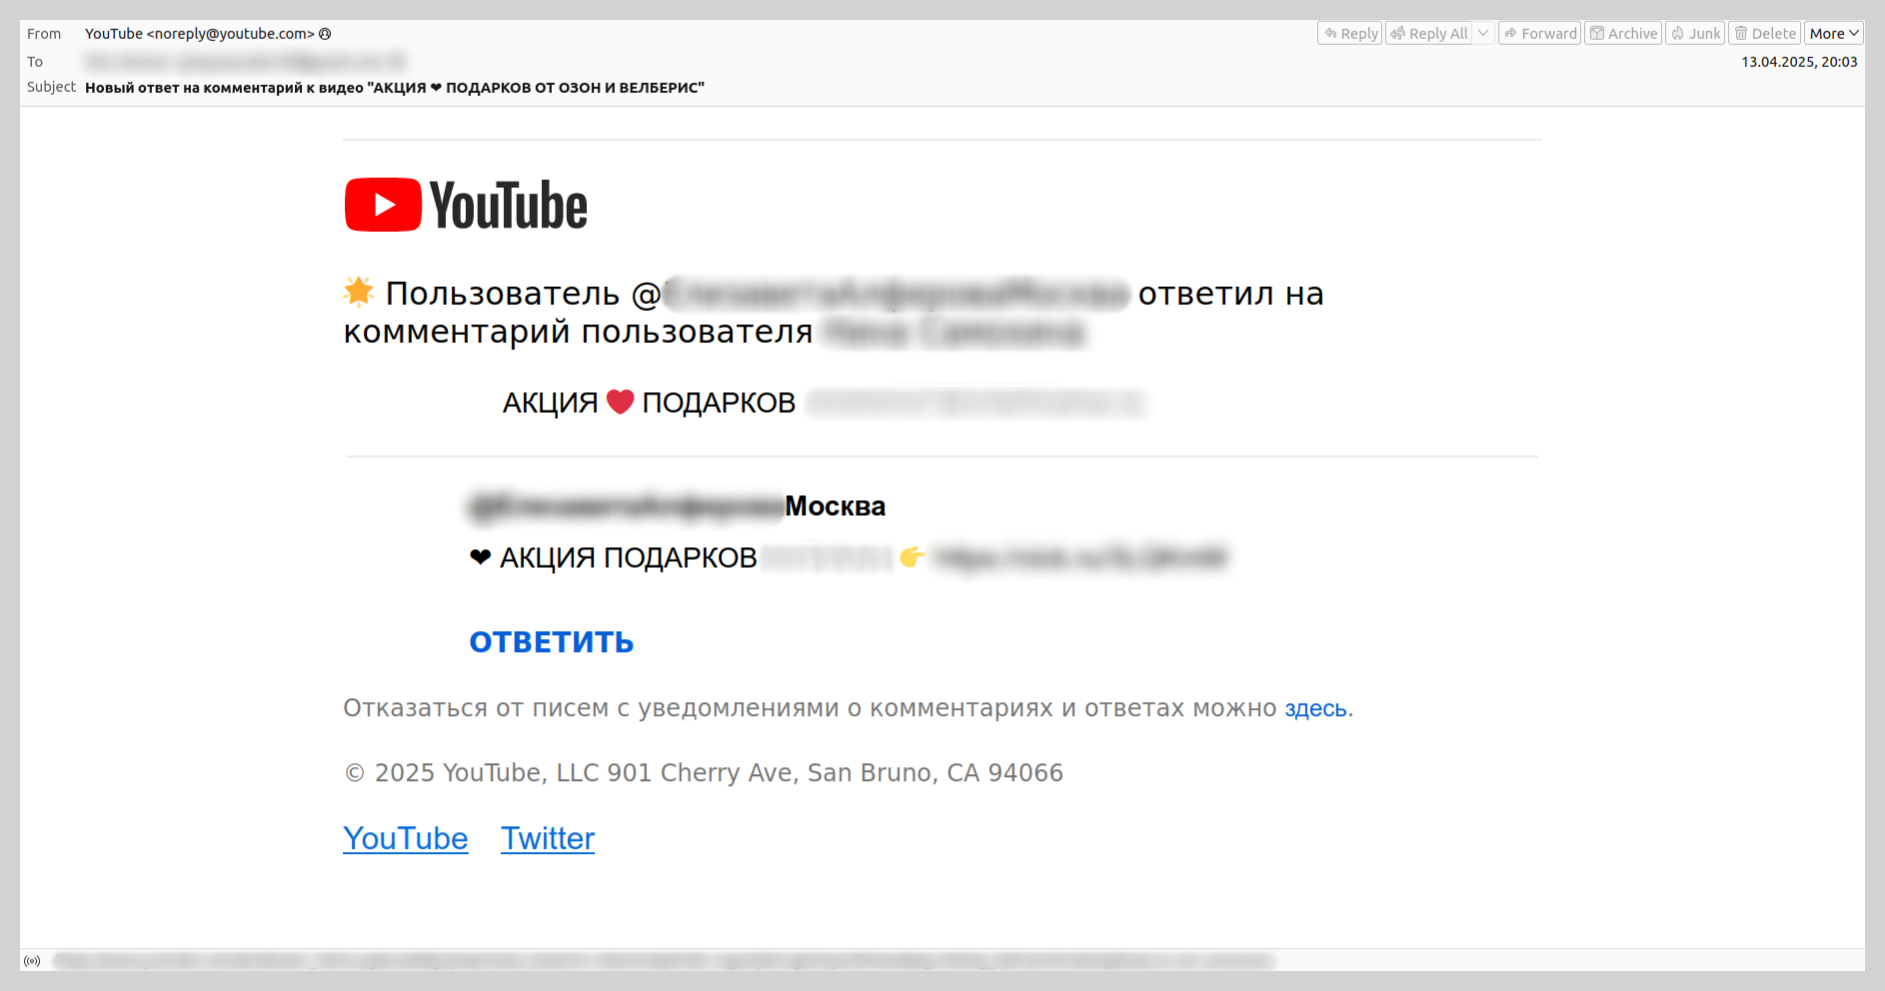
We also detected the distribution of fraudulent links via legitimate YouTube notifications. Attackers would reply to user comments under various videos, triggering an automated email notification to the victim. This email contained a link to a video that displayed only a message urging the viewer to “check the description”, where the actual link to the scam site was located. As the victim received an email containing the full text of the fraudulent comment, they were often lured through this chain of links, eventually landing on the scam site.
Over the past two years or so, there has been a significant rise in attacks utilizing Google Forms. Fraudsters create a survey with an enticing title and place the scam messaging directly in the form’s description. They then submit the form themselves, entering the victims’ email addresses into the field for the respondent email. This triggers legitimate notifications from the Google Forms service to the targeted addresses. Because these emails originate from Google’s own mail servers, they appear authentic to most spam filters. The attackers rely on the victim focusing on the “bait” description containing the fraudulent link rather than the standard form header.

Google Groups also emerged as a popular tool for spam distribution last year. Scammers would create a group, add the victims’ email addresses as members, and broadcast spam through the service. This scheme proved highly effective: even if a security solution blocked the initial spam message, the user could receive a deluge of automated replies from other addresses on the member list.
At the end of 2025, we encountered a legitimate email in terms of technical metadata that was sent via Google and contained a fraudulent link. The message also included a verification code for the recipient’s email address. To generate this notification, scammers filled out the account registration form in a way that diverted the recipient’s attention toward a fraudulent site. For example, instead of entering a first and last name, the attackers inserted text such as “Personal Link” followed by a phishing URL, utilizing noise contamination techniques. By entering the victim’s email address into the registration field, the scammers triggered a legitimate system notification containing the fraudulent link.

OpenAI
In addition to Google services, spammers leveraged other platforms to distribute email threats, notably OpenAI, riding the wave of artificial intelligence popularity. In 2025, we observed emails sent via the OpenAI platform into which spammers had injected short messages, fraudulent links, or phone numbers.

This occurs during the account registration process on the OpenAI platform, where users are prompted to create an organization to generate an API key. Spammers placed their fraudulent content directly into the field designated for the organization’s name. They then added the victims’ email addresses as organization members, triggering automated platform invitations that delivered the fraudulent links or contact numbers directly to the targets.
Spear phishing and BEC attacks in 2025
QR codes
The use of QR codes in spear phishing has become a conventional tactic that threat actors continued to employ throughout 2025. Specifically, we observed the persistence of a major trend identified in our previous report: the distribution of phishing documents disguised as notifications from a company’s HR department.
In these campaigns, attackers impersonated HR team members, requesting that employees review critical documentation, such as a new corporate policy or code of conduct. These documents were typically attached to the email as PDF files.
Phishing notification about “new corporate policies”

To maintain the ruse, the PDF document contained a highly convincing call to action, prompting the user to scan a QR code to access the relevant file. While attackers previously embedded these codes directly into the body of the email, last year saw a significant shift toward placing them within attachments – most likely in an attempt to bypass email security filters.
Malicious PDF content

Upon scanning the QR code within the attachment, the victim was redirected to a phishing page meticulously designed to mimic a Microsoft authentication form.
Phishing page with an authentication form

In addition to fraudulent HR notifications, threat actors created scheduled meetings within the victim’s email calendar, placing DOC or PDF files containing QR codes in the event descriptions. Leveraging calendar invites to distribute malicious links is a legacy technique that was widely observed during scam campaigns in 2019. After several years of relative dormancy, we saw a resurgence of this technique last year, now integrated into more sophisticated spear phishing operations.
Fake meeting invitation

In one specific example, the attachment was presented as a “new voicemail” notification. To listen to the recording, the user was prompted to scan a QR code and sign in to their account on the resulting page.
Malicious attachment content

As in the previous scenario, scanning the code redirected the user to a phishing page, where they risked losing access to their Microsoft account or internal corporate sites.
Link protection services
Threat actors utilized more than just QR codes to hide phishing URLs and bypass security checks. In 2025, we discovered that fraudsters began weaponizing link protection services for the same purpose. The primary function of these services is to intercept and scan URLs at the moment of clicking to prevent users from reaching phishing sites or downloading malware. However, attackers are now abusing this technology by generating phishing links that security systems mistakenly categorize as “safe”.
This technique is employed in both mass and spear phishing campaigns. It is particularly dangerous in targeted attacks, which often incorporate employees’ personal data and mimic official corporate branding. When combined with these characteristics, a URL generated through a legitimate link protection service can significantly bolster the perceived authenticity of a phishing email.
“Protected” link in a phishing email

After opening a URL that seemed safe, the user was directed to a phishing site.
Phishing page

BEC and fabricated email chains
In Business Email Compromise (BEC) attacks, threat actors have also begun employing new techniques, the most notable of which is the use of fake forwarded messages.
BEC email featuring a fabricated message thread

This BEC attack unfolded as follows. An employee would receive an email containing a previous conversation between the sender and another colleague. The final message in this thread was typically an automated out-of-office reply or a request to hand off a specific task to a new assignee. In reality, however, the entire initial conversation with the colleague was completely fabricated. These messages lacked the thread-index headers, as well as other critical header values, that would typically verify the authenticity of an actual email chain.
In the example at hand, the victim was pressured to urgently pay for a license using the provided banking details. The PDF attachments included wire transfer instructions and a counterfeit cover letter from the bank.
Malicious PDF content

The bank does not actually have an office at the address provided in the documents.
Statistics: phishing
In 2025, Kaspersky solutions blocked 554,002,207 attempts to follow fraudulent links. In contrast to the trends of previous years, we did not observe any major spikes in phishing activity; instead, the volume of attacks remained relatively stable throughout the year, with the exception of a minor decline in December.
Anti-Phishing triggers, 2025 (download)
The phishing and scam landscape underwent a shift. While in 2024, we saw a high volume of mass attacks, their frequency declined in 2025. Furthermore, redirection-based schemes, which were frequently used for online fraud in 2024, became less prevalent in 2025.
Map of phishing attacks
As in the previous year, Peru remains the country with the highest percentage (17.46%) of users targeted by phishing attacks. Bangladesh (16.98%) took second place, entering the TOP 10 for the first time, while Malawi (16.65%), which was absent from the 2024 rankings, was third. Following these are Tunisia (16.19%), Colombia (15.67%), the latter also being a newcomer to the TOP 10, Brazil (15.48%), and Ecuador (15.27%). They are followed closely by Madagascar and Kenya, both with a 15.23% share of attacked users. Rounding out the list is Vietnam, which previously held the third spot, with a share of 15.05%.
| Country/territory | Share of attacked users** |
| Peru | 17.46% |
| Bangladesh | 16.98% |
| Malawi | 16.65% |
| Tunisia | 16.19% |
| Colombia | 15.67% |
| Brazil | 15.48% |
| Ecuador | 15.27% |
| Madagascar | 15.23% |
| Kenya | 15.23% |
| Vietnam | 15.05% |
** Share of users who encountered phishing out of the total number of Kaspersky users in the country/territory, 2025
Top-level domains
In 2025, breaking a trend that had persisted for several years, the majority of phishing pages were hosted within the XYZ TLD zone, accounting for 21.64% – a three-fold increase compared to 2024. The second most popular zone was TOP (15.45%), followed by BUZZ (13.58%). This high demand can be attributed to the low cost of domain registration in these zones. The COM domain, which had previously held the top spot consistently, fell to fourth place (10.52%). It is important to note that this decline is partially driven by the popularity of typosquatting attacks: threat actors frequently spoof sites within the COM domain by using alternative suffixes, such as example-com.site instead of example.com. Following COM is the BOND TLD, entering the TOP 10 for the first time with a 5.56% share. As this zone is typically associated with financial websites, the surge in malicious interest there is a logical progression for financial phishing. The sixth and seventh positions are held by ONLINE (3.39%) and SITE (2.02%), which occupied the fourth and fifth spots, respectively, in 2024. In addition, three domain zones that had not previously appeared in our statistics emerged as popular hosting environments for phishing sites. These included the CFD domain (1.97%), typically used for websites in the clothing, fashion, and design sectors; the Polish national top-level domain, PL (1.75%); and the LOL domain (1.60%).
Most frequent top-level domains for phishing pages, 2025 (download)
Organizations targeted by phishing attacks
The rankings of organizations targeted by phishers are based on detections by the Anti-Phishing deterministic component on user computers. The component detects all pages with phishing content that the user has tried to open by following a link in an email message or on the web, as long as links to these pages are present in the Kaspersky database.
Phishing pages impersonating web services (27.42%) and global internet portals (15.89%) maintained their positions in the TOP 10, continuing to rank first and second, respectively. Online stores (11.27%), a traditional favorite among threat actors, returned to the third spot. In 2025, phishers showed increased interest in online gamers: websites mimicking gaming platforms jumped from ninth to fifth place (7.58%). These are followed by banks (6.06%), payment systems (5.93%), messengers (5.70%), and delivery services (5.06%). Phishing attacks also targeted social media (4.42%) and government services (1.77%) accounts.
Distribution of targeted organizations by category, 2025 (download)
Statistics: spam
Share of spam in email traffic
In 2025, the average share of spam in global email traffic was 44.99%, representing a decrease of 2.28 percentage points compared to the previous year. Notably, contrary to the trends of the past several years, the fourth quarter was the busiest one: an average of 49.26% of emails were categorized as spam, with peak activity occurring in November (52.87%) and December (51.80%). Throughout the rest of the year, the distribution of junk mail remained relatively stable without significant spikes, maintaining an average share of approximately 43.50%.
Share of spam in global email traffic, 2025 (download)
In the Russian web segment (Runet), we observed a more substantial decline: the average share of spam decreased by 5.3 percentage points to 43.27%. Deviating from the global trend, the fourth quarter was the quietest period in Russia, with a share of 41.28%. We recorded the lowest level of spam activity in December, when only 36.49% of emails were identified as junk. January and February were also relatively calm, with average values of 41.94% and 43.09%, respectively. Conversely, the Runet figures for March–October correlated with global figures: no major surges were observed, spam accounting for an average of 44.30% of total email traffic during these months.
Share of spam in Runet email traffic, 2025 (download)
Countries and territories where spam originated
The top three countries in the 2025 rankings for the volume of outgoing spam mirror the distribution of the previous year: Russia, China, and the United States. However, the share of spam originating from Russia decreased from 36.18% to 32.50%, while the shares of China (19.10%) and the U.S. (10.57%) each increased by approximately 2 percentage points. Germany rose to fourth place (3.46%), up from sixth last year, displacing Kazakhstan (2.89%). Hong Kong followed in sixth place (2.11%). The Netherlands and Japan shared the next spot with identical shares of 1.95%; however, we observed a year-over-year increase in outgoing spam from the Netherlands, whereas Japan saw a decline. The TOP 10 is rounded out by Brazil (1.94%) and Belarus (1.74%), the latter ranking for the first time.
TOP 20 countries and territories where spam originated in 2025 (download)
Malicious email attachments
In 2025, Kaspersky solutions blocked 144,722,674 malicious email attachments, an increase of nineteen million compared to the previous year. The beginning and end of the year were traditionally the most stable periods; however, we also observed a notable decline in activity during August and September. Peaks in email antivirus detections occurred in June, July, and November.
Email antivirus detections, 2025 (download)
The most prevalent malicious email attachment in 2025 was the Makoob Trojan family, which covertly harvests system information and user credentials. Makoob first entered the TOP 10 in 2023 in eighth place, rose to third in 2024, and secured the top spot in 2025 with a share of 4.88%. Following Makoob, as in the previous year, was the Badun Trojan family (4.13%), which typically disguises itself as electronic documents. The third spot is held by the Taskun family (3.68%), which creates malicious scheduled tasks, followed by Agensla stealers (3.16%), which were the most common malicious attachments in 2024. Next are Trojan.Win32.AutoItScript scripts (2.88%), appearing in the rankings for the first time. In sixth place is the Noon spyware for all Windows systems (2.63%), which also occupied the tenth spot with its variant specifically targeting 32-bit systems (1.10%). Rounding out the TOP 10 are Hoax.HTML.Phish (1.98%) phishing attachments, Guloader downloaders (1.90%) – a newcomer to the rankings – and Badur (1.56%) PDF documents containing suspicious links.
TOP 10 malware families distributed via email attachments, 2025 (download)
The distribution of specific malware samples traditionally mirrors the distribution of malware families almost exactly. The only differences are that a specific variant of the Agensla stealer ranked sixth instead of fourth (2.53%), and the Phish and Guloader samples swapped positions (1.58% and 1.78%, respectively). Rounding out the rankings in tenth place is the password stealer Trojan-PSW.MSIL.PureLogs.gen with a share of 1.02%.
TOP 10 malware samples distributed via email attachments, 2025 (download)
Countries and territories targeted by malicious mailings
The highest volume of malicious email attachments was blocked on devices belonging to users in China (13.74%). For the first time in two years, Russia dropped to second place with a share of 11.18%. Following closely behind are Mexico (8.18%) and Spain (7.70%), which swapped places compared to the previous year. Email antivirus triggers saw a slight increase in Türkiye (5.19%), which maintained its fifth-place position. Sixth and seventh places are held by Vietnam (4.14%) and Malaysia (3.70%); both countries climbed higher in the TOP 10 due to an increase in detection shares. These are followed by the UAE (3.12%), which held its position from the previous year. Italy (2.43%) and Colombia (2.07%) also entered the TOP 10 list of targets for malicious mailshots.
TOP 20 countries and territories targeted by malicious mailshots, 2025 (download)
Conclusion
2026 will undoubtedly be marked by novel methods of exploiting artificial intelligence capabilities. At the same time, messaging app credentials will remain a highly sought-after prize for threat actors. While new schemes are certain to emerge, they will likely supplement rather than replace time-tested tricks and tactics. This underscores the reality that, alongside the deployment of robust security software, users must remain vigilant and exercise extreme caution toward any online offers that raise even the slightest suspicion.
The intensified focus on government service credentials signals a rise in potential impact; unauthorized access to these services can lead to financial theft, data breaches, and full-scale identity theft. Furthermore, the increased abuse of legitimate tools and the rise of multi-stage attacks – which often begin with seemingly harmless files or links – demonstrate a concerted effort by fraudsters to lull users into a false sense of security while pursuing their malicious objectives.
securelist.com/spam-and-phishi…


Designing a Compact RGB 14-Segment Display

Sometimes you’re looking for a component for a project that you know should exist, but you just cannot find it. Something like a 14-segment LED display, but not just one with a fixed color, instead you want some of that sweet addressable RGB-ness. Unfortunately for [EastMakes], this particular display was nowhere to be found, so he decided to try making his own.
Using addressable SK6805 RGB LEDs with a mere 1.5 x 1.5 footprint as the basis, the layout for these individual LEDs on the PCBs was determined, and a layout created in KiCad. The PCB manufacturing and assembly were straightforward enough — the thing that really makes these displays is the diffuser. Here a few different approaches were tried, including FR4 with translucent segments in the soldermask, and a 3D printed version in both white and black PLA filament.
The FR4 approach using 0.8 mm thin PCBs looked quite all right, with the addition of through vias in the 1 mm version showing how these help to boost overall brightness. The 3D printed version prototypes didn’t look too shabby either, but it would probably help a lot if this diffuser panel also fit around the LEDs to prevent light bleeding between segments.
We’d love to see this type of RGB display being experimented with, as it seems to hold a lot of promise while also definitely being something that ought to exist.
youtube.com/embed/2100sdgQtL4?…
Scanning Table for the Professional Maker

Sometimes the simplest objects need some overthinking. This is exactly what [Chris Borge] realized when using his 3D scanner and finding that the included rotation table left quite a bit to be desired — providing him the perfect excuse to build a new one.
One of the main features of a rotation stage is the, well, rotation. This was done in [Chris]’s case with a NEMA 17 stepper motor, perfect for precise rotation of scanning. Hooking up the motor to a basic perf board with an Arduino Nano allows for on the fly adjustments to rotation speed. To really solidify the over-engineering, [Chris] applies his obligatory concrete mix to add some heft to the stage.
While the previous features could be removed/downgraded without much loss, the adjustable grid built into the top adds significant functionality. The grid is based on [Chris]’s past projects, which allows cross compatibility.
We love over-engineering here at Hackaday, especially when adding something new. For more prime overthought design, check out this over engineered egg cracker!
youtube.com/embed/GbyohbWr60A?…
The Complex Engineering of Runways

Airport runways seem pretty simple, just another strip of asphalt or concrete not unlike the roads that our cars drive upon every day. We can even use these same highways as landing strips in a pinch, so you’d assume that the engineering for either isn’t that dissimilar. Of course, you can use a highway for an occasional emergency, but a runway that sees the largest and heaviest airplanes taxi, take off and land on a constant basis is a whole other challenge, as detailed in a recent [Practical Engineering] video and its transcript.
When you consider that an Airbus A380 the take-off weight is up to 550 ton, it’s quite clear what the challenge is for larger airports. Another major issue is that of friction, or lack thereof, as the speeds and kinetic energy behind it are so much higher. One only has to look at not only runway overruns but also when one skids off sideways due issues like hydroplaning and uneven friction. Keeping the surface of a runway as high-friction as possible and intact after hundreds of take-offs, tail-strikes and other events is no small feat.
Of course, the other part of runway engineering is for when things do go wrong and an airplane enters the runway safety areas, or overrun zones. This usually provides some flat and clear space where an airplane can safely bleed off its kinetic energy, with the collapsing surface of the EMAS technology being one of the best demonstrations of how this can be safely and dramatically shortened.
Another aspect not covered here that is part of these overrun zones are frangible structures, such as any localizer antennae of ILS, lighting, etc. Frangible here means that the structure easily collapses when a heavy airplane crashes into it without causing significant damage to the airplane.
It was the failure of such a design process that doomed the crew and passengers of Jeju Air Flight 2216 in December of 2024, when the airplane during an emergency belly landing skidded over the end of the runway. Although there was a lot of open space after the ILS localizer array with just a flimsy wall and further level fields, the ILS array’s base contained a poured concrete base on which the airplane effectively pulverized.
youtube.com/embed/ZJqY1WLX4zA?…
Making a Hidden Door Status Sensor
")
A common sight in ‘smart homes’, door sensors allow you to detect whether a door is closed or open, enabling the triggering of specific events. Unfortunately, most solutions for these sensors are relatively bulky and hard to miss, making them a bit of a eyesore. This was the case for [Dillan Stock] as well, who decided that he could definitely have a smart home, yet not have warts sticking out on every single doorframe and door. There’s also a video version of the linked blog post.

These door sensors tend to be very simple devices, usually just a magnet and a reed relay, the latter signaling a status change to the wireless transmitter or transceiver. Although [Dillan] had come across recessed door sensors before, like a Z-wave-based unit from Aeotec, this was a very poorly designed product with serious reliability issues.
That’s when [Dillan] realized that he could simply take the PCB from one of the Aqara T1 door sensors that he already had and stuff them into a similar 20 mm diameter form factor as that dodgy sensor unit. Basically this just stuffs the magnet and PCB from an existing wart-style sensor into a recessed form factor, making it a very straightforward hack, that only requires printing the housings for the Aqara T1 sensor and some intimate time between the door and a drill.
youtube.com/embed/XVaGANL2T7o?…
Pi Pico Learns Morse Code

When [101 Things] didn’t want to copy Morse code, he decided to build a Pi Pico system to read it for him. On the face of it, this doesn’t seem particularly hard, until you look at the practical considerations. With perfectly timed dots and dashes, it would be trivial. But in real life, you get an audio signal. It has been mangled and mixed with noise and interference as it travels through the air. Then there’s the human on the other end who will rarely send at a constant speed with no errors.
Once you consider that, this becomes quite the project, indeed. The decoder captures audio via the Pi’s analog-to-digital converter. Then it resamples the input, applies an FFT, and converts the output via a complex classification pipeline that includes, among other things, Bayesian decoding. Part of the pipeline makes simple typo corrections. You can see the device do its thing in the video below.
Another issue with the code is that it decodes multiple channels in real time. So looking up spelling corrections, for example, has to be done rapidly. The device can also send code and show stats and graphics on an LCD screen.
If you know the code is arriving at a known speed, you could do something much simpler. The Pico has lots of memory which makes it easy to use complex algorithms. When you are memory-limited, you need different tricks.
youtube.com/embed/rBRf3QOt4wc?…
Building a Self-Playing Chess Board Robot

As popular as the game of chess is, it has one massive flaw. This being that it requires two participants, which can be a challenge. Although playing chess on a computer against an AI has been a thing for many decades, it’s hard to beat physical chess boards that give you all the tactile pleasure of handling and moving pieces, yet merging the two is tricky. You can either tell the player to also move the opponent’s pieces, or use a mechanism to do so yourself, which [Joshua Stanley] recently demonstrated in a video.
There are a few ways that you can go about having the computer move and detect the pieces. Here [Joshua] chose to use Hall magnetic sensors to detect the magnets that are embedded in the 3D printed chess pieces as well as their absence. These sensors are mounted to the back side of a PCB which is also the playing field, thus using the silkscreen for the board markings.
For the electromagnet that moves the chess pieces core x/y kinematics were used to move it underneath the PCB, engaging when moving pieces but otherwise deactivated. This is all controlled by an ESP32 MCU, while the computer runs the open-source Stockfish chess engine. As the human player changes piece positions this is detected by the magnet’s presence, with the change input into Stockfish.
As the demonstration at the end of the video shows, it definitely works, yet some issues remain. Ignoring the mistake with making the near-right corners black instead of white, the pieces are large enough that e.g. moving a knight piece between others pushes them to the side, requiring these to be put back in place.
There is also no way for the computer to detect which piece is placed where, which can be incredibly helpful on some commercial self-playing chess boards like this for new players, as well as to detect invalid moves, but this might be on the list for a potential V2 of this build.
Best part of this build is probably the use of a PCB for the playing field, which would allow you to go pretty crazy with custom designs and colors, especially now that some PCB places are offering multi-color silkscreens that allow for custom graphics.
youtube.com/embed/tLgXvUgsYmw?…
The Best USB To VGA Converter For The Job

There are many adapters, dongles, and cables designed for interfacing display standards, and no doubt some of you have them in the glue of your entertainment system or work space. They’re great for standards, but what about something that’s not quite standard? [Stephen] has an arcade cabinet with a CRT that runs at an unusual 336 by 262 pixel resolution. It can be driven as 320 by 240 but doesn’t look great, and even that “standard” resolution isn’t supported by many dongles. He’s shared the story of his path to a unique USB to VGA converter which may have application far beyond this arcade machine.
We follow him on a path of discovery, through RP2040 PIOs, simple resistor ladder DACs, and home-made kernel modules, before he arrives at GUD, a USB display protocol with its own upstreamed Linux kernel driver. It’s designed to be used with a Raspberry PI deriving an LCD or HDMI display, but for his task he implemented the protocol on one of the more expensive STM32 series microcontrollers. The result after several false starts and some fiendish PCB routing is a standalone GUD-based USB-to-VGA converter that delivers perfect 34-bit colour at this unusual resolution, and also presumably others if required. It’s a worthwhile read for the many hints it gives on the subject of driving displays, even if you’re not driving an odd cabinet monitor.
Is That Ancient Reel Of PLA Any Good?

When it comes to knowledge there are things you know as facts because you have experienced them yourself or had them verified by a reputable source, and there are things that you know because they are common knowledge but unverified. The former are facts, such as that a 100mm cube of water contains a litre of the stuff, while the latter are received opinions, such as the belief among Americans that British people have poor dental care. The first is a verifiable fact, while the second is subjective.
In our line there are similar received opinions, and one of them is that you shouldn’t print with old 3D printing filament because it will ruin the quality of your print. This is one I can now verify for myself, because I was recently given a part roll of blue PLA from a hackerspace, that’s over a decade old. It’s not been stored in a special environment, instead it’s survived a run of dodgy hackerspace premises with all the heat and humidity that’s normal in a slightly damp country. How will it print?
It Ain’t Stringy
In the first instance, looking at the filament, it looks like any other filament. No fading of the colour, no cracking, if I didn’t know its age it could have been opened within the last few weeks. It loads into the printer, a Prusa Mini, fine, it’s not brittle, and I’m ready to print a Benchy.

My first surprise on printing the Benchy is that it’s a pretty good print. Received Opinion tells me that PLA is hydrophobic, and if you leave some out for a decade it will absorb so much moisture as to be unusable. In fact I was expecting a very stringy print indeed because I’ve seen that before with filament left out for about a year in the damp British climate. But this Benchy had almost no hairiness, its only flaw was a little bit of collapse along its prow line. I know the Mini isn’t at fault here as I’ve seen it print a flawless Benchy with new PLA, so that’s strike one to the ancient plastic.
Manipulating the Benchy, I found strike two. This is a reasonable print, but with not-too-hard pressure on the cabin I could snap it. The layer adhesion wasn’t as much as it is with a new-filament Benchy, and it has broken cleanly along the layer lines in the cabin pillars. Since snapping a Benchy isn’t a quantitative measure of how much the layer adhesion had degraded, I decided to formulate a test for layer adhesion. If I print something designed for measuring layer adhesion failure in both this old PLA and some new PLA, I can compare the two. It’s not perfect as I don’t have a new reel of the same formulation as the old stuff, but it’ll be close enough.
Punishing Prints, And Risking Holes In The Floor

What I have come up with is a 150 mm long box section with a 2 mm wall. If I clamp the first 5 0mm to the edge of a table, I can apply a force to the far end of the 100 mm poking out into free space, and find its breaking point. To that end I’ve printed two, one in my blue old PLA, and another in brand new grey PLA. I’m dangling a collection of angle brackets each of which weighs 130 g from the end of the box section, and adding brackets until it breaks.
I had only twenty brackets, and as expected the old PLA broke first, at ten brackets, or a 1.3 kg load. My back of the envelope calculation from high school physics gives me about a 130 N force on the top edge of the layer boundary over the fulcrum on the edge of the table to do this. I ran out of brackets and other hardware to try to break the grey box section, and finally admitted defeat when it refused to break with a 3 kg piece of rail I’ve been hoarding to make an anvil dangling from its end. I have proved that layer adhesion with ancient PLA is more than three times weaker than on the same printer with new PLA. It’s interesting when examining the break, the layers have parted very cleanly, this is not tearing of the PLA but simply poor adhesion between layers.
In doing these experiments I’ve discovered, not unexpectedly, that ancient PLA isn’t as good as new PLA. I am assuming that this was as good a PLA as the modern stuff when it was new — indeed I remember printing back in the day and my prints seemed just as good as today. What does surprise me though is that how it’s deteriorated isn’t what I expected. It produces good prints in terms of their physical form, without the hairiness I was expecting. In turn I didn’t expect the prints with this stuff to be weak, so what’s going on?
When The Volatiles Depart, What’s Left?
PLA filament is not pure PLA, instead it has chemicals added to modify its properties. The most obvious one in this reel is the blue pigment, but others might modify its plasticity or melting characteristics, to name two possibilities. These are not going to be stable solids like the polymer, instead they will be volatile compounds which are capable of evaporating over time.
I’m no polymer chemist, so I’ll draw my engineer’s conclusions here and prepare for a roasting from the chemists if I’m wrong. What I think has happened is that the volatile additives in the filament have departed over the years, and both the stringiness in damp newer PLA and the strength in prints made with new PLA are as much due to their presence or absence as to the PLA itself. In my tests here I think I have seen something closer to PLA alone with the additive chemistry absent, and along the way I may have touched on why the manufacturers add it in the first place.
It’s likely few of you are printing using ancient PLA, so while interesting, these results have limited direct relevance to your printing. But I have to wonder whether there’s a lesson to be learned in filament storage, and perhaps using a warm environment to stave off moisture might hasten the departure of those volatiles. Perhaps the best thing is not to be a hoarder, and to use your filament up as quickly as you can. Meanwhile, this isn’t the first time we’ve ventured into backyard physical measurements.
ReMemory is the Amnesia-hedging Buddy Backup You Didn’t Know You Needed

What would happen if you lost your memory, even partially? With so much of our lives being digital, forgetting your passwords (or the master key to your password manager) could be disastrous. Haunted by that specter after a concussion, [eljojo] created ReMemory, a tool based on Shamir’s Secret Sharing to help your friends help you.
Shamir’s Secret Sharing, for the uninitiated, is a way to split up important data between parties so that the full picture is only available when a quorum comes together. The classic example is giving everyone a couple of digits out of the combination to the bank vault, but no one the full combination. Together, they can open the vault.
ReMemory works the same way. Rather than the combination to a bank vault, the locally-hosted, browser-based interface splits the encryption key to your sensitive data. If you’re old fashioned that might be a plaintext list of passwords, or for the more modern the recovery codes to your password manager. It could be literally anything, like your Aunt Edna’s famous cupcake recipe, which surely should not be lost to time.
You can chose how many friends to split your data betwixt, and how many will be required to meet quorum– the minimum, of course, being two, but the suggested default is to split the data five ways, and allow decryption from any three parties. Each bundle includes the complete recovery tool, so anyone in your circle of trust can start the process of decrypting your data if they get the others on board. Since it’s self-hosted and browser based, those friends don’t have to be particularly tech-savvy, as long as they can be trusted to hold onto the files. Everything is explained in the readme included in each bundle.
This does have the downside of requiring you to have multiple close friends, at least some of whom you trust to come through in a crunch, and all of whom you trust not to collude behind your back. Still, if you’re the social type, this seems like it might be a useful tool. The code is available under an Apache 2.0 license, so you can audit it for yourself — a must for any tool you plan on entrusting your secrets to.
The best part of the sharing algorithm is that it’s not vulnerable to quantum computing. While [eljojo] was thinking of amnesia when he put the tool together, we can’t help but think this also solves the postmortem password problem.
Gaming on an Arduino Uno Q in Linux

After Qualcomm’s purchase of Arduino it has left many wondering what market its new Uno Q board is trying to target. Taking the ongoing RAM-pocalypse as inspiration, [Bringus Studios] made a tongue-in-cheek video about using one of these SoC/MCU hybrid Arduino boards for running Linux and gaming on it. Naturally, with the lack of ARM-native Steam games, this meant using the FEX x86-to-ARM translator in addition to Steam’s Proton translation layer where no native Linux game exists, making for an excellent stress test of the SoC side of this board.")
We covered this new ‘Arduino’ board previously, which features both a quad-core Cortex-A53 SoC and a Cortex-M33 MCU. Since it uses the Uno form factor, all SoC I/O goes via the single USB-C connector, meaning that a USB-C docking station is pretty much required to use the SoC, though there’s at least 16 GB of eMMC to install the OS on. A Debian-based OS image even comes preinstalled, which is convenient.
With a mere 2 GB of LPDDR4 it’s not the ideal board to run desktop Linux on, but if you’re persistent and patient enough it will work, and you can even play 3D video games as though it’s Qualcomm’s take on Raspberry Pi SBCs. After some intense gaming the SoC package gets really quite toasty, so adding a heatsink is probably needed if you want to peg its cores and GPU to 100% for extended periods of time.
As for dodging the RAM-pocalypse with one of these $44 boards, it’s about the same price as the 1 GB Raspberry Pi 5, but the 2 GB RPi 5 – even with the recent second price bump – is probably a better deal for this purpose. Especially since you can skip the whole docking station, but losing the eMMC is a rawer deal, and the dedicated MCU could be arguably nice for more dedicated purposes. Still, desktop performance is a hard ‘meh’ on the Uno Q, even if you’re very generous.
Despite FEX being a pain to set up, it seems to work well, which is promising for Valve’s upcoming Steam Frame VR glasses, which are incidentally Qualcomm Snapdragon-based.
youtube.com/embed/YrrqF2y-dlM?…
DK 10x21 - Rancore
Uno ci prova a restare positivo, ma poi sei costretto a constatare che gli LLM sono un cancro che sta corrodento ogni campo del sapere, e allora...
spreaker.com/episode/dk-10x21-…
IBM Made a Sound Card? Who Knew!

Even in a field you think you know intimately, the Internet still has the power to surprise. Sound cards of the 1990s might not be everyone’s specialist subject, but since the CD-ROM business provided formative employment where this is being written, it’s safe to say that a lot of tech from that era is familiar. It’s a surprise then when along comes [DOS Storm] with a new one. The IBM Mwave was the computer giant’s offering back in the days when they were still pushing forward in the PC space, and sadly for them it turned out to be a commercial disaster.
The king of the sound cards in the ’90s was the SoundBlaster 16, which other manufacturers cloned directly. Not IBM of course, who brought their own Mwave DSP chip to the card, using it as both the sound card and the engine behind an on-board dial-up modem. This appears to have been its undoing, because aside from its notoriously flaky drivers, using both sound and modem at the same time just wasn’t a pleasant experience. To compound the problem, Big Blue resorted to trying to bury the problem with NDAs rather than releasing better drivers, so unsurprisingly it faded from view. Perhaps the reason it was unfamiliar here had something to do with it not being sold in Europe, but given that the chipset found its way into ’90s ThinkPads, we’d have expected to have seen something of it.
In the video below the break he introduces the card, and with quite some trouble gets it working. There are several demos of period games which sound a little scratchy, but we can’t judge from this whether they’d have sounded better on the Creative card. If you’d like to immerse yourself in the folly of ’90s multimedia, have a little bit of Hackaday scribe reminiscing.
youtube.com/embed/v1RmAd9iwwA?…
Why Haven’t Quantum Computers Factored 21 Yet?

If you are to believe the glossy marketing campaigns about ‘quantum computing’, then we are on the cusp of a computing revolution, yet back in the real world things look a lot less dire. At least if you’re worried about quantum computers (QCs) breaking every single conventional encryption algorithm in use today, because at this point they cannot even factor 21 yet without cheating.
In the article by [Craig Gidney] the basic problem is explained, which comes down to simple exponentials. Specifically the number of quantum gates required to perform factoring increases exponentially, allowing QCs to factor 15 in 2001 with a total of 21 two-qubit entangling gates. Extrapolating from the used circuit, factoring 21 would require 2,405 gates, or 115 times more.
Explained in the article is that this is due to how Shor’s algorithm works, along with the overhead of quantum error correction. Obviously this puts a bit of a damper on the concept of an imminent post-quantum cryptography world, with a recent paper by [Dennish Willsch] et al. laying out the issues that both analog QCs (e.g. D-Wave) and digital QCs will have to solve before they can effectively perform factorization. Issues such as a digital QC needing several millions of physical qubits to factor 2048-bit RSA integers.
A Working Intercom From Antique Telephones

Although it can be hard to imagine in today’s semiconductor-powered, digital world, there was electrical technology around before the widespread adoption of the transistor in the latter half of the 1900s that could do more than provide lighting. People figured out clever ways to send information around analog systems, whether that was a telegraph or a telephone. These systems are almost completely obsolete these days thanks to digital technology, leaving a large number of rotary phones and other communications systems relegated to the dustbin of history. [Attoparsec] brought a few of these old machines back to life anyway, setting up a local intercom system with technology faithful to this pre-digital era.
These phones date well before the rotary phone that some of us may be familiar with, to a time where landline phones had batteries installed in them to provide current to the analog voice circuit. A transformer isolated the DC out of the line and amplified the voice signal. A generator was included in parallel which, when operated by hand, could ring the other phones on the line. The challenge to this build was keeping everything period-appropriate, with a few compromises made for the batteries which are D-cell batteries with a recreation case. [Attoparsec] even found cloth wiring meant for guitars to keep the insides looking like they’re still 100 years old. Beyond that, a few plastic parts needed to be fabricated to make sure the circuit was working properly, but for a relatively simple machine the repairs were relatively straightforward.
The other key to getting an intercom set up in a house is exterior to the phones themselves. There needs to be some sort of wiring connecting the phones, and [Attoparsec] had a number of existing phone wiring options already available in his house. He only needed to run a few extra wires to get the phones located in his preferred spots. After everything is hooked up, the phones work just as they would have when they were new, although their actual utility is limited by the availability of things like smartphones. But, if you have enough of these antiques, you can always build your own analog phone network from the ground up to support them all.
youtube.com/embed/mkJmT9kiu30?…
Upcycling an iPad into a Touchscreen Display for your PC
")
Although generally iPads tend to keep their resale value, there are a few exceptions, such as when you find yourself burdened with iCloud-locked devices. Instead of tossing these out as e-waste, you can still give them a new, arguably better purpose in life: an external display, with touchscreen functionality if you’re persistent enough. Basically someone like [Tucker Osman], who spent the past months on making the touchscreen functionality play nice in Windows and Linux.

While newer iPads are easy enough to upcycle as an external display as they use eDP (embedded Display Port), the touch controller relies on a number of chips that normally are initialized and controlled by the CPU. Most of the time was thus spent on reverse-engineering this whole process, though rather than a full-depth reverse-engineering, instead the initialization data stream was recorded and played back.
This thus requires that the iPad can still boot into iOS, but as demonstrated in the video it’s good enough to turn iCloud-locked e-waste into a multi-touch display. The SPI data stream that would normally go to the iPad’s SoC is instead intercepted by a Raspberry Pi Pico board which pretends to be a USB HID peripheral to the PC.
If you feel like giving it a short yourself, there’s the GitHub repository with details.
Thanks to [come2] for the tip.
youtube.com/embed/3t8xT-2vBE0?…
Converting AC Irrigation Valves To DC Operation

Due to historical engineering decisions made many decades ago, a great many irrigation systems rely on solenoid valves that operate on 24 volts AC. This can be inconvenient if you’re trying to integrate those valves with a modern smart home control system. [Johan] had read that there were ways to convert these valves to more convenient DC operation, and dived into the task himself.

The workaround involves wiring up a current limiting resistor with a large capacitor in parallel. When firing 12 volts down the line to a solenoid valve, the resistor acts as a current limiter, while the parallel cap is initially a short circuit. This allows a high current initially, that slowly tails off to the limited value as the capacitor reaches full charge. This ensures the solenoid valve switches hard as required, but keeps the current level lower over the long term to avoid overheating. According to [Johan], this allows running 24V AC solenoid valves with a 12V DC supply and some simple off-the-shelf relay boards.
We’ve seen similar work before, which was applied to great effect. Sometimes doing a little hack work on your own can net you great hardware to work with. If you’ve found your own way to irrigate your garden as cheaply and effectively as possible, don’t hesitate to notify the tipsline!
Keebin’ with Kristina: the One with the Height-Adjustable Key Caps

Now, we can’t call these LEGO key caps for obvious reasons, but also because they don’t actually work with standard LEGO. But that’s just fine and dandy, because they’re height-adjustable key caps that use the building block principle.

In the caption of the gallery, [paper5963] mentions foam. As far as I’ve studied the pictures, it seems to be all 3D-printed material. If they were foam, they would likely be porous and would attract and hold all kinds of nastiness. Right?
[paper5963] says that there are various parts that add on to these, not just flat tops. There are slopes and curves, too. They are also designing these for narrow pitch, and say they are planning to release the files. Exciting!
Fold-able Keyboard Goes Anywhere
[pinya] says this is a remake of their Crabapplepad V2 into something that folds. They take it along in their backpack and use it either with a phone or a Lenovo Legion Go linux tablet. The original PCB was designed for this possibility, and now it’s a thing.

The hinges are the friction type you’d find on a laptop, so they’re strong and can stay in any position. The way they’re mounted doesn’t allow for much tenting, but it does allow for a few degrees. Otherwise, the whole thing would become unstable.
This baby has soldered brown Kailh chocs (yay!) with the diodes buried snugly beneath them. The switches were still exposed and snagging on things in the backpack, so [pinya] whipped up a nice little felt case for it.
Since there’s still enough space at the top of the board, [pinya] might add a built-in phone stand. I’m interested to see how that goes with the weight of the phone and all.
The Centerfold: These 3D-Printed Key Caps

Do you rock a sweet set of peripherals on a screamin’ desk pad? Send me a picture along with your handle and all the gory details, and you could be featured here!
Historical Clackers: the Lovely Waverley
This elegant late-Victorian piece is not only beautiful to look at, it has a special place in history. The Waverley was one of only four typewriters ever produced with a rear-downstrike arrangement of type bars. Basically, the bars strike the paper from the top and rear of the machine.
In case you’re wondering, the other three with this distinction are the Brooks, the Fitch, and the North’s, which this resembles quite a lot.
So, how does a rear-downstriker operate? The main issue is feeding the paper. The inventors Edward Smith Higgins and Henry Charles Jenkins created a system that fed the sheet from the front of the platen, wound around it, and then was expelled into that lovely basket on the front, where they would become neatly coiled and out of the visual path to the platen.
The Waverley has other notable features such as a shifting system that completely disengages the lower case type bars and engages the separate, upper case type bars. So each type bar only has one character.
It also has proportional spacing, but only for the widest letters (M and W). The carriage moves a little bit further to account for their extra width.
There’s a separate Space key in the upper right that moves the carriage only the width of one character, whereas the Space bar moves it twice as far to separate the words. This last is one of those features you’d have to train yourself to do, I would think: you can simultaneously push the Space bar while typing the last letter of a word, and then you’re immediately ready to type the next word.
Unfortunately, the Waverley Type-Writer Co. disbanded after just one year of production because of a lack of working capital. It may have just been too complex and thus difficult to produce.
Finally, a Truly Modular Keyboard Complete Input System
Would you like a modular keyboard? Or would you prefer an entire input system? Dutch company Naya are back with the Connect, which looks less like a ‘sensory nightmare’ than the Create, their ergonomic modular keyboard.

And I’m sure left-handers will appreciate that the 10-key thing can go on either the left or right. But you don’t have to use it as a 10-key. It’s essentially just a second macro module with 24 keys. (Not pictured.)
I love New Atlas’ opening salvo: “This might just be the most engineered desktop gear I’ve ever come across.” Much like the ergonomic Create, the four round things are as follows: a customizable trackpad, a 40 mm trackball, a rotary encoder, and a 6-DoF spatial mouse. I will spare you their ethereal names.
The keyboard itself is a 75%, 85-key number in a unibody of machined aluminium. It has hot-swappable Kailh Choc V2s, and those keycaps are allegedly dished, but they look flat as Kansas to me. Oh, okay; if you look at the many pictures on Kickstarter, you can see the dishing.
Here’s the kicker: it doesn’t come with everything. You either go with the base keyboard and add modules, or get the Dock (the thing on the right up there with four keys and a hole) and attach modules to that. Also, it’s in the Kickstarter phase as I alluded, but it’s something like 4,000% funded already, so.
The keyboard by itself isn’t that much — $119 for early birds — and the Dock is even cheaper. But they aren’t going to ship for more than a year, so consider that.
Got a hot tip that has like, anything to do with keyboards? Help me out by sending in a link or two. Don’t want all the Hackaday scribes to see it? Feel free to email me directly.
Living in the (LLM) Past

In the early days of AI, a common example program was the hexapawn game. This extremely simplified version of a chess program learned to play with your help. When the computer made a bad move, you’d punish it. However, people quickly realized they could punish good moves to ensure they always won against the computer. Large language models (LLMs) seem to know “everything,” but everything is whatever happens to be on the Internet, seahorse emojis and all. That got [Hayk Grigorian] thinking, so he built TimeCapsule LLM to have AI with only historical data.
Sure, you could tell a modern chatbot to pretend it was in, say, 1875 London and answer accordingly. However, you have to remember that chatbots are statistical in nature, so they could easily slip in modern knowledge. Since TimeCapsule only knows data from 1875 and earlier, it will be happy to tell you that travel to the moon is impossible, for example. If you ask a traditional LLM to roleplay, it will often hint at things you know to be true, but would not have been known by anyone of that particular time period.
Chatting with ChatGPT and telling it that it was a person living in Glasgow in 1200 limited its knowledge somewhat. Yet it was also able to hint about North America and the existence of the atom. Granted, the Norse apparently found North America around the year 1000, and Democritus wrote about indivisible matter in the fifth century. But that knowledge would not have been widespread among common people in the year 1200. Training on period texts would surely give a better representation of a historical person.
The model uses texts from 1800 to 1875 published in London. In total, there is about 90 GB of text files in the training corpus. Is this practical? There is academic interest in recreating period-accurate models to study history. Some also see it as a way to track both biases of the period and contrast them with biases found in data today. Of course, unlike the Internet, surviving documents from the 1800s are less likely to have trivialities in them, so it isn’t clear just how accurate a model like this would be for that sort of purpose.
Instead of reading the news, LLMs can write it. Just remember that the statistical nature of LLMs makes them easy to manipulate during training, too.
Featured Art: Royal Courts of Justice in London about 1870, Public Domain
Ask Hackaday: How Do You Detect Hidden Cameras?

The BBC recently published an exposé revealing that some Chinese subscription sites charge for access to their network of hundreds of hidden cameras in hotel rooms. Of course, this is presumably without the consent of the hotel management and probably isn’t specifically a problem in China. After all, cameras can now be very tiny, so it is extremely easy to rent a hotel room or a vacation rental and bug it. This is illegal, China has laws against spy cameras, and hotels are required to check for them, the BBC notes. However, there is a problem: At least one camera found didn’t show up on conventional camera detectors. So we wanted to ask you, Hackaday: How do you detect hidden cameras?
How it Works
Commercial detectors typically use one of two techniques. It is easy to scan for RF signals, and if the camera is emitting WiFi or another frequency you expect cameras to use, that works. But it also misses plenty. A camera might be hardwired, for example. Or store data on an SD card for later. If you have a camera that transmits on a strange frequency, you won’t find it. Or you could hide the camera near something else that transmits. So if your scanner shows a lot of RF around a WiFi router, you won’t be able to figure out that it is actually the router and a small camera.

The other common method uses a beam of light or a laser to try to see reflections of lenses, which will be retroreflective. The user views the room through a viewfinder, and any light that comes directly back will show up in the view. Despite some false positives, this method will find cameras even if they are not powered or transmitting. Even shining a flashlight, maybe from the same cell phone, around a dark room might uncover some camera devices.
There are a few other techniques. If you assume a spy camera probably uses IR lighting to see you at night, you can scan for that. A good tip is that your cell phone camera can probably see IR. (Test it on an IR remote control.) So looking around with your phone camera is a good, free way to find some cameras. A thermal imager might show hidden equipment, too, although it might be hard to determine if it is actually a camera or not.
You might be thinking: just look for the camera. But that’s not always simple. In the BBC article, the camera was the size of a pencil eraser. Not to mention, a quick search of your favorite retailer will reveal cameras made to look like smoke detectors, stuffed toys, USB chargers, and more. You can even get small cameras that can mount a fake button or screw head on the lens.
Testing
[Project Farm] has a video that tests a few detectors. The problem, of course, is that there are different kinds of cameras. Detecting the test camera doesn’t mean it will detect all cameras. Still, you can get some idea of how effective some detectors are compared to others.
youtube.com/embed/1reman2waLs?…
Your Turn?
Given that none of the current ways to detect cameras work perfectly, what would you build to find them? Maybe an NLJD? Or maybe some tech to blind them? Tell us what you think in the comments.
Public security meets disinformation threats
IT'S MONDAY, AND THIS IS DIGITAL POLITICS. I'm Mark Scott, and will be in Amsterdam next week to present this work at this year's DSA and Platform Regulation Conference. If you're also in town, drop me a line to say hi.

— As defense types meet at the Munich Security Conference this week, the importance of protecting the online information environment from abuse has never been more important. But it comes with significant perils.
— The European Commission's latest regulatory move against TikTok is less to do with potential harm on the platform, and more about sending a policymaking message, at home and abroad.
— The rise of a polarized social media has led to many users disengaging with these online platforms.
Let's get started:
THE PUBLIC SECURITY INDUSTRIAL COMPLEX
IF DAVOS IS WHERE THE GREAT AND THE GOOD of the business world meet to swap notes, then the Munich Security Conference, which gets underway on Feb 13, is where their equivalents in the defense world similarly gather to break bread. They will have a lot to talk about. From the almost 4-year war between Russia and Ukraine to the fraying transatlantic alliance to Europe's renewed efforts to stand up on its own two feet, this year's gathering in the southern German town represents a marker of a new era that has yet to be defined.
Among the topics to be discussed (alongside the ubiquitous AI hype-vest) will be the ongoing toxic nature of the online world and how that potentially harms countries' public security.
For many policymakers, this represents the sweet spot of ongoing accusations — some real, some not — that Russia continues to meddle in Western elections via a spidery web of disinformation agents and so-called hybrid attacks. It also includes an increase in public spending for government efforts to thwart such digital trickery, as well as proposals like the European Commission's Democracy Shield aimed at boosting collective resilience through a mixture of media literacy, public support for independent media and greater research into social media platforms.
It wouldn't be an international conference without some shade from the United States. Details are still thin on the ground. But I would expect senior White House and federal government officials to double down on accusations that Europe's online safety rules are akin to censorship; that Europe needs to embrace its historic culture heritage; and that only more free speech can combat the legitimate real-world harms seeping out of some of these global digital services.
Let's leave aside the US' significant critique on any form of online safety or disinformation-busting efforts. More on that here.
Thanks for reading Digital Politics. If you've been forwarded this newsletter (and like what you've read), please sign up here. For those already subscribed, reach out on digitalpolitics@protonmail.com
For other countries realizing there's a significant public security threat associated with unfettered — and, for most jurisdictions, unregulated — online spaces, many fall into a policymaking fallacy about where the real threat lies. That reduces their ability to truly marshal sufficient resources to provide a safe online environment — while, it should go without saying, upholding fundamental free speech rights.
First, the fallacy. While each country is different — and some jurisdictions face significantly more Russian meddling (like Moldova and Germany) than others — the Kremlin, on average, is not the main driver of politically-motivated disinformation and online polarization that many would believe. This over-indexing on Russian actors therefore pushes national security and digital policymaking to focus on a small subset of threats compared to more comprehensive issues currently affecting social media.
Yes, Russian state-affiliated actors are still doing what they can to shift public opinion. That includes everything from creating spoofed websites that pretend to be Western media outlets so they can spread falsehoods to significant bot farms — on all social media platforms — to try and shift the conversation, one way or the other.
These tactics have evolved since they first hit the headlines in 2016 around the US presidential election. Though, arguably, they existed decades earlier, often in analogue form. But what also has shifted over the last decade is online attention economy. Now, roughly the top two percent of online creators garner more than 60 percent, if not more, of time in people's social media feeds. That means most Russian-affiliated content just doesn't get the eyeballs that it once did.
If a Kremlin bot creates a sophisticated disinformation campaign, but no one (apart from other bots) sees it, does it even exist? In my view, no. No it doesn't.
Such ongoing attempts to create Russia as the bogeyman — especially due to its ongoing atrocities in Ukraine — has fixated many policymakers and, increasingly, national security types on the "what," and not the "why" of social media. By that, I mean it's too easy to focus on finding potentially harmful, politicized disinformation (see here) and not on the systems that amplify potential polarizing content to national audiences.
The 'why' in this context is the increasingly sophisticated social media recommendation algorithms that have made each user's feed a bespoke make-up of content which these companies believe will keep people interested (and, therefore, glued to the platform.)
Gone are the days where people typically received updates from friends and family — those posts now represent between seven and 17 percent on Instagram and Facebook, respectively.
Instead, these recommender systems, whose operations remain closed off from scrutiny, have been tailored to maximize engagement, even if that comes through party-political polarization and other content that potentially harms wider public security.
This is where I start to get queasy. I am a big fan of free speech, and I do not believe national security agencies should be poking around into either my, yours or companies' business. But just as too much time is spent hunting down Russian actors online, not enough time is dedicated to unpicking how these social media algorithms operate. These systems can actually harm people in the real world — more so, in my opinion, than the specter of Kremlin-back botfarms.
There needs to be greater coordination between outward looking national security agencies and inward looking regulators and policymakers focused around online safety. Currently, that is a relationship that either doesn't exist, or is only starting to take shape.
That will involve national security officials finding a way to maintain their independence from monitoring what happens within their countries' borders — a barrier which, legitimately, must be upheld to protect people's fundamental rights.
But to suggest that protecting the information environment is merely a foreign issue — that whatever foreign actors do overseas to target a country's population stands apart from how social media promotes specific content, at home — is a false dichotomy.
To combat online threats that may affect public security — all while upholding free speech rights and other individual freedoms — new connections must be formed between national security and online safety officials. That is not going to be an easy lift, given how each community approaches the digital topics that fall within their overlapping mandates.
But to not try is to relegate ourselves to live in a world defined by what happened in 2016 (and the specific characteristics of a singular US presidential election.)
The world has moved on. So should we.
Chart of the Week
A RESEARCHER AT THE UNIVERSITY AMSTERDAM discovered a correlation between the rise of polarization of posts (at least on Facebook and X) and the number of users who disengaged on those platforms during the 2020 and 2024 US presidential elections.
The first set of charts (on the left) highlight how between the 2020-2024 election cycles, all social media sites — with the exception of TikTok and Reddit — lost users, particularly among the young and elderly.
The second set of charts (on the right) shows the level of posting on both X and Facebook rose significantly, over that period, for those users who were more polarized than their more mainstream counterparts.


Source: Petter Törnberg
THE ANATOMY OF A EUROPEAN COMMISSION ANNOUNCEMENT
THE BERLAYMONT BUILDING in central Brussels can be a weird place. Amid the smattering of European languages and EU officials busily going about their business, the center of the European Commission is a labyrinth of complexity, double-speak and really (and I mean really) bad coffee.
So when the EU's executive branch announced on Feb 6 it had found TikTok in preliminary violation of the bloc's Digital Services Act, I took note. But not for the reason you might think.
Under the still-yet-to-be-finalized decision, the European Commission said it believed the China-linked app had not adequately assessed the addictive features baked into the popular social media service. That included allegedly rewarding users with new content to keep them doomscrolling and sending people (and particularly children) notifications during the wee hours of the morning.
"Social media addiction can have detrimental effects on the developing minds of children and teens," Henna Virkkunen, the European Commissioner in charge of tech policy, said in a statement. In response, TikTok denied the accusations and said it would fight Brussels' preliminary decision.
So far, so good.
But the European Commission's announcement wasn't really about TikTok. I mean, it was about the China-linked platform, as the investigation that led to this preliminary ruling dated from 2024. But the true audience, for my money, was Europeans and, to a lesser degree, Americans.
On the first, the TikTok ruling was specifically designed to tee up the EU's upcoming Digital Fairness Act, which is slated to be published in the fourth quarter of the year. Those proposals are aimed, in part, at so-called "dark patterns" of addictive design that — shockingly — are central to Brussels' claims against TikTok.
What better way to show the need for more rulemaking than demonstrating a real-world case of harm (via the TikTok preliminary decision), which then can be used to make the case for the Digital Fairness Act in late 2026.
On the second, it's telling the European Commission chose TikTok, and not Facebook, for its preliminary ruling. Officials say that separate case (around similar issues linked to addictive design) is still ongoing, and may (or may not) lead to a preliminary ruling.
But in the wake of the US House of Representatives holding another hearing around alleged European online censorship — and US officials traveling to Munich this week to make similar accusations — it's helpful, politically, to show that Europe's digital rulebook isn't just targeting Silicon Valley. In truth, more Chinese firms (AliExpress, Temu, TikTok) have faced decisions under the bloc's online safety rules than US counterparts (which only includes X, so far).
Sign up for Digital Politics
Thanks for getting this far. Enjoyed what you've read? Why not receive weekly updates on how the worlds of technology and politics are colliding like never before. The first two weeks of any paid subscription are free.
Subscribe
Email sent! Check your inbox to complete your signup.
No spam. Unsubscribe anytime.
This is where you have every right to call me a conspiracy theorist. That's not how regulatory enforcement works, I hear you saying. Brussels is just enforcing the rules as outlined within its regulation.
To which, I say yes. But to a point. As I mentioned above, the Berlaymont Building is a strange place. The European Commission sits in a weird regulatory position where it both writes and enforces the rules. Political decisions — particularly in light of the strained relationship with the US — are always taken into account in how the bloc's legislation is enforced. That's especially true for something like the Digital Services Act that includes new enforcement powers which no one within the European Commission has ever wielded before.
In that context, a regulatory decision is not just a regulatory decision.
It's a political marker to demonstrate, to both internal and external audiences, where the region is heading with its digital rulebook. Choosing TikTok and its alleged addictive design therefore meets two purposes. It provides political cover for the upcoming Digital Fairness Act and it allows EU leaders to tell Washington the bloc's rules apply to everyone — and not just US Big Tech.
What I'm reading
— The European Artificial Intelligence & Society Fund outlines its strategy for the next five years. More here.
— The Lowy Institute published a deep dive into the so-called "sovereign citizen movement" has gone global via digital platforms. More here.
— Ahead of next week's AI Impact Summit in India, researchers have written the second annual International AI Safety Report which documents efforts to safeguard the emerging technology. More here.
— Media companies still want to work with online platform to access their audience and global reach, despite reservations about how their content is monetized by these tech companies, argues Rasmus Kleis Nielsen in Digital Journalism.
— Australia's eSafety Commissioner hosts a series of analyses of emerging technologies and their impact on online safety. More here.
Lessons Learned After a Head-First Dive Into Hardware Manufacturing

Sometimes you just know that you have the best ever idea for a hardware product, to the point that you’re willing to quit your job and make said product a reality. If only you can get the product and its brilliance to people, it would really brighten up their lives. This was the starry-eyed vision that [Simon Berens] started out with in January of 2025, when he set up a Kickstarter campaign for the World’s Brightest Lamp.")
At 50,000 lumens this LED-based lamp would indeed bring the Sun into one’s home, and crowdfunding money poured in, leaving [Simon] scrambling to get the first five-hundred units manufactured. Since it was ‘just a lamp’, how hard could it possibly be? As it turns out, ‘design for manufacturing’ isn’t just a catchy phrase, but the harsh reality of where countless well-intended designs go to die.
The first scramble was to raise the lumens output from the prototype’s 39K to a slight overshot at 60K, after which a Chinese manufacturer was handed the design files. This manufacturer had to create among other things the die casting molds for the heatsinks before production could even commence. Along with the horror show of massive US import taxes suddenly appearing in April, [Simon] noticed during his visit to the Chinese factory that due to miscommunication the heatsink was completely wrong.
Months of communication and repeated trips to the factory follow after this, but then the first units ship out, only for users to start reporting issues with the control knobs ‘scraping’. This was due to an issue with tolerances not being marked in the CNC drawings. Fortunately the factory was able to rework this issue within a few days, only for users to then report issues with the internal cable length, also due to this not having been specified explicitly.
All of these issues are very common in manufacturing, and as [Simon] learned the hard way, it’s crucial to do as much planning and communication with the manufacturer and suppliers beforehand. It’s also crucial to specify every single part of the design, down to the last millimeter of length, thickness, diameter, tolerance and powder coating layers, along with colors, materials, etc. ad nauseam. It’s hard to add too many details to design files, but very easy to specify too little.
Ultimately a lot of things did go right for [Simon], making it a successful crowdfunding campaign, but there were absolutely many things that could have saved him a lot of time, effort, lost sleep, and general stress.
Thanks to [Nevyn] for the tip.
A New and Strangely Strong Kind of Plastic

As anyone who extrudes plastic noodles knows, the glass transition temperature of a material is a bit misleading; polymers gradually transition between a glass and a liquid across a range of temperatures, and calling any particular point in that range the glass transition temperature is a bit arbitrary. As a general rule, the shorter the glass transition range is, the weaker it is in the glassy state, and vice-versa. A surprising demonstration of this is provided by compleximers, a class of polymers recently discovered by researchers from Wageningen University, and the first organic polymers known to form strong ionic glasses (open-access article).
When a material transforms from a glass — a hard, non-ordered solid — to a liquid, it goes through various relaxation processes. Alpha relaxations are molecular rearrangements, and are the main relaxation process involved in melting. The progress of alpha relaxation can be described by the Kohlrausch-Williams-Watts equation, which can be exponential or non-exponential. The closer the formula for a given material is to being exponential, the more uniformly its molecules relax, which leads to a gradual glass transition and a strong glass. In this case, however, the ionic compleximers were highly non-exponential, but nevertheless had long transition ranges and formed strong glasses.
The compleximers themselves are based on acrylate and methacrylate backbones modified with ionic groups. To prevent water from infiltrating the structure and altering its properties, it was also modified with hydrophobic groups. The final glass was solvent-resistant and easy to process, with a glass transition range of more than 60 °C, but was still strong at room temperature. As the researchers demonstrated, it can be softened with a hot air gun and reshaped, after which it cools into a hard, non-malleable solid.
The authors note that these are the first known organic molecules to form strong glasses stabilized by ionic interactions, and it’s still not clear what uses there may be for such materials, though they hope that compleximers could be used to make more easily-repairable objects. The interesting glass-transition process of compleximers makes us wonder whether their material aging may be reversible.
Pendulum Powered Battery

While the average person would use a standard charger to top off their phone, [Tom Stanton] is no average man. Instead, he put mind to matter with an entire pendulum battery system.
Using the inductive effects of magnets on copper coils, [Tom] found the ability to power small components. With that in mind, the only path was forward with a much larger pendulum. A simple diode rectifier and capacitors allow for a smoother voltage output. The scale of the device is still too small to power anything insane, even the phone charging test is difficult. One thing the device can do is juice up the electromagnetic launcher he put together a couple years back to hurl an RC plane into the air.
The useful applications of pendulum power storage might not be found in nationwide infrastructure, but the application on this scale is certainly a fun demonstration. [Tom] has a particular fascination with similar projects where practical application comes second to novelty. For a perfect example of this, check out his work with air powered planes!
youtube.com/embed/uqmT1GzRXWI?…
Kodak MC3: Everything But a Phone In 2001

One of the constants in consumer electronics is that designers will try to put as many features into a single device as possible, whether it’s a Walkman with a radio tuner or a new class of devices that crams a photo and video camera in the same enclosure as a music player. At the time that the Kodak MC3 was released this made it a rather unique device, with it in hindsight being basically a smartphone without the phone, as [Tech Tangents] aptly notes in his recent video on the device.
Six years before Apple’s iPhone would be announced, and eight years before the first iPod with a video camera, the Kodak MC3 was in many respects bleeding edge technology targeted straight at tech enthusiasts. For less than $300 you got VGA-quality images, CompactFlash storage, and MP3 playback capability. The videos it produced were 320×240 resolution, h.263 encoded MOVs with a maximum length of 4 seconds at 20 FPS, or 4 minutes with a 64 MB CF card.
The unit that [Tech Tangents] got used came with a 128 MB CF card, but couldn’t use a 2 GB CF card, which is a shame. The screen on it got a lot of flak for not not having a backlight, but this was common for the era, as were the poor viewing angles. Ditto for the poor video quality, as anyone who invested in consumer digital cameras in the early 2000s can attest to. In that respect this Kodak device was probably a bit too ambitious with its features for the era, maybe to compensate for it completely missing the boat on the rise of digital camera technology around the time.
youtube.com/embed/dq2KLhKRH6Q?…
Hackaday Links: February 8, 2026

We start this week with a bit of a good news/bad news situation. On February 6th, the Relativistic Heavy Ion Collider (RHIC) was shut down after 25 years of operation. Located at Brookhaven National Laboratory in Upton, New York, the RHIC was the only operating particle collider in the United States, and along with the Large Hadron Collider (LHC), was one of only two heavy-ion colliders in existence.
So that’s the bad news. The good news is that the RHIC is going dark so that the Electron-Ion Collider (EIC) can take its place. Planned for activation in the mid-2030s, the EIC will occupy the same tunnel as the RHIC and reuse much of the same hardware. As the name implies, it will be used to collide electrons.
Switching gears (no pun intended) to the world of self-driving cars, Waymo’s chief safety officer, Dr. Mauricio Peña, made a surprising admission this week during a U.S. Senate hearing. When asked what his company’s vehicles do when they are presented with a situation that their on-board systems can’t resolve, Dr. Peña explained that they would contact a human “remote assistance operator.” He further clarified that these individuals, located both in the US and the Philippines, don’t literally drive the car remotely. Still, Senator Ed Markey of Massachusetts questioned not only the company’s transparency on the issue of remote assistance, but the idea that individuals overseas could be making decisions on how vehicles should operate on US roadways.
While on the subject of a hyped-up technology that hasn’t quite delivered, CNN posed an interesting question — in an article titled “No, but seriously: What’s going on with bitcoin?“, David Goldman pointed out that the cryptocurrency recently dropped below $63,000 USD for the first time in over a year and a half (as of today, it has rebounded slightly to just under $71,000). He goes on to explain that global uncertainty and rapidly improving AI technology are partly to blame, although we’re honestly not quite sure how that second one works. But more importantly, he theorizes that the market is returning to where it was before the 2024 presidential election. Then candidate Trump embraced the digital currency and promised to remove restrictions he claimed were holding it back. This naturally caused a bump in Bitcoin value after he won the White House, but as those changes have yet to materialize, the excitement is apparently wearing off.
In software news, the remaining Windows users who still haven’t been beaten into submission by Microsoft will have another feature taken away from them; as of February, the operating system’s integrated 3D Viewer is officially being deprecated. The tool allows users to inspect various types of 3D files, including STLs, and was added to Windows back when Microsoft was convinced “mixed reality” was going to be a thing. Anyone who has 3D Viewer installed will still be able to use it, but it will no longer be available for download officially from Microsoft. On the bright side, the web-based alternative that Microsoft recommends seems pretty slick.
Those holding out hope for life on the Red Planet will be excited to read the recent report from NASA which claims that the organic compounds discovered on Mars by the Curiosity rover can’t be fully explained by non-biological processes. In other words, while there are geological processes that could have produced some of the molecules detected, and some could have been deposited on the planet by meteorites, none of the possibilities studied could account for them all. The researchers caution that this doesn’t mean there is current or active life on the Martian surface, however, as we still don’t fully understand the timescales required to break these molecules down. Curiosity might have sniffed out the signs of life, but that life could still have died off billions of years ago.
On the subject of space, a recent post about the number of satellites in low-Earth orbit by mathematician John Cook got some debate going. He runs the numbers and argues that given the current number of LEO satellites (~12,500), and the area of space that they operate in, each bird has roughly 100,000,000 km³ to itself. Not exactly the close quarters flying that we’ve been hearing so much about recently with the proliferation of satellite constellations such as SpaceX’s Starlink. That said, others were quick to point out that his math only really works out if all the satellites were evenly distributed, which is obviously not the case in the real world. So while his estimate is probably a bit too generous, it still helps put into context just how mind-bogglingly big space actually is.
Finally, for those who would prefer to scroll endlessly through something a bit more intellectually stimulating than social media, check out Xikipedia. This open source project takes the content from the Simple English Wikipedia and turns it into a never ending feed that you can browse, complete with an algorithm that will suggest articles to you based on your personal interests. What do you call the opposite of doomscrolling — maybe knowledgescrolling?
See something interesting that you think would be a good fit for our weekly Links column? Drop us a line, we’ve love to hear about it.
Wooden Case Makes a 2026 TV Stylish

The middle of the 20th century produced a revolution in understated stylish consumer design, some of which lives on today. The reality of living in a 1950s or ’60s house was probably to be surrounded by the usual mess of possessions from many past decades, but the promise was of a beautiful sleek and futuristic living space. Central to this in most homes would have been the TV set, and manufacturers followed the trends of the age with cases that are now iconic. Here in 2026 we put up with black rectangles, but fortunately there’s Cordova Woodworking with a modern take on a retro TV cabinet.
We’ve put the build video below, and it’s a wonderfully watchable piece of workshop titillation in a fully-equipped modern shop. While we appreciate they’ve put the design up for sale, we think many Hackaday readers could come up with their own having already been inspired. One thing we notice over the originals is that they use “proper” wood for their case, when we know the ’60s version would have had veneer-faced ply or chipboard.
The result is a piece of furniture which nicely contains the modern TV and accessories, but doesn’t weigh a ton or dominate the room in the way one of the originals would have, much less emit that evocative phenolic hot-electronics smell. We’d have one in our living room right now. Meanwhile if you’d like a wallow in mid-century TV, we have you covered.
youtube.com/embed/5RI6_DHBPfM?…
Habit Detection For Home Assistant

Computers are very good at doing exactly what they’re told. They’re still not very good at coming up with helpful suggestions of their own. They’re very much more about following instructions than using intuition; we still don’t have a digital version of Jeeves to aid our bumbling Wooster selves. [Sherrin] has developed something a little bit intelligent, though, in the form of a habit detector for use with Home Assistant.
In [Sherrin]’s smart home setup, there are lots of things that they wanted to fully automate, but they never got around to implementing proper automations in Home Assistant. Their wife also wanted to automate things without having to get into writing YAML directly. Thus, they implemented a sidecar which watches the actions taken in Home Assistant.
The resulting tool is named TaraHome. When it detects repetitive actions that happen with a certain regularity, it pops up and suggests automating the task. For example, if it detects lights always being dimmed when media is playing, or doors always being locked at night, it will ask if that task should be set to happen automatically and can whip up YAML to suit. The system is hosted on the local Home Assistant instance. It can be paired with an LLM to handle more complicated automations or specific requests, though this does require inviting cloud services into the equation.
We’ve featured lots of great Home Assistant hacks over the years, like this project that bridges 433 MHz gear to the smart home system. If you’ve found your own ways to make your DIY smart home more intelligent, don’t hesitate to notify the tipsline!
Investigating the Science Claims Behind the Donut Solid State Battery

Earlier this year Donut Lab caused quite the furore when they unveiled what they claimed was the world’s first production-ready solid state battery, featuring some pretty stellar specifications. Since then many experts and enthusiasts in the battery space have raised concerns that this claimed battery may not be real, or even possible at all. After seeing the battery demonstrated at CES’26 and having his own concerns, [Ziroth] decided to do some investigating on what part of the stated claims actually hold up when subjected to known science.
On paper, the Donut Lab battery sounds amazing: full charge in less than 10 minutes, 400 Wh/kg energy density, 100,000 charge cycles, extremely safe and low cost. Basically it ticks every single box on a battery wish list, yet the problem is that this is all based on Donut’s own claims. Even aside from the concerns also raised in the video about the company itself, pinning down what internal chemistry and configuration would enable this feature set proves to be basically impossible.
In this summary of research done on Donut’s claimed battery as well as current battery research, a number of options were considered, including carbon nanotube-based super capacitors. Yet although this features 418 Wh/kg capacity, this pertains only to the basic material, not the entire battery which would hit something closer to 50 Wh/kg.
Other options include surface-redox sodium-ion chemistry with titanium oxide. This too would allow for fast charging and high endurance, but Donut has already come out to state that their battery is not capacitor-based and uses no lithium, so that gets shot down too.
Combined with the ‘cheap’ and ‘scalable’ claims this effectively shoots down any potential battery chemistry and architecture. Barring some amazing breakthrough this thus raises many red flags, especially when you consider Donut Lab’s major promises for investors that should make any reasonable person feel skittish about pouring money into the venture.
Sadly, it seems that this one too will not be the battery breakthrough that we’re all waiting for. Even new chemistries like sodium-ion are struggling to make much of inroads, although lithium-titanate shows real promise. Albeit it not with amazing power density increases that would make it better than plain lithium-ion for portable applications.
youtube.com/embed/V8mkD6g9Ujc?…