 - Collegamento all'originale")
Commodore 64 Helps Revive the BBS Days

Before the modern Internet existed, there were still plenty of ways of connecting with other computer users “online”, although many of them might seem completely foreign to those of us in the modern era. One of those systems was the Bulletin Board System, or BBS, which would have been a single computer, often in someone’s home, connected to a single phone line. People accessing the BBS would log in if the line wasn’t busy, leave messages, and quickly log out since the system could only support one user at a time. While perhaps a rose-tinted view, this was a more wholesome and less angsty time than the modern algorithm-driven Internet, and it turns out these systems are making a bit of a comeback as a result.
The video by [The Retro Shack] sets up a lot of this history for context, then, towards the end, uses a modern FPGA-based recreation called the Commodore 64 Ultimate to access a BBS called The Old Net, a modern recreation of what these 80s-era BBS systems were like. This involves using a modern networking card that allows the C64 to connect to Wi-Fi access points to get online instead of an old phone modem, and then using a terminal program called CCGMS to connect to the BBS itself. Once there, users can access mail, share files, and even play a few games.
While the video is a very basic illustration of how these BBS systems worked and how to access one, it is notable in that it’s part of a trend of rejecting more modern technology and systems in favor of older ones, where the users had more control. A retro machine like a C64 or Atari is not required either; modern operating systems can access these with the right terminal program, too. A more in-depth guide to the BBS can be found here for those looking to explore, and we’ve also seen other modern BBS systems recently.
Thanks to [Charlie] for the tip!
youtube.com/embed/A2x3TKRB5X4?…

Building A Little Quadruped Robot

Robots don’t have to be large and imposing to be impressive. As this tiny quadruped from [Dorian Todd] demonstrates, some simple electronics and a few servos can create something altogether charming on their own.
This little fellow is named Sesame. A quadruped robot, it’s built out of 3D-printed components. Each leg features a pair of MG90S hobby servos, one of which rotates the leg around the vertical axis, while the other moves the foot. The ESP32 microcontroller controls all eight servos, enabling remote control of Sesame via its built-in wireless connectivity. Sesame also gets a 128×64 OLED display, which it uses to display a range of emotions.
Mechanically, the Sesame design isn’t particularly sophisticated. Where it shines is that even with such a limited range of motion, between its four legs and its little screen, this robot can display a great deal of emotion. [Dorian] shows this off in the project video, in which Sesame scampers around a desktop with all the joy and verve of a new puppy. It’s also very cheap; [Dorian] estimates you can build your own Sesame for about $60. Files are on GitHub for the curious.
If you prefer your quadrupeds built for performance over charm, you might consider an alternative build. Video after the break.
youtube.com/embed/1UDsWkcQZhc?…
Tamper Detection with Time-Domain Reflectometry

For certain high-security devices, such as card readers, ATMs, and hardware security modules, normal physical security isn’t enough – they need to wipe out their sensitive data if someone starts drilling through the case. Such devices, therefore, often integrate circuit meshes into their cases and regularly monitor them for changes that could indicate damage. To improve the sensitivity and accuracy of such countermeasures, [Jan Sebastian Götte] and [Björn Scheuermann] recently designed a time-domain reflectometer to monitor meshes (pre-print paper).
Many meshes are made from flexible circuit boards with winding traces built into the case, so cutting or drilling into the case breaks a trace. The problem is that most common ways to detect broken traces, such as by resistance or capacitance measurements, aren’t easy to implement with both high sensitivity and low error rates. Instead, this system uses time-domain reflectometry: it sends a sharp pulse into the mesh, then times the returning echoes to create a mesh fingerprint. When the circuit is damaged, it creates an additional echo, which is detected by classifier software. If enough subsequent measurements find a significant fingerprint change, it triggers a data wipe.
The most novel aspect of this design is its affordability. An STM32G4-series microcontroller manages the timing, pulse generation, and measurement, thanks to its two fast ADCs and a high-resolution timer with sub-200 picosecond resolution. For a pulse-shaping amplifier, [Jan] and [Björn] used the high-speed amplifiers in an HDMI redriver chip, which would normally compensate for cable and connector losses. Despite its inexpensive design, the circuit was sensitive enough to detect when oscilloscope probes contacted the trace, pick up temperature changes, and even discern the tiny variations between different copies of the same mesh.
It’s not absolutely impossible for an attacker to bypass this system, nor was it intended to be, but overcoming it would take a great deal of skill and some custom equipment, such as a non-conductive drill bit. If you’re interested in seeing such a system in the real world, check out this teardown of a payment terminal. One of the same authors also previously wrote a KiCad plugin to generate anti-tamper meshes.
Thanks to [mark999] for the tip!
Ancient Egyptian Flatness

Making a truly flat surface is a modern engineering feat, and not a small one. Even making something straight without reference tools that are already straight is a challenge. However, the ancient Egyptians apparently made very straight, very flat stone work. How did they do it? Probably not alien-supplied CNC machines. [IntoTheMap] explains why it is important and how they may have done it in a recent video you can see below.
The first step is to define flatness, and modern mechanical engineers have taken care of that. If you use 3D printers, you know how hard it is to even get your bed and nozzle “flat” with respect to each other. You’ll almost always have at least a 100 micron variation in the bed distances. The video shows how different levels of flatness require different measurement techniques.
The Great Pyramid’s casing stones have joints measuring 0.5 mm, which is incredible to achieve on such large stones with no modern tools. A stone box in the Pyramid of Seostris II is especially well done and extremely flat, although we can make things flatter today.
The main problem with creating a flat surface is that to do a good job, you need some flat things to start with. However, there is a method from the 19th century that uses three plates and multiple lapping steps to create three very flat plates. In modern times, we use a blue material to indicate raised areas, much as a dentist makes you chomp on a piece of paper to place a crown. There are traces of red ochre on Egyptian stonework that probably served the same purpose.
Lapping large pieces is still a challenge, but moving giant stones at scale appears to have been a solved problem for the Egyptians. Was this the method they used? We don’t know, of course. But it certainly makes sense.
It would be a long time before modern people could make things as flat. While we can do even better now, we also have better measuring tools.
youtube.com/embed/vhv8fAqN1cw?…
Wireless MIDI Controller Has Lots Of Knobs

We live in a golden age for MIDI controllers. [rheslip]’s contribution to the milieu is a twisty take on the format, in that it’s covered in an array of knobs. Thus the name—Twisty 2.
The controller can be built using the Raspberry Pi Pico or Pico 2. It’s set up to read a 4×4 array of clickable encoders, plus two bonus control knobs to make 18 in total, which are read via a 74HC4067 analog mux chip. There’s also an SK6812 RGB LED for each encoder, and an OLED display for showing status information. MIDI output is via USB, or, if you purchased the W variant of the Pi Pico/Pico 2, it can operate wirelessly over Bluetooth MIDI instead. The controller is set up to send MIDI CC messages, program changes, or note on/off messages depending on its configuration. Flipping through different modes is handled with the bottom set of encoders and the OLED display.
Few musicians we’ve ever met have told us they learned how to play the encoders, and yet. The cool thing about building your own MIDI controller is you can tune it to suit whatever method of performance strikes your fancy. If the name of this build alone has you inspired, you could always whip up a MIDI controller out of a Twister mat.
youtube.com/embed/-W1Gd_hKzS8?…
Crazy Old Machines

Al and I were talking about the IBM 9020 FAA Air Traffic Control computer system on the podcast. It’s a strange machine, made up of a bunch of IBM System 360 mainframes connected together to a common memory unit, with all sorts of custom peripherals to support keeping track of airplanes in the sky. Absolutely go read the in-depth article on that machine if it sparks your curiosity.
It got me thinking about how strange computers were in the early days, and how boringly similar they’ve all become. Just looking at the word sizes of old machines is a great example. Over the last, say, 40 years, things that do computing have had 4, 8, 16, 32, or even 64-bit words. You noticed the powers-of-two trend going on here, right? Basically starting with the lowly Intel 4004, it’s been round numbers ever since.
I wasn’t there, but it gives you the feeling that each computer is a unique, almost hand-crafted machine. Some must have made their odd architectural choices to suit particular functions, others because some designer had a cleaver idea. I’m not a computer historian, but I’m sure that the word lengths must tell a number of interesting stories.
On the whole, though, it gives the impression of a time when each computer was it’s own unique machine, before the convergence of everything to roughly the same architectural ideas. A much more hackery time, for lack of a better word. We still see echoes of this in the people who make their own “retro” computers these days, either virtually, on a breadboard, or emulated in the fabric of an FPGA. It’s not just nostalgia, though, but a return to a time when there was more creative freedom: a time before 64 bits took over.
This article is part of the Hackaday.com newsletter, delivered every seven days for each of the last 200+ weeks. It also includes our favorite articles from the last seven days that you can see on the web version of the newsletter. Want this type of article to hit your inbox every Friday morning? You should sign up!
Isolated AC/DC Power Supply and Testing Station for 230 V Devices

When you’re testing or debugging some mains-powered gear, plugging it directly into the outlet can often be an exciting proposition. If such excitement is not really your thing, you can opt for an isolation transformer and other types of safeties. In the case of [Michał Słomkowski], he opted to take a few steps further by modding a vintage East-German isolating variac with a broken amp meter into an isolated AC/DC power supply and testing station.

The core is formed by the isolated variable transformer, to which a configurable DC output section, a current limiter and digital voltage and current read-outs were added. This enables a variable AC output of 0 – 330 VAC and 0 – 450 VDC on their respective terminals, with the incandescent light bulb providing an optional current limiter.
In its final configuration [Michał] has been using the device for the past four years now for a range of tasks, including the simulating of various undesirable mains power conditions, varying the speed of an old Soviet-era drill, powering vacuum tube devices, capacitor reforming and of course running 100-120 VAC devices from e.g. the US.
As far as feature set goes, we have to admit that it is an impressive device, indeed. Although some parts of it are clearly playing it fast and loose with best practices, with [Michał] admitting to not being an electrician, it was clearly engineered well enough to survive a few years of use, something which cannot be said for even professional laboratory equipment these days.
Environmental Monitoring on the Cheap

If there is one thing we took from [azwankhairul345’s] environmental monitor project, it is this: sensors and computing power for such a project are a solved problem. What’s left is how to package it. The solution, in this case, was using recycled plastic containers, and it looks surprisingly effective.
A Raspberry Pi Pico W has the processing capability and connectivity for a project like this. A large power bank battery provides the power. Off-the-shelf sensors for magnetic field (to measure anemometer spins), air quality, temperature, and humidity are easy to acquire. The plastic tub that protects everything also has PVC pipe and plastic covers for the sensors. Those covers look suspiciously like the tops of drink bottles.
We noted that the battery bank inside the instrument doesn’t have a provision for recharging. That means the device will go about two days before needing some sort of maintenance. Depending on your needs, this could be workable, or you might have to come up with an alternative power supply.
This probably won’t perform as well as a Hoffman box-style container, and we’ve seen those crop up, too. There are a number of ways of sealing things against the elements.
Beer Keg Plumbing for a Liquid Rocket

When you think of a high performance liquid rocket, what do you think of? Beer kegs? No? Well, when [Ryan] from the YouTube channel “Project KegRocket” saw a beer keg, the first thing he and his friends saw was a pressurized rocket body.
You wouldn’t be crazy if the first thing you thought of was something designed by a massive company or university. Liquid rockets are far from simple to develop, with Keg Rocket being no exception. Liquid oxygen and alcohol is the oxidizer/fuel mixture of choice. Liquid oxygen in particular is a problem with its cryogenic temperatures and tendency to do what rocket fuel does best, burn. This problem causes a large amount of work to simply connect the pipes. Traditional O-rings have no chance at surviving, along with most other non-metallic solutions.
Even with all these problems, the group creating the piece of art is more than capable, having experience creating similar rockets in the past. As of currently, the pumping has been pressure and leak checked. We will be watching this project closely for updates and an eventual launch.
For more rocketry science, be sure to check out aerospike engines for the most efficient engines around. If you want efficiency in your pizzas and beer kegs, check out this keg pizza oven instead!
youtube.com/embed/TzWWWmHvjkI?…
Polymer Skins That Change Color and Texture When Exposed to Water

Researchers at Stanford University recently came up with an interesting way (Phys.org summary) to create patterns and colors that emerge when a polymer is exposed to water. Although the paper itself is sadly paywalled with no preprint available, it’s fairly easily summarized and illustrated with details from the Supplementary Data section. The polymer used is poly(3,4-ethylenedioxythiophene) polystyrene sulfonate (PEDOT:PSS), which when exposed to an electron beam (electron-beam lithography) undergoes certain changes that become apparent when said water is added.
The polymer is hygroscopic, but the electron beam modifies the extent to which a specific area swells up, thus making it possible to create patterns that depend on the amount of electron beam exposure. In order to ‘colorize’ the polymer, complex cavities are created that modify the angular distribution of light, as illustrated in the top image from the Supplemental Data docx file.
By varying the concentration of IPA versus water, the intermediate swelling states can be controlled. Although this sounds pretty advanced, if you look at the supplementary videos that are already sped up a lot, you can see that it is a very slow process. Compared to an octopus and kin whose ability to alter their own skin texture and coloring is legendary and directly controlled by their nervous system, this isn’t quite in the same ballpark yet, even if it’s pretty cool to watch.
Lead Acid Battery Upgraded to Lithium Iron Phosphate

Lithium batteries have taken over as the primary battery chemistry from applications ranging from consumer electronics to electric vehicles and all kinds of other things in between. But the standard lithium ion battery has a few downsides, namely issues operating at temperature extremes. Lead acid solves some of these problems but has much lower energy density, and if you want to split the difference with your own battery you’ll need to build your own lithium iron phosphate (LiFePO4) pack.
[Well Done Tips] is building this specific type of battery because the lead acid battery in his electric ATV is on the decline. He’s using cylindrical cells that resemble an 18650 battery but are much larger. Beyond the size, though, many of the design principles from building 18650 battery packs are similar, with the exception that these have screw terminals so that bus bars can be easily attached and don’t require spot welding.
With the pack assembled using 3D printed parts, a battery management system is installed with the balance wires cleverly routed through the prints and attached to the bus bars. The only problem [Well Done Tips] had was not realizing that LiFePO4 batteries’ voltages settle a bit after being fully charged, which meant that he didn’t properly calculate the final voltage of his pack and had to add a cell, bringing his original 15S1P battery up to 16S1P and the correct 54V at full charge.
LiFePO4 has a few other upsides compared to lithium ion as well, including that it delivers almost full power until it’s at about 20% charge. It’s not quite as energy dense but compared to the lead-acid battery he was using is a huge improvement, and is one of the reasons we’ve seen them taking over various other EV conversions as well.
youtube.com/embed/l-nkiqVb0J8?…
Wired to Wireless: ESP32 Gives Your USB Keyboard Bluetooth

Few things rival the usability and speed of a full-sized keyboard for text input. For decades, though, keyboards were mostly wired, which can limit where you use your favorite one. To address this, [KoStard]’s latest project uses an ESP32 to bridge a USB keyboard to BLE devices.
The ESP32-S3 packs a ton of fantastic functionality into its small size and low price—including USB-OTG support, which is key here. Taking advantage of this, [KoStard] programmed an ESP32-S3 to host a keyboard over its USB port while connecting via BLE to devices like cellphones.
There are some slick tricks baked in, too: you can pair with up to three devices and switch between them using a key combo. Some of you might be wondering how you can just plug a microcontroller into a keyboard and have it work. The truth is, it doesn’t without extra hardware. Both the keyboard and ESP32-S3 need power. The simplest fix is a powered USB hub: it can be battery-powered for a truly mobile setup, or use a wired 5V supply so you never have to charge batteries.
We love seeing a simple, affordable microcontroller extend the usefulness of gear you already have. Let us know in the comments about other hacks you’ve used to connect keyboards to devices never designed for them.
youtube.com/embed/dVUMYTfJw0s?…
Hackaday Podcast Episode 354: Firearms, Sky Driving, and Dumpster Diving

Hackaday Editors Elliot Williams and Al Williams took a break to talk about their favorite hacks last week. You can drop in to hear about articulated mirrors, triacs, and even continuous 3D-printing modifications.
Flying on an airplane this weekend? Maybe wait until you get back to read about how the air traffic control works. Back home, you can order a pizza on a Wii or run classic Basic games on a calculator.
For the can’t miss articles, the guys talked about very low Earth orbit satellites and talked about readers who dumpster dive.
Check out the links below if you want to follow along, and don’t be shy. Tell us what you think about this episode in the comments!
html5-player.libsyn.com/embed/…
As always, this episode is available in DRM-free MP3.
Where to Follow Hackaday Podcast
Places to follow Hackaday podcasts:
Episode 354 Show Notes:
What’s that Sound?
- Congratulations to [Spybob42], who guessed last week’s sound. Come back next week to take your shot at a coveted Hackaday Podcast T-Shirt.
News
Interesting Hacks of the Week:
- How To Use Tiny Open Loop Actuators For A Living Mirror
- A Guide To Using Triacs For Switching AC
- Testing A Continuous Printing Mod For The Bambu Lab A1 Mini
- Accurately Aiming Audio With An Ultrasonic Array
- Acoustic Mirrors: How To Find Planes Without RADAR
- A Phased-Array Ultrasonic 3D Scanner From Scratch
- Supercon 2024: Killing Mosquitoes With Freaking Drones, And Sonar
- Build A Parametric Speaker Of Your Own
- Self-Powered Top Spins For Hours
- Inside Air Traffic Control
Quick Hacks:
- Elliot’s Picks:
- The Windows Interface You Didn’t Like, For Linux
- Binary And Digital Gradients For Telling Time
- Ordering Pizza On The Nintendo Wii (Again)
- Al’s Picks:
- BASIC On A Calculator Again
- Robot Sees Light With No CPU
- Flux And Solder Paste Dispenser Looks Good While Doing It
- BASIC On A Calculator Again
Can’t-Miss Articles:
hackaday.com/2026/01/23/hackad…
The Defunct Scooter Company, and the Default Key

Äike were an Estonian scooter company, which sadly went bust last year. [Rasmus Moorats] has one, and since the app and cloud service the scooter depends on have lost functionality, he decided to reverse engineer it. Along the way he achieved his goal, but found a vulnerability that unlocks all Äike scooters.
The write-up is a tale of app and Bluetooth reverse engineering, ending with the startling revelation of a hardcoded key that’s simply “ffffffffffffffff”. From that he can unlock and interact with any Äike scooter, except for a subset that were used as hire scooters and didn’t have Bluetooth. Perhaps of more legitimate use is the reverse engineering of the scooter functionality.
What do you do when you find a vulnerability in a product whose manufacturer has gone? He reported to the vendor of the IoT module inside the scooter, who responded that the key was a default value that should have been changed by the Äike developers. Good luck, should you own one of these machines.
Meanwhile, scooter hacking is very much a thing for other manufacturers too.
Size (and Units) Really Do Matter

We miss the slide rule. It isn’t so much that we liked getting an inexact answer using a physical moving object. But to successfully use a slide rule, you need to be able to roughly estimate the order of magnitude of your result. The slide rule’s computation of 2.2 divided by 8 is the same as it is for 22/8 or 220/0.08. You have to interpret the answer based on your sense of where the true answer lies. If you’ve ever had some kid at a fast food place enter the wrong numbers into a register and then hand you a ridiculous amount of change, you know what we mean.
Recent press reports highlighted a paper from Nvidia that claimed a data center consuming a gigawatt of power could require half a million tons of copper. If you aren’t an expert on datacenter power distribution and copper, you could take that number at face value. But as [Adam Button] reports, you should probably be suspicious of this number. It is almost certainly a typo. We wouldn’t be surprised if you click on the link and find it fixed, but it caused a big news splash before anyone noticed.
Thought Process
Best estimates of the total copper on the entire planet are about 6.3 billion metric tons. We’ve actually only found a fraction of that and mined even less. Of the 700 million metric tons of copper we actually have in circulation, there is a demand for about 28 million tons a year (some of which is met with recycling, so even less new copper is produced annually).
Simple math tells us that a single data center could, in a year, consume 1.7% of the global copper output. While that could be true, it seems suspicious on its face.
Digging further in, you’ll find the paper mentions 200kg per megawatt. So a gigawatt should be 200,000kg, which is, actually, only 200 metric tons. That’s a far cry from 500,000 tons. We suspect they were rounding up from the 440,000 pounds in 200 metric tons to “up to a half a million pounds,” and then flipped pounds to tons.
Glass Houses
We get it. We are infamous for making typos. It is inevitable with any sort of writing at scale and on a tight schedule. After all, the Lincoln Memorial has a typo set in stone, and Webster’s dictionary misprinted an editor’s note that “D or d” could stand for density, and coined a new word: dord.
So we aren’t here to shame Nvidia. People in glass houses, and all that. But it is amazing that so much of the press took the numbers without any critical thinking about whether they made sense.
Innumeracy
We’ve noticed many people glaze over numbers and take them at face value. The same goes for charts. We once saw a chart that was basically a straight line except for one point, which was way out of line. No one bothered to ask for a long time. Finally, someone spoke up and asked. Turns out it was a major issue, but no one wanted to be the one to ask “the dumb question.”
You don’t have to look far to find examples of innumeracy: a phrase coined by [Douglas Hofstadter] and made famous by [John Allen Paulos]. One of our favorites is when a hamburger chain rolled out a “1/3 pound hamburger,” which flopped because customers thought that since three is less than four, they were getting more meat with a “1/4 pound hamburger” at the competitor’s restaurant.
This is all part of the same issue. If you are an electronics or computer person, you probably have a good command of math. You may just not realize how much better your math is than the average person’s.
Gimli Glider

Even so, people who should know better still make mistakes with units and scale. NASA has had at least one famous case of unit issues losing an unmanned probe. In another famous incident, an Air Canada flight ran out of fuel in 1983. Why?
The plane’s fuel sensors were inoperative, so the ground crew manually checked the fuel load with a dipstick. The dipstick read in centimeters. The navigation computer expected fuel to be in kg. Unfortunately, the fuel’s datasheet posted density in pounds/liter. This incorrect conversion happened twice.
Unsurprisingly, the plane was out of fuel and had to glide to an emergency landing on a racetrack that had once been a Royal Canadian Air Force training base. Luckily, Captain Pearson was an experienced glider pilot. With reduced control and few instruments, the Captain brought the 767 down as if it were a huge glider with 61 people onboard. Although the landing gear collapsed and caused some damage, no one on the plane or the ground were seriously hurt.
What’s the Answer?
Sadly, math answers are much easier to get than social answers. Kids routinely complain that they’ll never need math once they leave school. (OK, not kids like we were, but normal kids.) But we all know that is simply not true. Even if your job doesn’t directly involve math, understanding your own finances, making decisions about purchases, or even evaluating political positions often requires that you can see through math nonsense, both intentional and unintentional.
[Antoine de Saint-Exupéry] was a French author, and his 1948 book Citadelle has an interesting passage that may hold part of the answer. If you translate the French directly, it is a bit wordy, but the quote is commonly paraphrased: “If you want to build a ship, don’t herd people together to collect wood and don’t assign them tasks and work, but rather teach them to long for the endless immensity of the sea.”
We learned math because we understood it was the key to building radios, or rockets, or computer games, or whatever it was that you longed to build. We need to teach kids math in a way that makes them anxious to learn the math that will enable their dreams.
How do we do that? We don’t know. Great teachers help. Inspiring technology like moon landings helps. What do you think? Tell us in the comments. Now with 285% more comment goodness. Honest.
We still think slide rules made you better at math. Just like not having GPS made you better at navigation.
Embedded TPM: Watch Out!

Today’s PCs are locked up with Trusted Platform Module (TPM) devices so much so that modern Windows versions insist on having a recent TPM to even install. These have become so prevalent that even larger embedded boards now have TPM and, of course, if you are repurposing consumer hardware, you’ll have to deal with it, too. [Sigma Star] has just the primer for you. It explains what TPM does, how it applies to embedded devices, and where the pitfalls are.
The TPM is sometimes a chip or sometimes secure firmware that is difficult to tamper with. They provide secret storage and can store boot signatures to detect if something has changed how a computer starts up. The TPM can also “sign off” that the system configuration is the same to a remote entity. This allows, for example, a network to prevent a hacked or rogue computer from communicating with other computers.
Embedded systems, usually, aren’t like PCs. A weather station at a remote location may have strangers poking at it without anyone noticing. Also, that remote computer might be expected to be working for many more years than a typical laptop or desktop computer.
This leads to a variety of security concerns that TPM 2.0 attempts to mitigate. For example, it is unreasonable to think a typical attacker might connect a logic analyzer to your PC, but for an embedded system, it is easier to imagine. There is a session-based encryption to protect against someone simply snooping traffic off the communication bus. According to the post, not all implementations use this encryption, however.
Motherboard has a slot for TPM, but no board? We’ve seen people build their own TPM boards.
Title image by [Raimond Spekking] CC BY-SA-4.0
Vacuum Fluorescent Displays Explained

After having been sent a vacuum fluorescent display (VFD) based clock for a review, [Anthony Francis-Jones] took the opportunity to explain how these types of displays work.
Although VFDs are generally praised for their very pleasant appearance, they’re also relatively low-power compared to the similar cathode ray tubes. The tungsten wire cathode with its oxide coating produces the electrons whenever the relatively low supply voltage is applied, with a positively charged grid between it and the phosphors on the anode side inducing the accelerating force.
Although a few different digit control configurations exist, all VFDs follow this basic layout. The reason why they’re also called ‘cold cathode’ displays is because the cathode doesn’t heat up nearly as hot as those of a typical vacuum tube, at a mere 650 °C. Since this temperature is confined to the very fine cathode mesh, this is not noticeable outside of the glass envelope.
While LCDs and OLED displays have basically eradicated the VFD market, these phosphor-based displays still readily beat out LCDs when it comes to viewing angles, lack of polarization filter, brightness and low temperature performance, as LC displays become extremely sluggish in cold weather. Perhaps their biggest flaw is the need for a vacuum to work, inside very much breakable glass, as this is usually how VFDs die.
youtube.com/embed/EjIiTFet2L8?…
A 1970s Electronic Game

What happens when a traditional board game company decides to break into electronic gaming? Well, if it were a UK gaming company in 1978, the result would be a Waddingtons 2001 The Game Machine that you can see in the video from [Re:Enthused] below.
The “deluxe console model” had four complete games: a shooting gallery, blackjack, Code Hunter, and Grand Prix. But when you were done having fun, no worries. The machine was also a basic calculator with a very strange keyboard. We couldn’t find an original retail price on these, but we’ve read it probably sold for £20 to £40, which, in 1978, was more than it sounds like today.
Like a board game, there were paper score sheets. The main console had die-cut panels to decorate the very tiny screen (which looks like a very simple vacuum fluorescent display) and provide labels for the buttons. While it isn’t very impressive today, it was quite the thing in 1978.
This would be a fun machine to clone and quite easy, given the current state of the art in most hacker labs. A 3D-printed case, color laser-printed overlays, and just about any processor you have lying around would make this a weekend project.
It is easy to forget how wowed people were by games like this when they were new. Then again, we don’t remember any of those games having a calculator.
As a side note, Waddingtons was most famous for their special production of Monopoly games at the request of MI9 during World War II. The games contained silk maps, money, and other aids to help prisoners of war escape.
youtube.com/embed/QMk79fnd0VE?…
Nic Barker Explains ASCII, Unicode, and UTF-8

Over on YouTube [Nic Barker] gives us: UTF-8, Explained Simply.
If you’re gonna be a hacker eventually you’re gonna have to write software to process and generate text data. And when you deal with text data, in this day and age, there are really only two main things you need to know: 7-bit ASCII and UTF-8. In this video [Nic] explains 7-bit ASCII and Unicode, and then explains UTF-8 and how it relates to Unicode and ASCII. [Nic] goes into detail about some of the clever features of Unicode and UTF-8 such as self-synchronization, single-byte ASCII, multi-byte codepoints, leading bytes, continuation bytes, and grapheme clusters.
[Nic] mentions about UTF-16, but UTF-16 turned out to be a really bad idea. UTF-16 combines all of the disadvantages of UTF-8 with all of the disadvantages of UTF-32. In UTF-16 there are things known as “surrogate pairs”, which means a single Unicode codepoint might require two UTF-16 “characters” to describe it. Also the Byte Order Marks (BOM) introduced with UTF-16 proved to be problematic. Particularly if you cat files together you can end up with stray BOM indicators randomly embedded in your new file. They say that null was a billion dollar mistake, well, UTF-16 was the other billion dollar mistake.
tl;dr: don’t use UTF-16, but do use 7-bit ASCII and UTF-8.
Oh, and as we’re here, and talking about Unicode, did you know that you can support The Unicode Consortium with Unicode Adopt-a-Character? You send money to sponsor a character and they put your name up in lights! Win, win! (We noticed while doing the research for this post that Jeroen Frijters of IKVM fame has sponsored #, a nod to C#.)
If you’re interested in learning more about Unicode check out Understanding And Using Unicode and Building Up Unicode Characters One Bit At A Time.
youtube.com/embed/vpSkBV5vydg?…
Silica Gel Makes For Better 3D Prints

It’s possible to improve your 3D prints in all kinds of ways. You can tune your printer’s motion, buy better filament, or tinker endlessly with any number of slicer settings. Or, as [Dirt-E-Bikes] explains, you could grab yourself some silica gel.
If you’re unfamiliar with silica gel, it’s that stuff that comes in the “DO NOT EAT” packet when you buy a new pair of shoes. It’s key feature is that it’s hygroscopic—which means it likes to suck up moisture from the atmosphere. When it comes to 3D printing, this is a highly useful property—specifically because it can help keep filament dry. Over time, plastic filament tends to pick up some moisture on its own from the atmosphere, and this tends to interfere with print quality. This can be avoided by storing filament in a sealed or semi-seaeled environment with silica gel. The gel will tend to suck up most of the moisture from the air in the sealed container, helping to keep the filament drier.
[Dirt-E-Bikes] does a great job of explaining how best to integrate silica gel with your filament spools and automatic material changer (if you have one). He also explains the value of color changing silica gel which indicates when the material is saturated with water, as well as how to dry it out for reuse. You can even combine some of the color changing beads with the more common plain white beads recycled from your shoe boxes, since you only need a few colored beads to get an idea of the water content.
We’ve explored other filament drying solutions before, too. Video after the break.
youtube.com/embed/Ue3A35s2yeQ?…
[Thanks to Keith Olson for the tip!]
Converting a Nebra Cryptocurrency Miner To a Meshcore Repeater

After the swivel by Helium Inc. towards simply running distributed WiFi hotspots after for years pushing LoRaWAN nodes, many of the associated hardware became effectively obsolete. This led to quite a few of these Nebra LoRa Miners getting sold off, with the [Buy it Fix it] channel being one of those who sought to give these chunks of IP-67-rated computing hardware a new life.
Originally designed to be part of the Helium Network Token (HNT) cryptocurrency mining operation, with users getting rewarded by having these devices operating, they contain fairly off-the-shelf hardware. As can be glanced from e.g. the Sparkfun product page, it’s basically a Raspberry Pi Compute Module 3+ on a breakout board with a RAK 2287 LoRa module. The idea in the video was to convert it into a Meshcore repeater, which ought to be fairly straightforward, one might think.
Unfortunately the unit came with a dead eMMC chip on the compute module, the LoRa module wasn’t compatible with Meshcore, and the Nebra breakout board only covers the first 24 pins of the standard RPi header on its pin header.
The solutions involved using a µSD card for the firmware instead of the eMMC, and doing some creative routing on the bottom of the breakout board to connect the unconnected pins on the breakout’s RPi header to the pins on the compute module’s connector. This way a compatible LoRa module could be placed on this header.
Rather than buying an off-the-shelf LoRa module for the RPi and waiting for delivery, a custom module was assembled from an eByte E22 LoRa module and some stripboard to test whether the contraption would work at all. Fortunately a test of the system as a Meshcore repeater showed that it works as intended, serving as a pretty decent proof-of-concept of how to repurpose those systems from a defunct crypto mining scheme into a typical LoRa repeater, whether Meshcore or equivalent.
youtube.com/embed/TTZOLLRgsGU?…
Touchless Support Leaves No Mark

[Clough42] created a 3D print for a lathe tool and designed in some support to hold the piece on the bed while printing. It worked, but removing the support left unsightly blemishes on the part. A commenter mentioned that the support doesn’t have to exactly touch the part to support it. You can see the results of trying that method in the video below.
In this case [Cloug42] uses Fusion, but the idea would be the same regardless of how you design your parts. Originally, the support piece was built as a single piece along with the target object. However, he changed it to make the object separate from the support structure. That’s only the first step, though. If you import both pieces and print, the result will be the same.
Instead, he split the part into the original two objects that touch but don’t blend together. The result looks good.
We couldn’t help but notice that we do this by mistake when we use alternate materials for support (for example, PETG mixed with PLA or PLA with COPE). Turns out, maybe you don’t have to switch filament to get good results.
youtube.com/embed/1Zocl7n98xY?…
New Drug Hopes To Treat Sleep Apnea Without Masks

Sleep apnea is a debilitating disease that many sufferers don’t even realize they have. Those afflicted with the condition will regularly stop breathing during sleep as the muscles in their throat relax, sometimes hundreds of times a night. Breathing eventually resumes when the individual’s oxygen supply gets critically low, and the body semi-wakes to restore proper respiration. The disruption to sleep causes serious fatigue and a wide range of other deleterious health effects.
Treatment for sleep apnea has traditionally involved pressurized respiration aids, mechanical devices, or invasive surgeries. However, researchers are now attempting to develop a new drug combination that could solve the problem with pharmaceuticals alone.
Breathe Into Me
There are a variety of conditions that fall under the sleep apnea umbrella, with various causes and a range of imperfect treatments. Perhaps the most visible is obstructive sleep apnea (OSA), in which the muscles in the throat relax during sleep. Under certain conditions, and depending on anatomy, this can lead the airway to become blocked, causing a cessation of breathing that requires the sufferer to wake to a certain degree to restore proper respiration. Since the 1980s, OSA has routinely been treated with the use of Continuous Positive Airway Pressure (CPAP) machines, which supply pressurized air to the face and throat to forcibly keep the airway open. These are effective, except for one major problem—a great deal of patients hate them, and compliance with treatment is remarkably poor. Some studies have shown up to 50% of patients give up on CPAP treatment within a year due to discomfort around sleeping with a pressurized air mask.
Against this backdrop, a simple pill-based treatment for sleep apnea is a remarkably attractive proposition. It would allow the treatment of the condition without the need for expensive, high-maintenance CPAP machines which a huge proportion of patients hate using in the first place. Such a treatment is now close to being a reality, under the name AD109.
The treatment aims to directly target the actual cause of obstructive sleep apnea. OSA is a neuromuscular condition, and one that only occurs during sleep—as those afflicted with the disease don’t suffer random airway blockages while awake. When sleep occurs, neurotransmitter levels like norepinephrine tend to decrease. This can can cause the upper airway muscles to excessively relax in sleep apnea sufferers, to the point that the airway blocks itself shut. AD109 tackles this issue with a combination of drugs—an antimuscarinic called aroxybutynin, and a norepinephrine reuptake inhibitor called atomoxetine. In simple terms, the aroxybutynin blocks so-called muscarinic receptors which decrease muscle tone in the upper airway. Meanwhile, the atomoxetine is believed to simultaneously improve muscle tone in the upper airway by maintaining higher activity in the hyperglossal motor neurons that control muscles in this area.
Thus far, clinical testing has been positive, suggesting the synergistic combination of drugs may be able to improve airflow for sleep apnea patients. Phase 1 and Phase 2 clinical trials have been conducted to verify the safety of the treatment, as well as its efficacy at treating the condition. Success in the trials was measured with the Apnea-Hypopnea Index (AHI), which records the number of airway disruptions an individual has per hour. AHI events were reduced by 45% in those taking AD109 when compared to the placebo group in a phase 2 trial featuring 211 participants. It achieved this while proving generally safe in early testing without causing detectable detriments to attention or memory. However, some side effects were noted with the drug—most specifically dry mouth, urinary hesitancy, and a level of insomina. The latter being particularly of note given the drug’s intention to improve sleep.
Testing on AD109 continues, with randomized Phase 3 trials measuring its performance in treating mild, moderate, and severe obstructive sleep apnea. For now, commercialization remains a ways down the road. And yet, for the first time, it appears promising that modern medicine will develop a simple drug-based treatment for a disease that leaves millions fatigued and exhausted every day. If it proves viable, expect it to become a major pharmaceutical success story and the hottest new drug on the market.
STL Editing with FreeCAD

[Kevin] admits that FreeCAD may not be the ideal tool for editing STL files. But it is possible, and he shares some practical advice in the video below. If you want to get the most out of your 3D printer, it pays to be able to create new parts, and FreeCAD is a fine option for that. However, sometimes you download an STL from the Internet, and it just isn’t quite what you need.
Unlike native CAD formats, STLs are meshes of triangles, so you get very large numbers of items, which can be unwieldy. The first trick is to get the object exactly centered. That’s easy if you know how, but not easy if you are just eyeballing it.
If you use the correct workbench, FreeCAD can analyze and fix mesh problems like non-manifold parts, flipped normals, and other issues. The example is a wheel with just over 6,000 faces, which is manageable. But complex objects may make FreeCAD slow. [Kevin] says you should be fine until the number of faces goes above 100,000. In that case, you can decimate the number of faces with, of course, a corresponding loss in resolution.
Once you are satisfied with the mesh, you can create a real FreeCAD shape from the mesh. The resulting object will be hollow, so the next step will be to convert the shape to a solid.
That still leaves many triangles when you really want flat surfaces to be, well, flat. The trick is to make a copy and use the “refine shape” option for the copy. Once you have a FreeCAD solid, you can do anything you can do in FreeCAD.
We’ve run our share of FreeCAD tips if you want more. There are other ways to tweak STLs, too.
youtube.com/embed/bdt53O5_rsw?…
Skimming Satellites: On the Edge of the Atmosphere

There’s little about building spacecraft that anyone would call simple. But there’s at least one element of designing a vehicle that will operate outside the Earth’s atmosphere that’s fairly easier to handle: aerodynamics. That’s because, at the altitude that most satellites operate at, drag can essentially be ignored. Which is why most satellites look like refrigerators with solar panels and high-gain antennas attached jutting out at odd angles.
But for all the advantages that the lack of meaningful drag on a vehicle has, there’s at least one big potential downside. If a spacecraft is orbiting high enough over the Earth that the impact of atmospheric drag is negligible, then the only way that vehicle is coming back down in a reasonable amount of time is if it has the means to reduce its own velocity. Otherwise, it could be stuck in orbit for decades. At a high enough orbit, it could essentially stay up forever.
There was a time when that kind of thing wasn’t a problem. It was just enough to get into space in the first place, and little thought was given to what was going to happen in five or ten years down the road. But today, low Earth orbit is getting crowded. As the cost of launching something into space continues to drop, multiple companies are either planning or actively building their own satellite constellations comprised of thousands of individual spacecraft.
Fortunately, there may be a simple solution to this problem. By putting a satellite into what’s known as a very low Earth orbit (VLEO), a spacecraft will experience enough drag that maintaining its velocity requires constantly firing its thrusters. Naturally this presents its own technical challenges, but the upside is that such an orbit is essentially self-cleaning — should the craft’s propulsion fail, it would fall out of orbit and burn up in months or even weeks. As an added bonus, operating at a lower altitude has other practical advantages, such as allowing for lower latency communication.
VLEO satellites hold considerable promise, but successfully operating in this unique environment requires certain design considerations. The result are vehicles that look less like the flying refrigerators we’re used to, with a hybrid design that features the sort of aerodynamic considerations more commonly found on aircraft.
ESA’s Pioneering Work
This might sound like science fiction, but such craft have already been developed and successfully operated in VLEO. The best example so far is the Gravity Field and Steady-State Ocean Circulation Explorer (GOCE), launched by the European Space Agency (ESA) back in 2009.
To make its observations, GOCE operated at an altitude of 255 kilometers (158 miles), and dropped as low as just 229 km (142 mi) in the final phases of the mission. For reference the International Space Station flies at around 400 km (250 mi), and the innermost “shell” of SpaceX’s Starlink satellites are currently being moved to 480 km (298 mi).

Even with its streamlined design, maintaining such a low orbit required GOCE to continually fire its high-efficiency ion engine for the duration of its mission, which ended up being four and a half years.
In the case of GOCE, the end of the mission was dictated by how much propellant it carried. Once it had burned through the 40 kg (88 lb) of xenon onboard, the vehicle would begin to rapidly decelerate, and ground controllers estimated it would re-enter the atmosphere in a matter of weeks. Ultimately the engine officially shutdown on October 21st, and by November 9th, it’s orbit had already decayed to 155 km (96 mi). Two days later, the craft burned up in the atmosphere.
JAXA Lowers the Bar
While GOCE may be the most significant VLEO mission so far from a scientific and engineering standpoint, the current record for the spacecraft with the lowest operational orbit is actually held by the Japan Aerospace Exploration Agency (JAXA).
In December 2017 JAXA launched the Super Low Altitude Test Satellite (SLATS) into an initial orbit of 630 km (390 mi), which was steadily lowered in phases over the next several weeks until it reached 167.4 km (104 mi). Like GOCE, SLATS used a continuously operating ion engine to maintain velocity, although at the lowest altitudes, it also used chemical reaction control system (RCS) thrusters to counteract the higher drag.

SLATS was a much smaller vehicle than GOCE, coming in at roughly half the mass. It also carried just 12 kg (26 lb) of xenon propellant, which limited its operational life. It also utilized a far more conventional design than GOCE, although its rectangular shape was somewhat streamlined when compared to a traditional satellite. Its solar arrays were also mounted in parallel to the main body of the craft, giving it an airplane-like appearance.
The combination of lower altitude and higher frontal drag meant that SLATS had an even harder time maintaining velocity than GOCE. Once its propulsion system was finally switched off in October 2019, the craft re-entered the atmosphere and burned up within 24 hours. The mission has since been recognized by Guinness World Records for the lowest altitude maintained by an Earth observation satellite.
A New Breed of Satellite
As impressive as GOCE and SLATS were, their success was based more on careful planning than any particular technological breakthrough. After all, ion propulsion for satellites is not new, nor is the field of aerodynamics. The concepts were simply applied in a novel way.

Both the Defense Advanced Research Projects Agency (DARPA) in the United States and the ESA are currently funding several studies of ABEP vehicles, such as Redwire’s SabreSat, which have numerous military and civilian applications. Test flights are still years away, but should VLEO satellites powered by ABEP become common platforms for constellation applications, they may help alleviate orbital congestion before it becomes a serious enough problem to impact our utilization of space.
PlayStation 3 Emulator RPCS3 Can Almost Play Three-Quarters of PS3 Games

Although already having entered the territory of ‘retro gaming’, the Sony PlayStation 3 remains a notoriously hard to emulate game console. Much of this is to blame on its unique PowerPC-based Cell processor architecture, which uses a highly parallel approach across its asymmetric multi-core die that is very hard to map to more standard architectures like those in today’s x86 and ARM CPUs. This makes it even more amazing that the RPCS3 emulator team has now crossed the 70% ‘playable’ threshold on their compatibility list.
This doesn’t mean that you can fire up these games on any purported ‘gaming system’, as the system requirements are pretty steep. If you want any kind of enjoyable performance the recommended PC specifications feature an Intel 10th generation 6-core CPU, 16 GB of dual-channel RAM and a NVIDIA RTX 2000 or AMD RX 5000 series GPU or better.
It should be noted here also that the ‘playable’ tag in the compatibility list means that the game can be completed without game breaking glitches. Performance remains an issue, with very creative optimizations through e.g. the abuse of x86 SIMD instructions remaining the topic of research by the emulator developers. Yet as original PS3 hardware gradually becomes less available, the importance of projects like RPCS3 will become more important.
Header: Evan-Amos, Public domain.
Ordering Pizza On The Nintendo Wii (Again)

The Nintendo Wii first launched in 2006, and quickly became a fixture in living rooms around the world. It offered motion-controlled bowling, some basic internet features, and a pretty decent Zelda game. On top of all that, though, you could also use it to order a pizza, as [Retro Game Attic] demonstrates.
The Wii used to organize different features of the console into “channels.” Way back in the day, you could install the Demae Channel on your Wii in Japan, which would let you order fast food from various outlets using the Demaecan service.
The Demae Channel service was discontinued in 2017. However, it has since been resurrected by WiiLink, which is a homebrew project which replicates the functionality of the original Nintendo WiiConnect 24 and Wi-Fi Connection servers. As it stands, you can load the WiiLink version of the Demae Channel (or Food Channel) on to your Wii, and use it to order pizza from your local Domino’s Pizza. It only works in the United States and Canada right now, and there are no other restaurants available, at least until further development is completed to add JustEat compatibility. It’s not entirely clear how much of the functionality was recreated from the original Demae Channel; what is clear is that plenty of custom development has been done on the WiiLink version to integrate it with modern delivery services.
What’s so exciting about this is how well it actually works. The app perfectly nails the classic Wii Channel visual style. It also seems to integrate well with the Domino’s API for digital orders, even displaying simple updates on holiday opening hours and order times. Pricing data and images of the pizzas are all available right in the app, and you can even make modifications. It might be a gimmick… but it actually works. Notably, though, the app avoids any stickiness with handling payment—thankfully, pay-on-delivery is still legitimate in the pizza world in 2026.
Will this revolutionize how you order pizza on a daily basis? Probably not. Is it one of the coolest Wii hacks we’ve seen in a while? Undeniably. Video after the break.
youtube.com/embed/_Z-yPjYAkjY?…
Binary and Digital Gradients for Telling Time

Creative clocks are a dime a dozen, even clocks that use binary have been created in nearly every format. [typo] promises a clever adaptation to the binary format, and it promises a more usable display. Using a combination of both traditional binary and digital gradients creates a usable and yet still nerdy fun clock.
[typo]’s clock fits the traditional binary counting method with the hours on the left side of its face. On the other hand, its right side presents a lighting gradient depending on the completion of the hour. While this is simple in principle, [typo] chose to correct what many don’t consider when deploying visual gradients. The human eye doesn’t see everything exactly as it is, which creates a rough logarithmic curve that gets corrected for in the binary/digital hybrid clock.
If you want something more mobile and still have that smidge of difficult time telling you, check out this minimalist wrist watch!
youtube.com/embed/3vhNw6UBNwo?…
Simulating Pots with LTSpice

One of the good things about simulating circuits is that you can easily change component values trivially. In the real world, you might use a potentiometer or a pot to provide an adjustable value. However, as [Ralph] discovered, there’s no pot component in LTSpice. At first, he cobbled up a fake pot with two resistors, one representing the top terminal to the wiper, and the other one representing the wiper to the bottom terminal. Check it out in the video below.
At first, [Ralph] just set values for the two halves manually, making sure not to set either resistor to zero so as not to merge the nets. However, as you might guess, you can make the values parameters and then step them.
By using .step you can alter one of the resistor values. Then you can use a formula to compute the other resistor since the sum of the two resistors has to add up to the pot’s total value. That is, a 10K pot will have the two resistors always add up to 10K.
Of course, you could do this without the .step and simply change one value to automatically compute both resistors if you prefer.
We’ve done our own tutorials with .step and parameters if you want a little more context. You can even use this idea to make your own custom pot component.
youtube.com/embed/da3TbdDrjXo?…
Driving A DAC Real Fast With A Microcontroller

Normally, if you want to blast out samples to a DAC in a hurry, you’d rely on an FPGA, what with their penchant for doing things very quicky and in parallel. However, [Anabit] figured out a way to do the same thing with a microcontroller, thanks to the magic of the Raspberry Pi Pico 2.
The design in question is referred to as the PiWave 150 MS/s Bipolar DAC, and as the name suggests, it’s capable of delivering a full 150 million samples per second with 10, 12, or 14 bits of resolution. Achieving that with a microcontroller would normally be pretty difficult. In regular linear operation, it’s hard to clock bits out to GPIO pins at that sort of speed. However, the Raspberry Pi Pico 2 serves as a special case in this regard, thanks to its Programmable I/O (PIO) subsystem. It’s a state machine, able to be programmed to handle certain tasks entirely independently from the microcontroller’s main core itself, and can do simple parallel tasks very quickly. Since it can grab data from RAM and truck it out to a bank of GPIO pins in a single clock cycle, it’s perfect for trucking out data to a DAC in parallel at great speed. The Pi Pico 2’s clock rate tops out at 150 MHz, which delivers the impressive 150 MS/s sample rate.
The explainer video is a great primer on how this commodity microcontroller is set up to perform this feat in detail. If you’re trying for accuracy over speed, we’ve explored solutions for that as well. Video after the break.
youtube.com/embed/UaaveknkjBM?…
Repair and Reverse-Engineering of Nespresso Vertuo Next Coffee Machines

Akin to the razor-and-blades model, capsule-based coffee machines are an endless grind of overpriced pods and cheaply made machines that you’re supposed to throw out and buy a new one of, just so that you don’t waste all the proprietary pods you still have at home. What this also means is a seemingly endless supply of free broken capsule coffee makers that might be repairable. This is roughly how [Mark Furneaux] got into the habit of obtaining various Nespresso VertuoLine machine for attempted repairs.

The VirtuoLine machines feature the capsule with a bar code printed on the bottom of the lip, requiring the capsule to be spun around so that it can be read by the optical reader. Upon successful reading, the code is passed to the MCU after which the brewing process is either commenced or cruelly halted if the code fails. Two of the Vertuo Next machines that [Mark] got had such capsule reading errors, leading to a full teardown of the first after the scanner board turned out to work fine.
Long story short and many hours of scrubbed footage later, one machine was apparently missing the lens assembly on top of the photo diode and IR LED, while the other simply had these lenses gunked up with spilled coffee. Of course, getting to this lens assembly still required a full machine teardown, making cleaning it an arduous task.
Unfortunately the machine that had the missing lens assembly turned out to have another fault which even after hours of debugging remained elusive, but at least there was one working coffee machine afterwards to make a cup of joe to make [Mark] feel slightly better about his life choices. As for why the lens assembly was missing, it’s quite possible that someone else tried to repair the original fault, didn’t find it, and reassembled the machine without the lens before passing the problem on to the next victim.
youtube.com/embed/v424-YxSAbM?…
FLOSS Weekly Episode 861: Big Databases with OpenRiak

This week Jonathan chats with Nicholas Adams about OpenRiak! Why is there a Riak and an OpenRiak, which side of the CAP theorem does OpenRiak land on, and why is it so blazingly fast for some operations? Listen to find out!
- linkedin.com/groups/14551410/
- github.com/openriak/
- join.slack.com/t/postriak/shar…
- files.tiot.jp/riak/
- tiot.jp/riak-docs/
- meetup.com/tokyo-openriak-meet…
youtube.com/embed/SOFBTvvtqLg?…
Did you know you can watch the live recording of the show right on our YouTube Channel? Have someone you’d like us to interview? Let us know, or have the guest contact us! Take a look at the schedule here.
play.libsyn.com/embed/episode/…
Direct Download in DRM-free MP3.
If you’d rather read along, here’s the transcript for this week’s episode.
Places to follow the FLOSS Weekly Podcast:
Theme music: “Newer Wave” Kevin MacLeod (incompetech.com)
Licensed under Creative Commons: By Attribution 4.0 License
hackaday.com/2026/01/21/floss-…
Retrotechtacular: RCA Loses Fight to IBM

If you follow electronics history, few names were as ubiquitous as RCA, the Radio Corporation of America. Yet in modern times, the company is virtually forgotten for making large computers. [Computer History Archive Project] has a rare film from the 1970s (embedded below) explaining how RCA planned to become the number two supplier of business computers, presumably behind behemoth IBM. They had produced other large computers in the 1950s and 1960s, like the BIZMAC, the RCA 510, and the Spectra. But these new machines were their bid to eat away at IBM’s dominance in the field.
RCA had innovative ideas and arguably one of the first demand paging, virtual memory operating systems for mainframes. You can hope they were better at designing computers than they were at making commercials.

In 1964, [David Sarnoff] famously said: “The computer will become the hub of a vast network of remote data stations and information banks feeding into the machine at a transmission rate of a billion or more bits of information a second … Eventually, a global communications network handling voice, data and facsimile will instantly link man to machine — or machine to machine — by land, air, underwater, and space circuits. [The computer] will affect man’s ways of thinking, his means of education, his relationship to his physical and social environment, and it will alter his ways of living. … [Before the end of this century, these forces] will coalesce into what unquestionably will become the greatest adventure of the human mind.”
He was, of course, right. Just a little early.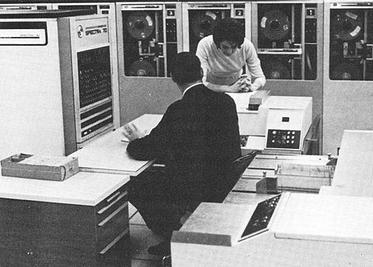
The machines were somewhat compatible with IBM computers, touted virtual memory, and had flexible options, including a lease that let you own your hardware in six years. They mention, by the way, IBM customers who were paying up to $60,000 / month to IBM. They mentioned that an IBM 360/30 with 65K was about $13,200 / month. You could upgrade with a 360/30 for an extra $3,000 / month, which would double your memory but not double your computing power. (If you watch around the 18-minute mark, you’ll find the computing power was extremely slow by today’s standards.)
RCA, of course, had a better deal. The RCA 2 had double the memory and reportedly triple the performance for only $2,000 extra per month. We don’t know what the basis for that performance number was. For $3,500 a month extra, you could have an RCA 3 with the miracle of virtual memory, providing an apparent 2 megabytes per running job.
There are more comparisons, and keep in mind, these are 1970 dollars. In 1970, a computer programmer probably made $10,000 to $20,000 a year while working on a computer that cost $158,000 in lease payments (not to count electricity and consumables). How much cloud computing could you buy in a year for $158,000 today? Want to buy one? They started at $700,000 up to over $1.6 million.
By their release, the systems were named after their Spectra 70 cousins. So, officially, they were Spectra 70/2, 70/3, 70/5, and 70/6.
Despite all the forward-looking statements, RCA had less than 10% market share and faced increasing costs to stay competitive. They decided to sell the computer business to Sperry. Sperry rebranded several RCA computers and continued to sell and support them, at least for a while.
Now, RCA is a barely remembered blip on the computer landscape. You are more likely to find someone who remembers the RCA 1800 family of CPUs than an actual RCA mainframe. Maybe they should have throw in the cat with the deal.
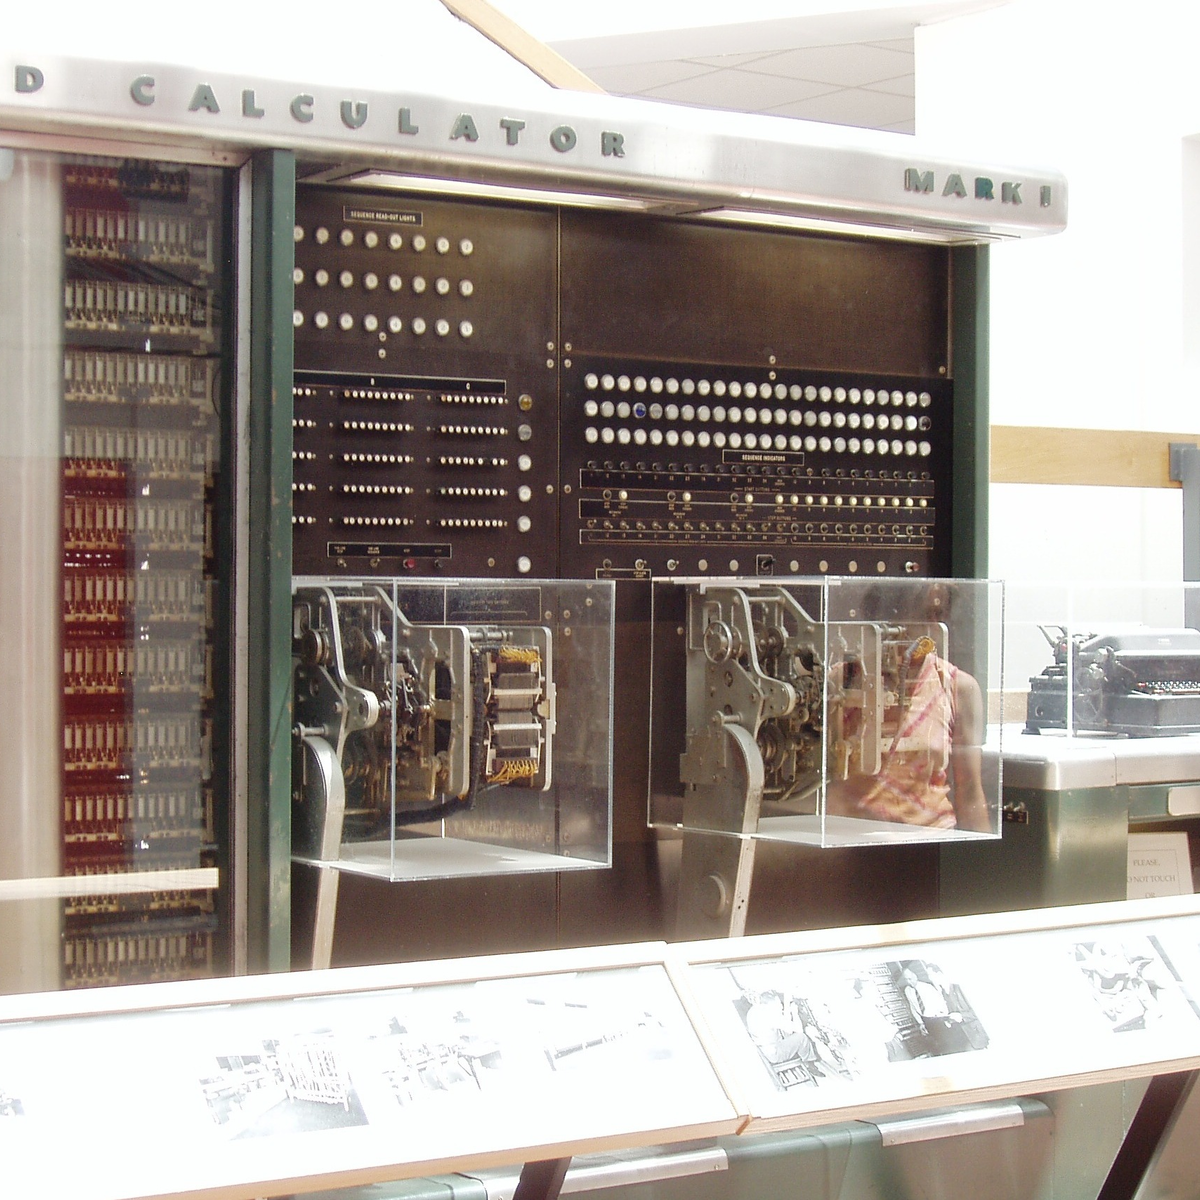
Want to see the IBM machines these competed with? Here you go. We doubt there were any RCA computers in this data center, but they’d have been right at home.
youtube.com/embed/GygR1Nbrhfc?…
Fiber Optic Lamp Modified To Be Scarily Bright

[Brainiac75] is a fan of fiber optic lamps, except for one thing—they’re often remarkably dim. Thus, they set out to hack the technology to deliver terrifying amounts of light while still retaining their quirky charm.
Older fiber optic lamps use a dim filament lamp or halogen lamp to light them up. They also often feature a spinning color disk to vary the light patterns, which does have the side effect of absorbing some of the already-limited light output.
When it came to upgrading his own decades-old lamp, [Braniac75] decided to initially stick within the specs of the original halogen lamp. The fixture was rated for 12 volts at 5 watts, with a GU4/GZ4 compatible base, and white light was desired so the color wheel could still do its thing. Swapping out the original 5 W halogen for a 2.5 W LED unit brought a big upgrade in brightness, since the latter is roughly equivalent to a 20 W halogen in light output. Upgrading to a 4.2 W LED pushed things even further, greatly improving the look of the lamp.
The video also explores modding a modern fiber optic lamp, too. It was incredibly cheap, running off batteries and using a single color-changing LED to illuminate the fibers. [Braniac75] decided to try illuminating the plastic fibers with an RGB stage lighting laser rig—namely, the LaserCube Ultra 7.5 W from Wicked Lasers. With this kind of juice, the fiber lamp is eye-searingly bright, quite literally, and difficult to film. However, with the laser output dialed way down, the lamp looks amazing—with rich saturated colors dancing across the fiber bundle as the lasers do their thing.
If you’ve ever wanted to build a fiber lamp that doesn’t look like a cheap gimmick, now you know how. We’ve looked at weird applications for these lamps before, too.
youtube.com/embed/5uoKlGzmDgg?…
Tech in Plain Site: Finding a Flat Tire

There was a time when wise older people warned you to check your tire pressure regularly. We never did, and would eventually wind up with a flat or, worse, a blowout. These days, your car will probably warn you when your tires are low. That’s because of a class of devices known as tire pressure monitoring systems (TPMS).
If you are like us, you see some piece of tech like this, and you immediately guess how it probably works. In this case, the obvious guess is sometimes, but not always, correct. There are two different styles that are common, and only one works in the most obvious way.
Obvious Guess
We’d guess that the tire would have a little pressure sensor attached to it that would then wirelessly transmit data. In fact, some do work this way, and that’s known as dTPMS where the “d” stands for direct.
Of course, such a system needs power, and that’s usually in the form of batteries, although there are some that get power wirelessly using an RFID-like system. Anything wireless has to be able to penetrate the steel and rubber in the tire, of course.
But this isn’t always how dTPMS systems worked. In days of old, they used a finicky system involving a coil and a pressure-sensitive diaphragm — more on that later.

This is cheap and requires no batteries in the tire. However, it isn’t without its problems. It is purely a relative measurement. In practice, you have to inflate your tires, tell the system to calibrate, and then drive around for half an hour or more to let it learn how your tires react to different roads, speeds, and driving styles.
Changes in temperature, like the first cold snap of winter, are notorious for causing these sensors to read flat. If the weather changes and you suddenly have four flat tires, that’s probably what happened. The tires really do lose some pressure as temperatures drop, but because all four change together, the indirect system can’t tell which one is at fault, if any.
History

The first passenger vehicle to offer TPMS was the 1986 Porsche 959. Two sensors made from a diaphragm and a coil are mounted between the wheel and the wheel’s hub. The sensors were on opposite sides of the tire. With sufficient pressure on the diaphragm, an electrical contact was made, changing the coil value, and a stationary coil would detect the sensor as it passed. If the pressure drops, the electrical contact opens, and the coil no longer sees the normal two pulses per rotation. The technique was similar to a grid dip meter measuring an LC resonant circuit. The diaphragm switch would change the LC circuit’s frequency, and the sensing coil could detect that.
If one or two pulses were absent despite the ABS system noting wheel rotation, the car would report low tire pressure. There were some cases of centrifugal force opening the diaphragms at high speed, causing false positives, but for the most part, the system worked. This isn’t exactly iTPMS, but it isn’t quite dTPMS either. The diaphragm does measure pressure in a binary way, but it doesn’t send pressure data in the way a normal dTPMS system does.
youtube.com/embed/l0cY5sLySEE?…
Of course, as you can see in the video, the 959 was decidedly a luxury car. It would be 1991 before the US-made Corvette acquired TPMS. The Renault Laguna II in 2000 was the first high-volume car to have similar sensors.
Now They’re Everywhere
In many places, laws were put in place to require TPMS in vehicles. It was also critical for cars that used “run flat” tires. The theory is that you might not notice your run flat tires were actually flat, and while they are, as their name implies, made to run flat, they also require you to limit speed and distance when they are flat.
Old cars or other vehicles that don’t have TPMS can still add it. There are systems that can measure tire pressure and report to a smartphone app. These are, of course, a type of dTPMS.
Problems
Of course, there are always problems. An iTPMS system isn’t really reading the tire pressure, so it can easily get out of calibration. Direct systems need battery changing, which usually means removing the tire, and a good bit of work — watch the video below. That means there is a big tradeoff between sending data with enough power to go through the tire and burning through batteries too fast.
youtube.com/embed/aorDT-wGz2M?…
Another issue with dTPMS is that you are broadcasting. That means you have to reject interference from other cars that may also transmit. Because of this, most sensors have a unique ID. This raises privacy concerns, too, since you are sending a uniquely identifiable code.
Of course, your car is probably also beaming Bluetooth signals and who knows what else. Not to even mention what the phone in your car is screaming to the ether. So, in practice, TPMS attacks are probably not a big problem for anyone with normal levels of paranoia.
An iTPMS sensor won’t work on a tire that isn’t moving, so monitoring your spare tire is out. Even dTPMS sensors often stop transmitting when they are not moving to save battery, and that also makes it difficult to monitor the spare tire.
The (Half Right) Obvious Answer
Sometimes, when you think of the “obvious” way something works, you are wrong. In this case, you are half right. TPMS reduces tire wear, prevents accidents that might happen during tire failure, and even saves fuel.
Thanks to this technology, you don’t have to remember to check your tire pressure before a trip. You should, however, probably check the tread.
You can roll your own TPMS. Or just listen in with an SDR. If biking is more your style, no problem.
Espressif Introduces the ESP32-E22 Wi-Fi 6E and Bluetooth Co-Processor

Espressif has unveiled its latest major chip in the form of the ESP32-E22. Officially referred to as a Radio Co-Processor (RCP), it’s intended to be used via its PCIe 2.1 or SDIO 3.0 host interface to provide wireless communications to an SoC or similar.
This wireless functionality includes full WiFi 6E functionality across all three bands, 160 MHz channel bandwidth and 2×2 MU-MIMO, making it quite a leap from the basic WiFi provided by e.g. the ESP32-S* and -C* series. There is also Bluetooth Classic and BLE 5.4 support, which is a relief for those who were missing Bluetooth Classic in all but the original ESP32 for e.g. A2DP sinks and sources.
The ESP32-E22 processing grunt is provided by two proprietary Espressif RISC-V CPU cores that can run at 500 MHz. At this point no details appear to be available about whether a low-power core is also present, nor any additional peripherals. Since the graphics on the Espressif PR article appear to be generic, machine-generated images – that switch the chip’s appearance from a BGA to an LQFP package at random – there’s little more that we can gather from there either.
Currently Espressif is making engineering samples available to interested parties after presumed vetting, which would indicate that any kind of public release will still be a while off. Whether this chip would make for an interesting stand-alone MCU or SoC along the lines of the -S3 or -P4 will remain a bit of a mystery for a bit longer.
Thanks to [Rogan] for the tip.
Can Skynet Be a Statesman?

There’s been a lot of virtual ink spilled about LLMs and their coding ability. Some people swear by the vibes, while others, like the FreeBSD devs have sworn them off completely. What we don’t often think about is the bigger picture: What does AI do to our civilization? That’s the thrust of a recent paper from the Boston University School of Law, “How AI Destroys Institutions”. Yes, Betteridge strikes again.
We’ve talked before about LLMs and coding productivity, but [Harzog] and [Sibly] from the school of law take a different approach. They don’t care how well Claude or Gemini can code; they care what having them around is doing to the sinews of civilization. As you can guess from the title, it’s nothing good.
The paper a bit of a slog, but worth reading in full, even if the language is slightly laywer-y. To summarize in brief, the authors try and identify the key things that make our institutions work, and then show one by one how each of these pillars is subtly corroded by use of LLMs. The argument isn’t that your local government clerk using ChatGPT is going to immediately result in anarchy; rather it will facilitate a slow transformation of the democratic structures we in the West take for granted. There’s also a jeremiad about LLMs ruining higher education buried in there, a problem we’ve talked about before.
If you agree with the paper, you may find yourself wishing we could launch the clankers into orbit… and turn off the downlink. If not, you’ll probably let us know in the comments. Please keep the flaming limited to below gas mark 2.
Self-Powered Top Spins for Hours

The meaning of Inception’s ending famously revolves around a top which spins forever in dreams, but in real life comes to a stop like any other top. Any other top, that is, except for [Aaed Musa]’s self-spinning top, which can continuously spin for about two hours before coming to a stop.
The one constraint was that every functional component had to be contained within the top’s shell, and [Aaed]’s first approach was to build a reaction wheel into the top. When a motor accelerates a weighted wheel, conservation of angular momentum applies an equal and opposite torque to the motor. The problem is that motors eventually reach a top speed and stop accelerating, which puts an end to the torque. This is known as saturation, and the only way to desaturate a reaction wheel is to slow it down, which counteracts the originally generated torque. [Aaed] originally planned to mount the motor in a one-way bearing, which would let it bleed off speed without producing torque against the rest of the top, but it was rather choppy in practice.
The solution occurred to [Aaed] while watching the aforementioned final scene, when it occurred to him that the wobbling of a top could actually generate rotation. A prototype proved that an off-center weight rotating at a constant speed did successfully spin the top by rotating the center of mass, and after that, it was a matter of incremental testing and improvement. A higher moment of inertia worked better, as did a lower center of gravity and a tip made from a hard, low-friction silicon nitride ball bearing. He made housings out of both 3D-printed plastic and CNC-milled aluminium, which each contained a tiny brushless motor, an electric speed controller, a microcontroller, and a small rechargeable lithium battery.
If you allow for external power, you can make the top itself the rotor of a motor, and drive it from a base. Alternatively, if you levitate your top in a vacuum, it could spin for longer than recorded history.
youtube.com/embed/Wp5NodfvvF4?…
Block Devices in User Space

Your new project really could use a block device for Linux. File systems are easy to do with FUSE, but that’s sometimes too high-level. But a block driver can be tough to write and debug, especially since bugs in the kernel’s space can be catastrophic. [Jiri Pospisil] suggests Ublk, a framework for writing block devices in user space. This works using the io_uring facility in recent kernels.
This opens the block device field up. You can use any language you want (we’ve seen FUSE used with some very strange languages). You can use libraries that would not work in the kernel. Debugging is simple, and crashing is a minor inconvenience.
Another advantage? Your driver won’t depend on the kernel code. There is a kernel driver, of course, named ublk_drv, but that’s not your code. That’s what your code talks to.
The driver maintains the block devices and relays I/O and ioctl requests to your code for servicing. There are several possible use cases for this. For example, you could dream up some exotic RAID scheme and expose it as a block device that multiplexes many devices. The example in the post, for example, exposes a block device that is made up of many discrete files on a different file system.
Do you need this? Probably not. But if you do, it is a great way to push out a block driver in a hurry. Is it high-performance? Probably not, just like FUSE isn’t as performant as a “real” file system. But for many cases, that’s not a problem.
If you want to try FUSE, why not make your favorite website part of your file system?
RAM Prices Got You Down? Try DDR3. Seriously!

DDR3 seemed plenty fast when it first showed up 19 years ago. Who could say no to 6400 Mb/s transfer speeds? Of course compared to the modern DDR5 that’s glacially slow, but given that RAM is worth its weight in gold these days– with even DDR4 spiking in price– some people, like [Gheeotine], are asking “can you game on DDR3“? The answer is a shocking yes.
[Gheeotine] builds two budget-friendly PCs for this video, using some of the newest DD3-supporting motherboards available. That’s not exactly new: we’re talking 12 to 15 years old, but hey, not old enough to drive. We certainly didn’t expect to hear about an x79 motherboard hosting an Ivy Bridge processor in 2026, but needs must when the devil dances. The only concession to modernity is the graphics cards: the x79 mobo got an RX6600XT 8GB, and the other build, using a z97 motherboard got an NVIDIA RTX 4060. The z97 motherboard allowed a slightly newer processor, as well, an i7 4790, with the new and exciting Haswell architecture you may have heard of. Both boards are maxed out on RAM, because at less than one USD/GB, why not?
[Gheeotine] puts a few new titles through their paces on these boxen, and while the results aren’t amazing, everything he tries comes out playable, which is amazing in and of itself. Well, playable unless you’re one of those people who can’t stand playing at resolutions under 4K or FPS under 100. Those of who spent their formative years with 29.7 FPS or 25 FPS in NTSC or PAL regions aren’t going to complain too loudly if frame rates dip down into the 30s playing at 1080p for some of the more demanding titles. Ironically, one of those was the five-year-old Crysis Remastered. Given the age of some of this hardware “Can it Run Crysis” is a perfectly reasonable question, and the answer is still yes.
If you want modern games, you’re much better off with a z97 chipset motherboard if you chose to go the DDR3 route, since you won’t run into issues related to the AVX2 instruction, which first appeared with the Haswell microarchitecture. Here at Hackaday our preferred solution to the rampocalypse is software optimization, Since holding your breath for that would probably be fatal, cost-optimizing PC builds is probably a good plan, even if some might balk at going all the way back to DDR3.
Of course if you’re going to use nearly-retro hardware like DDR3, you might as well go all-out on retro vibes with a nostalgic 80s-style, or even 50s-style case.
youtube.com/embed/3_BNJCUqR-o?…